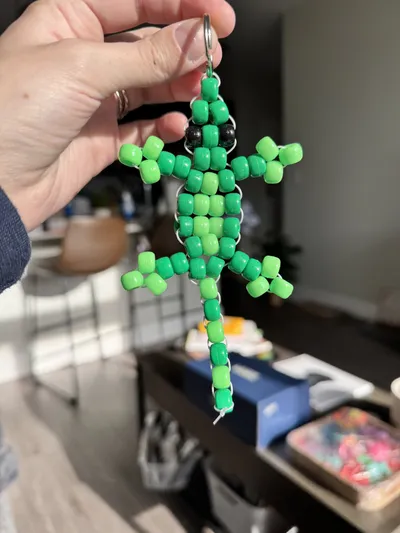
Beaded Lizard Keychain
Let's make a cool lizard keychain with beads! Attach it to your bag to personalize your things. This project is best for crafters 8 and up as it involves small pieces. Requires some help from a grown up.
Let's make a cool lizard keychain with beads! Attach it to your bag to personalize your things. This project is best for crafters 8 and up as it involves small pieces. Requires some help from a grown up.
Log in to GlueStick to track your supplies and seeif you have everything you need.
Let's make a cool lizard keychain with beads! Attach it to your bag to personalize your things. This project is best for crafters 8 and up as it involves small pieces. Requires some help from a grown up.
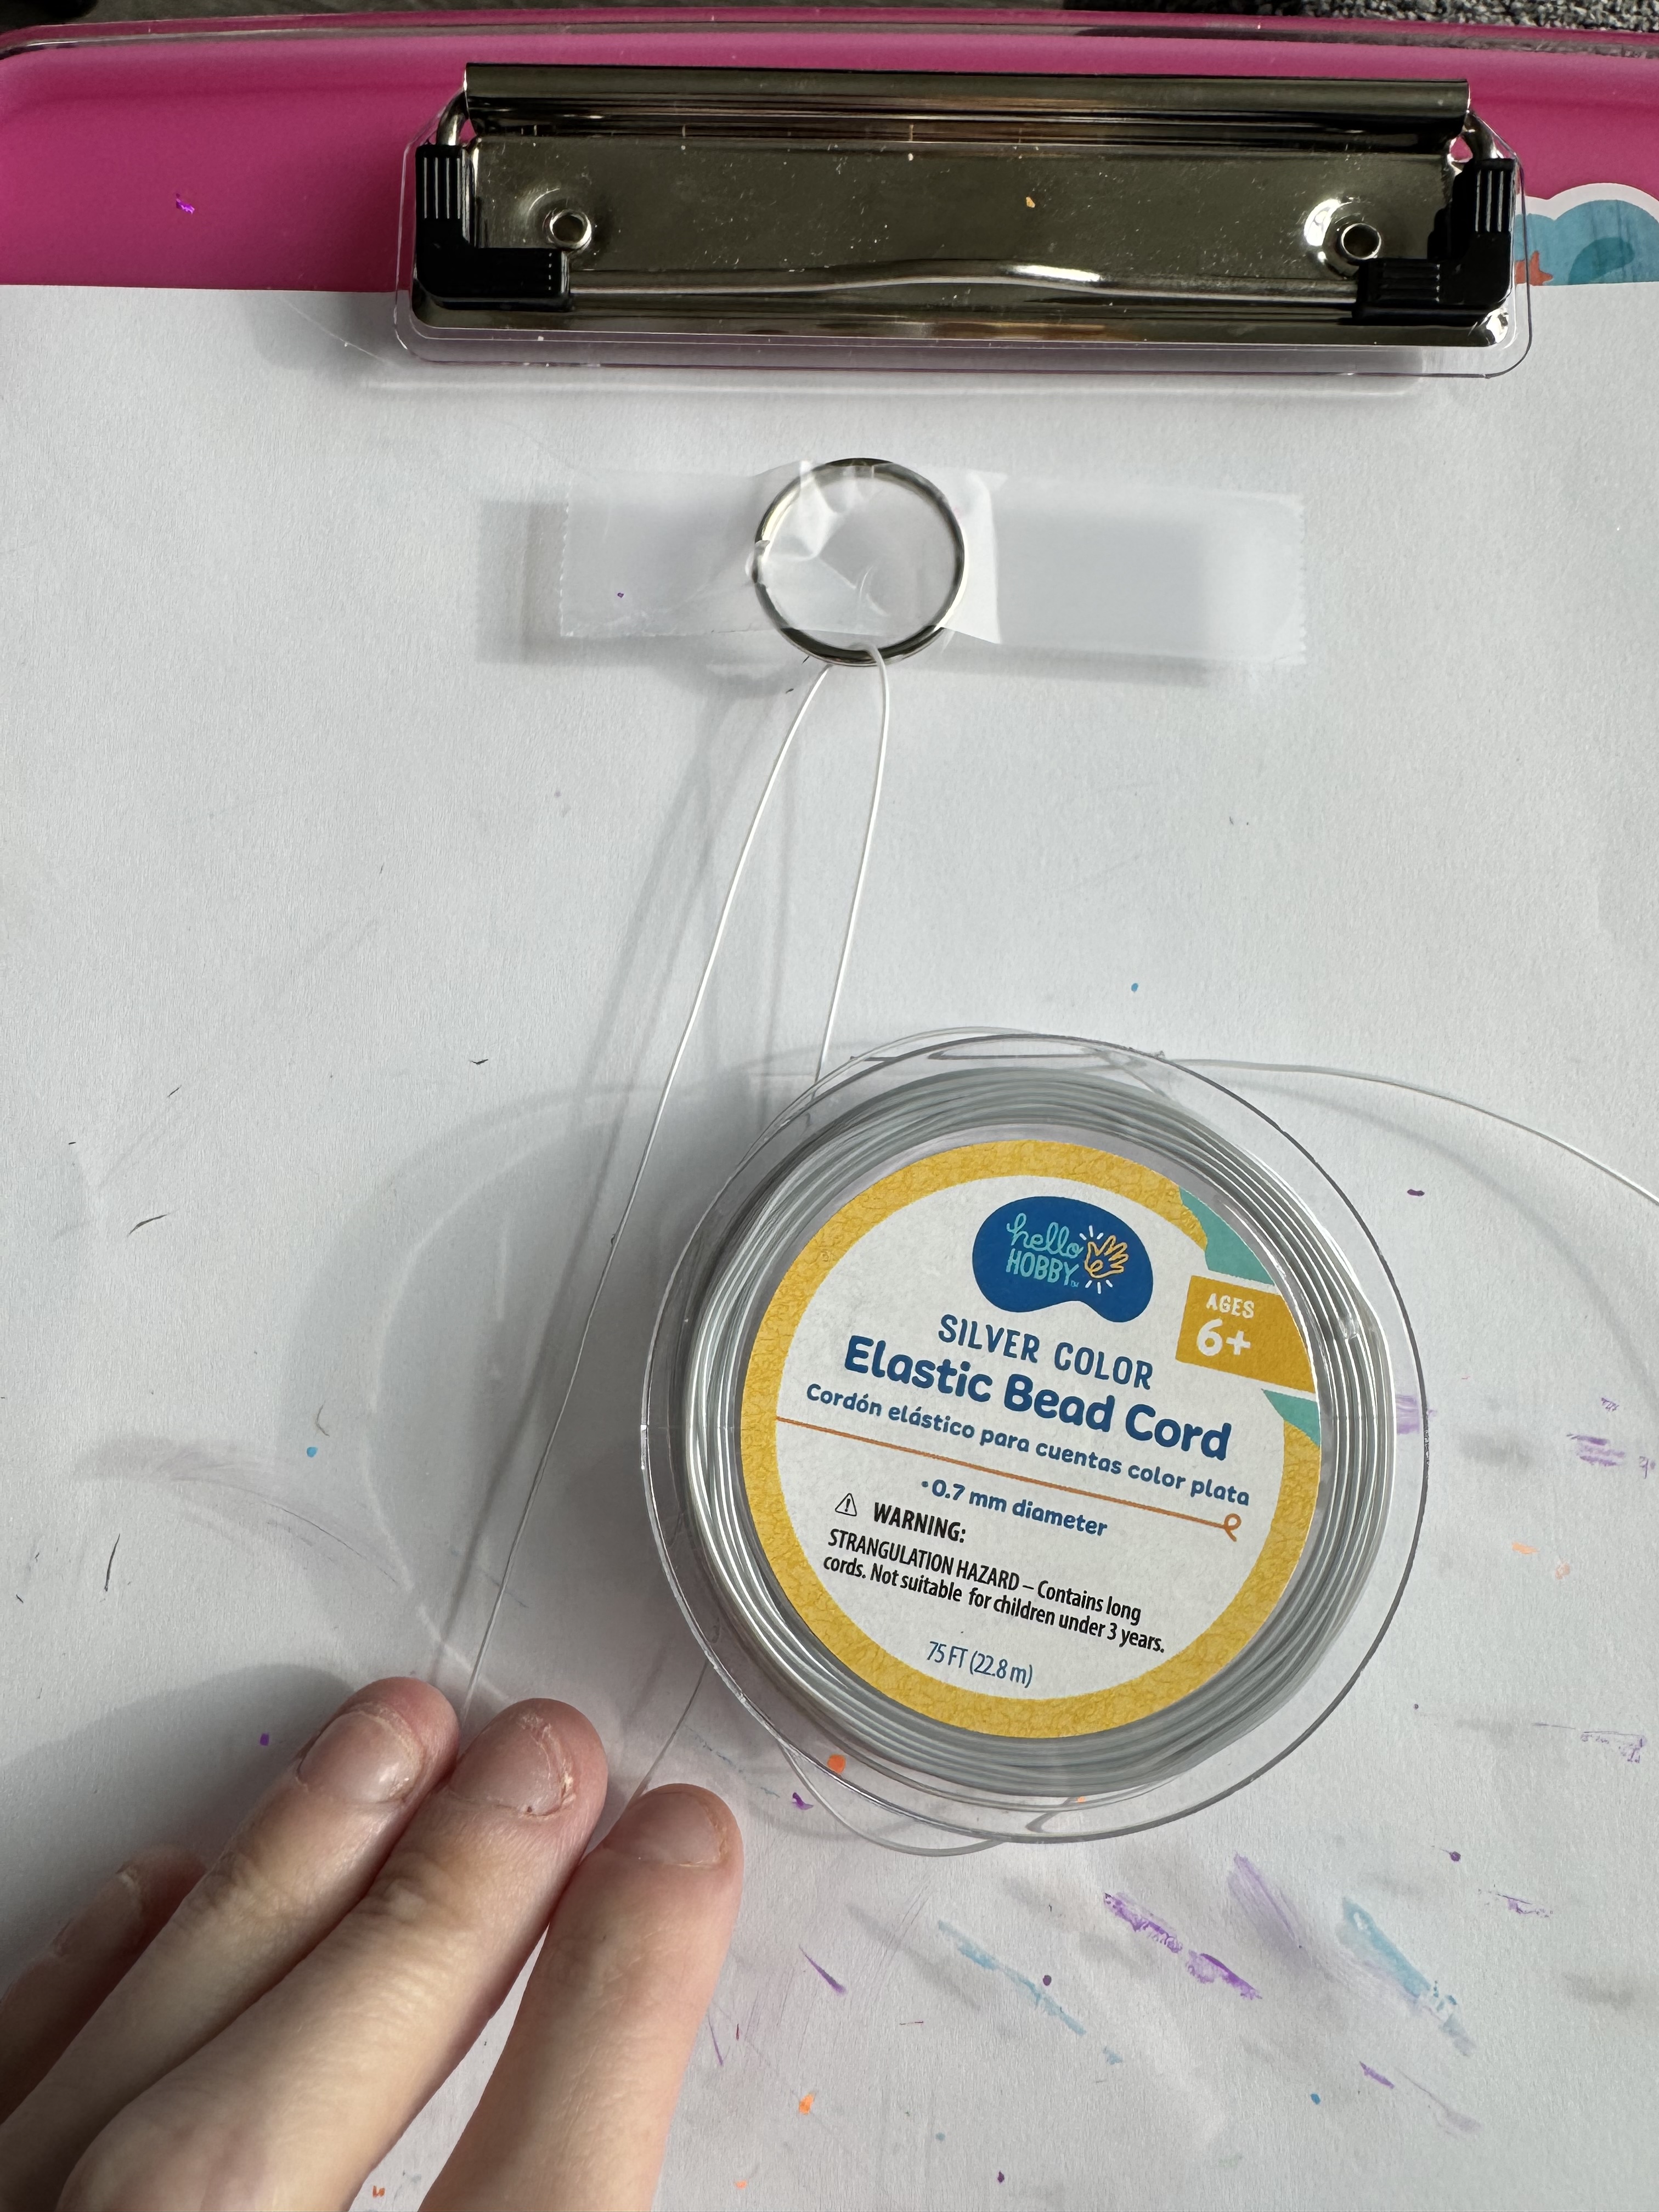
Have a grown-up help you cut about 5 feet of cord. Slip it through the keyring and pull it through to about halfway, then secure the keyring so you can bead.
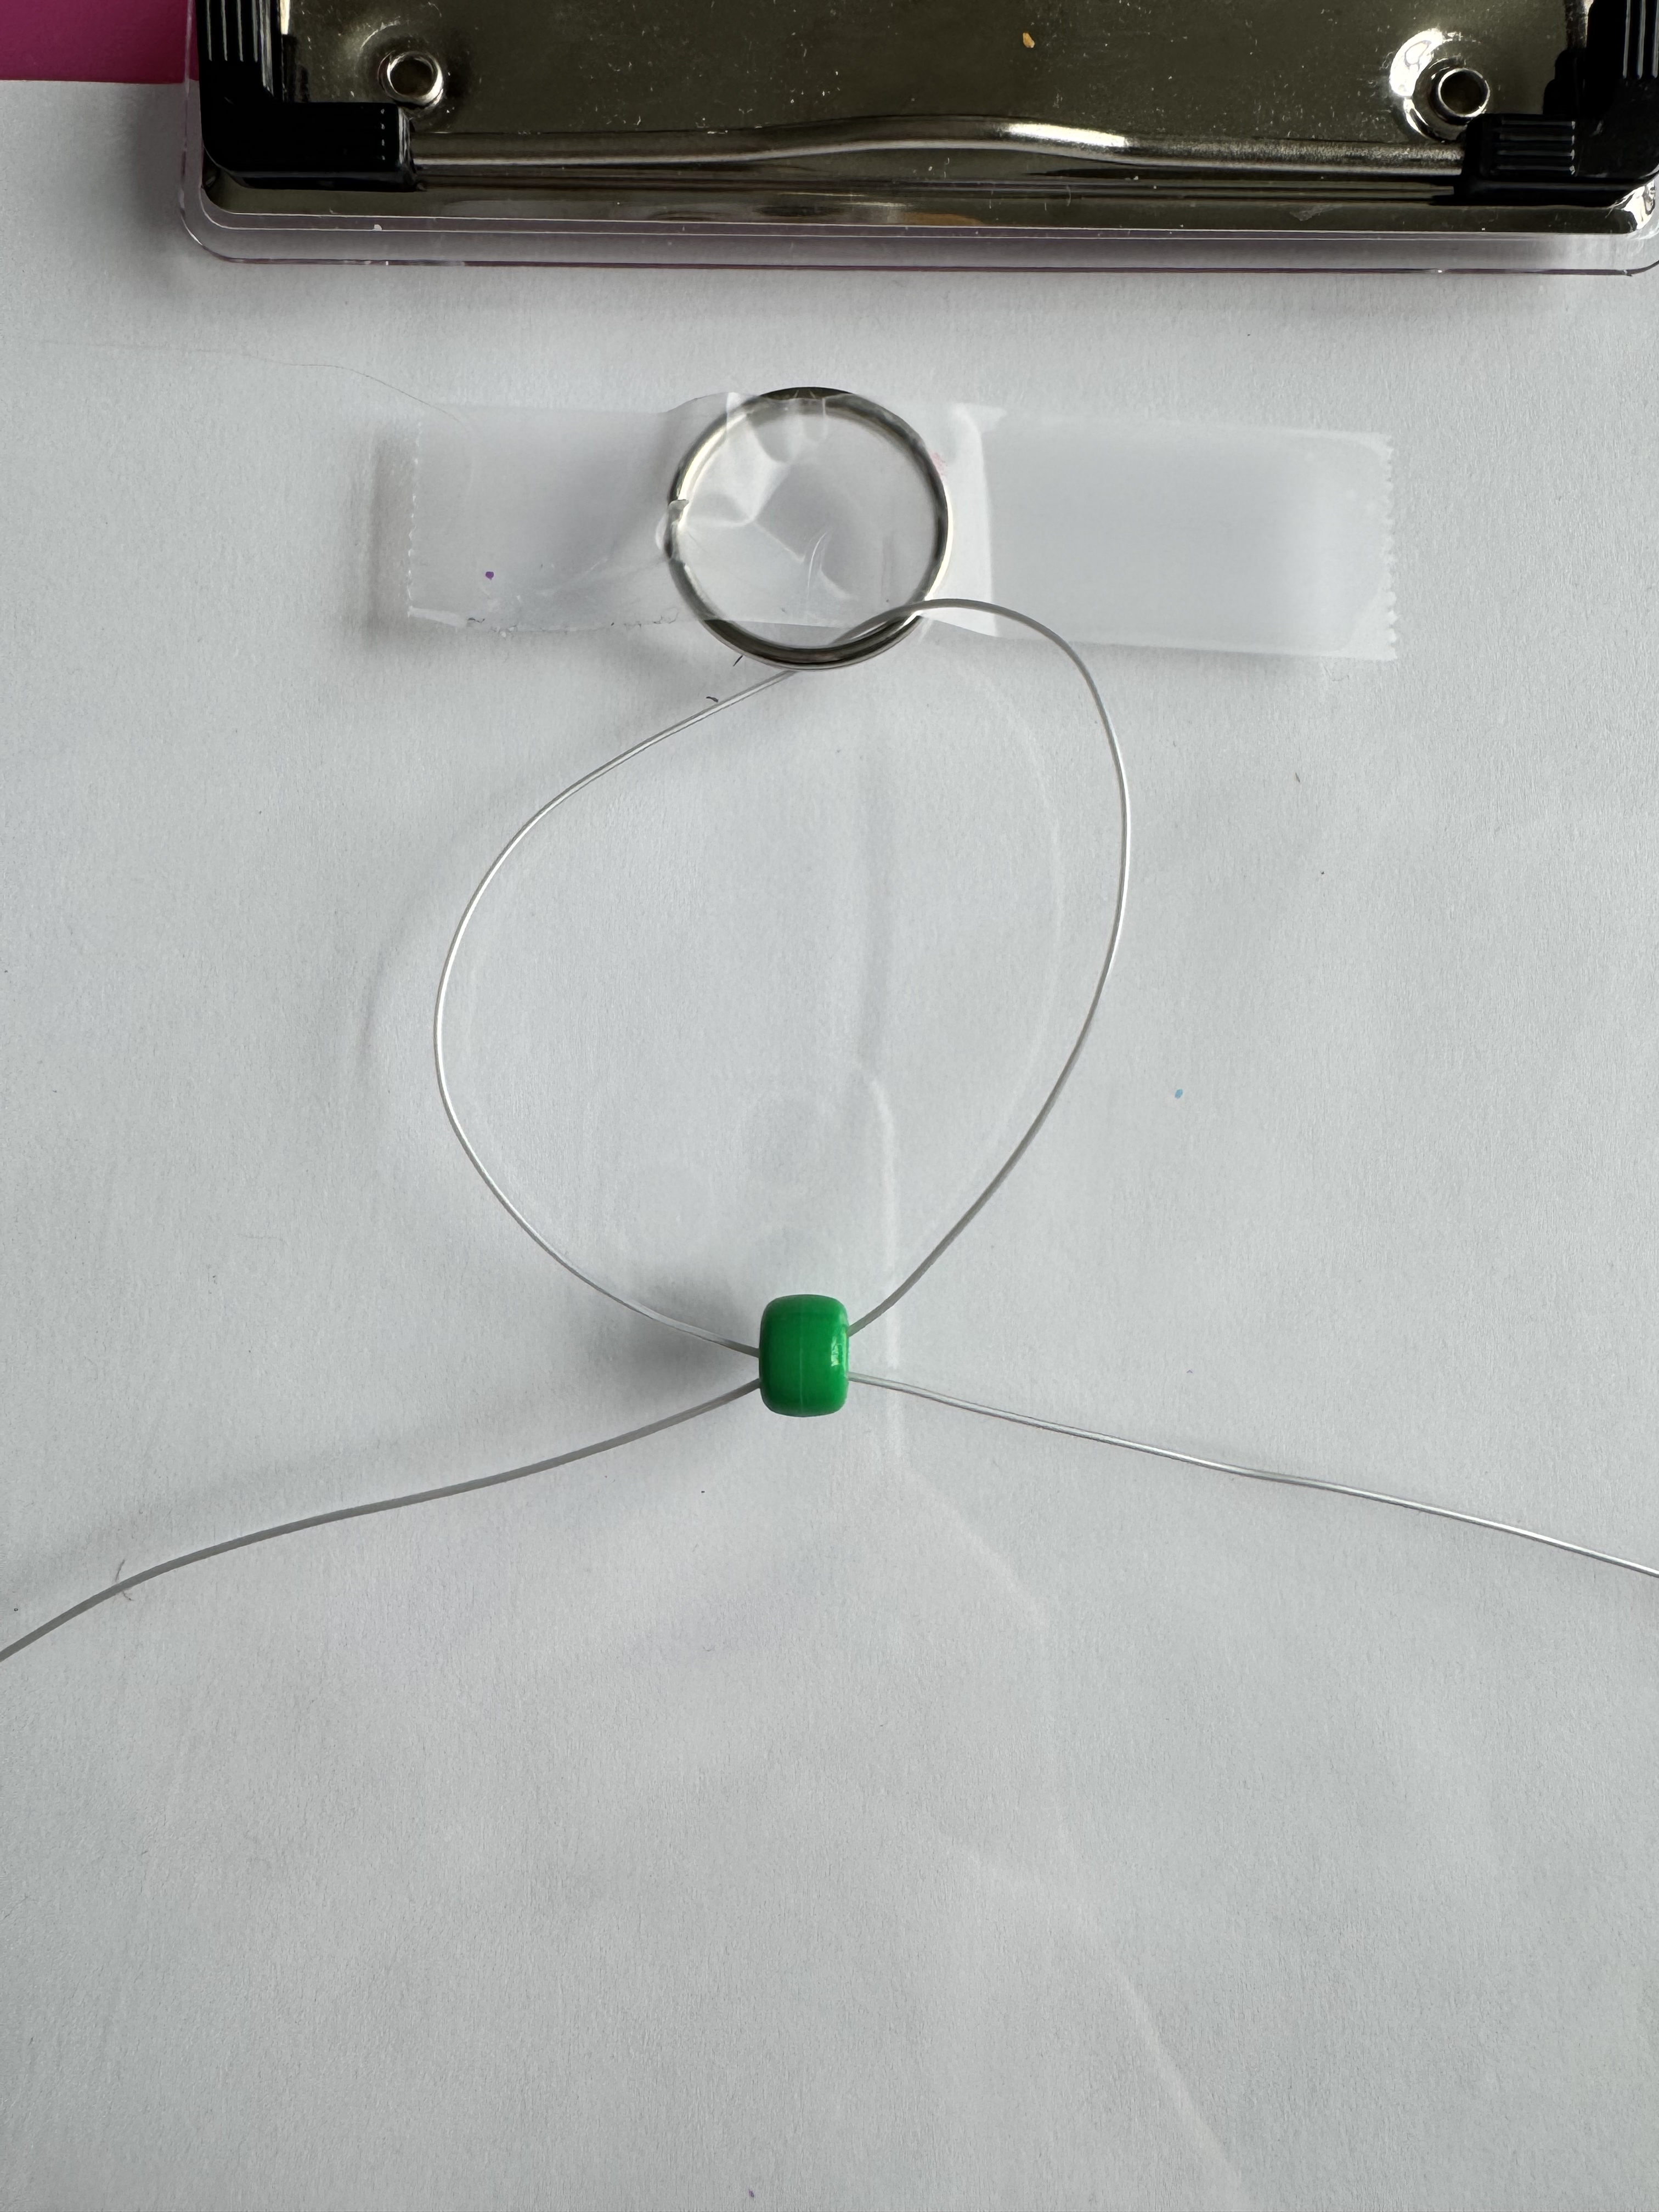
Using a dark green bead, bead the first row by threading both ends of the cord through the bead and pulling it tight (not too worry if it won't stay put, the beads will begin to secure into place as you bead)
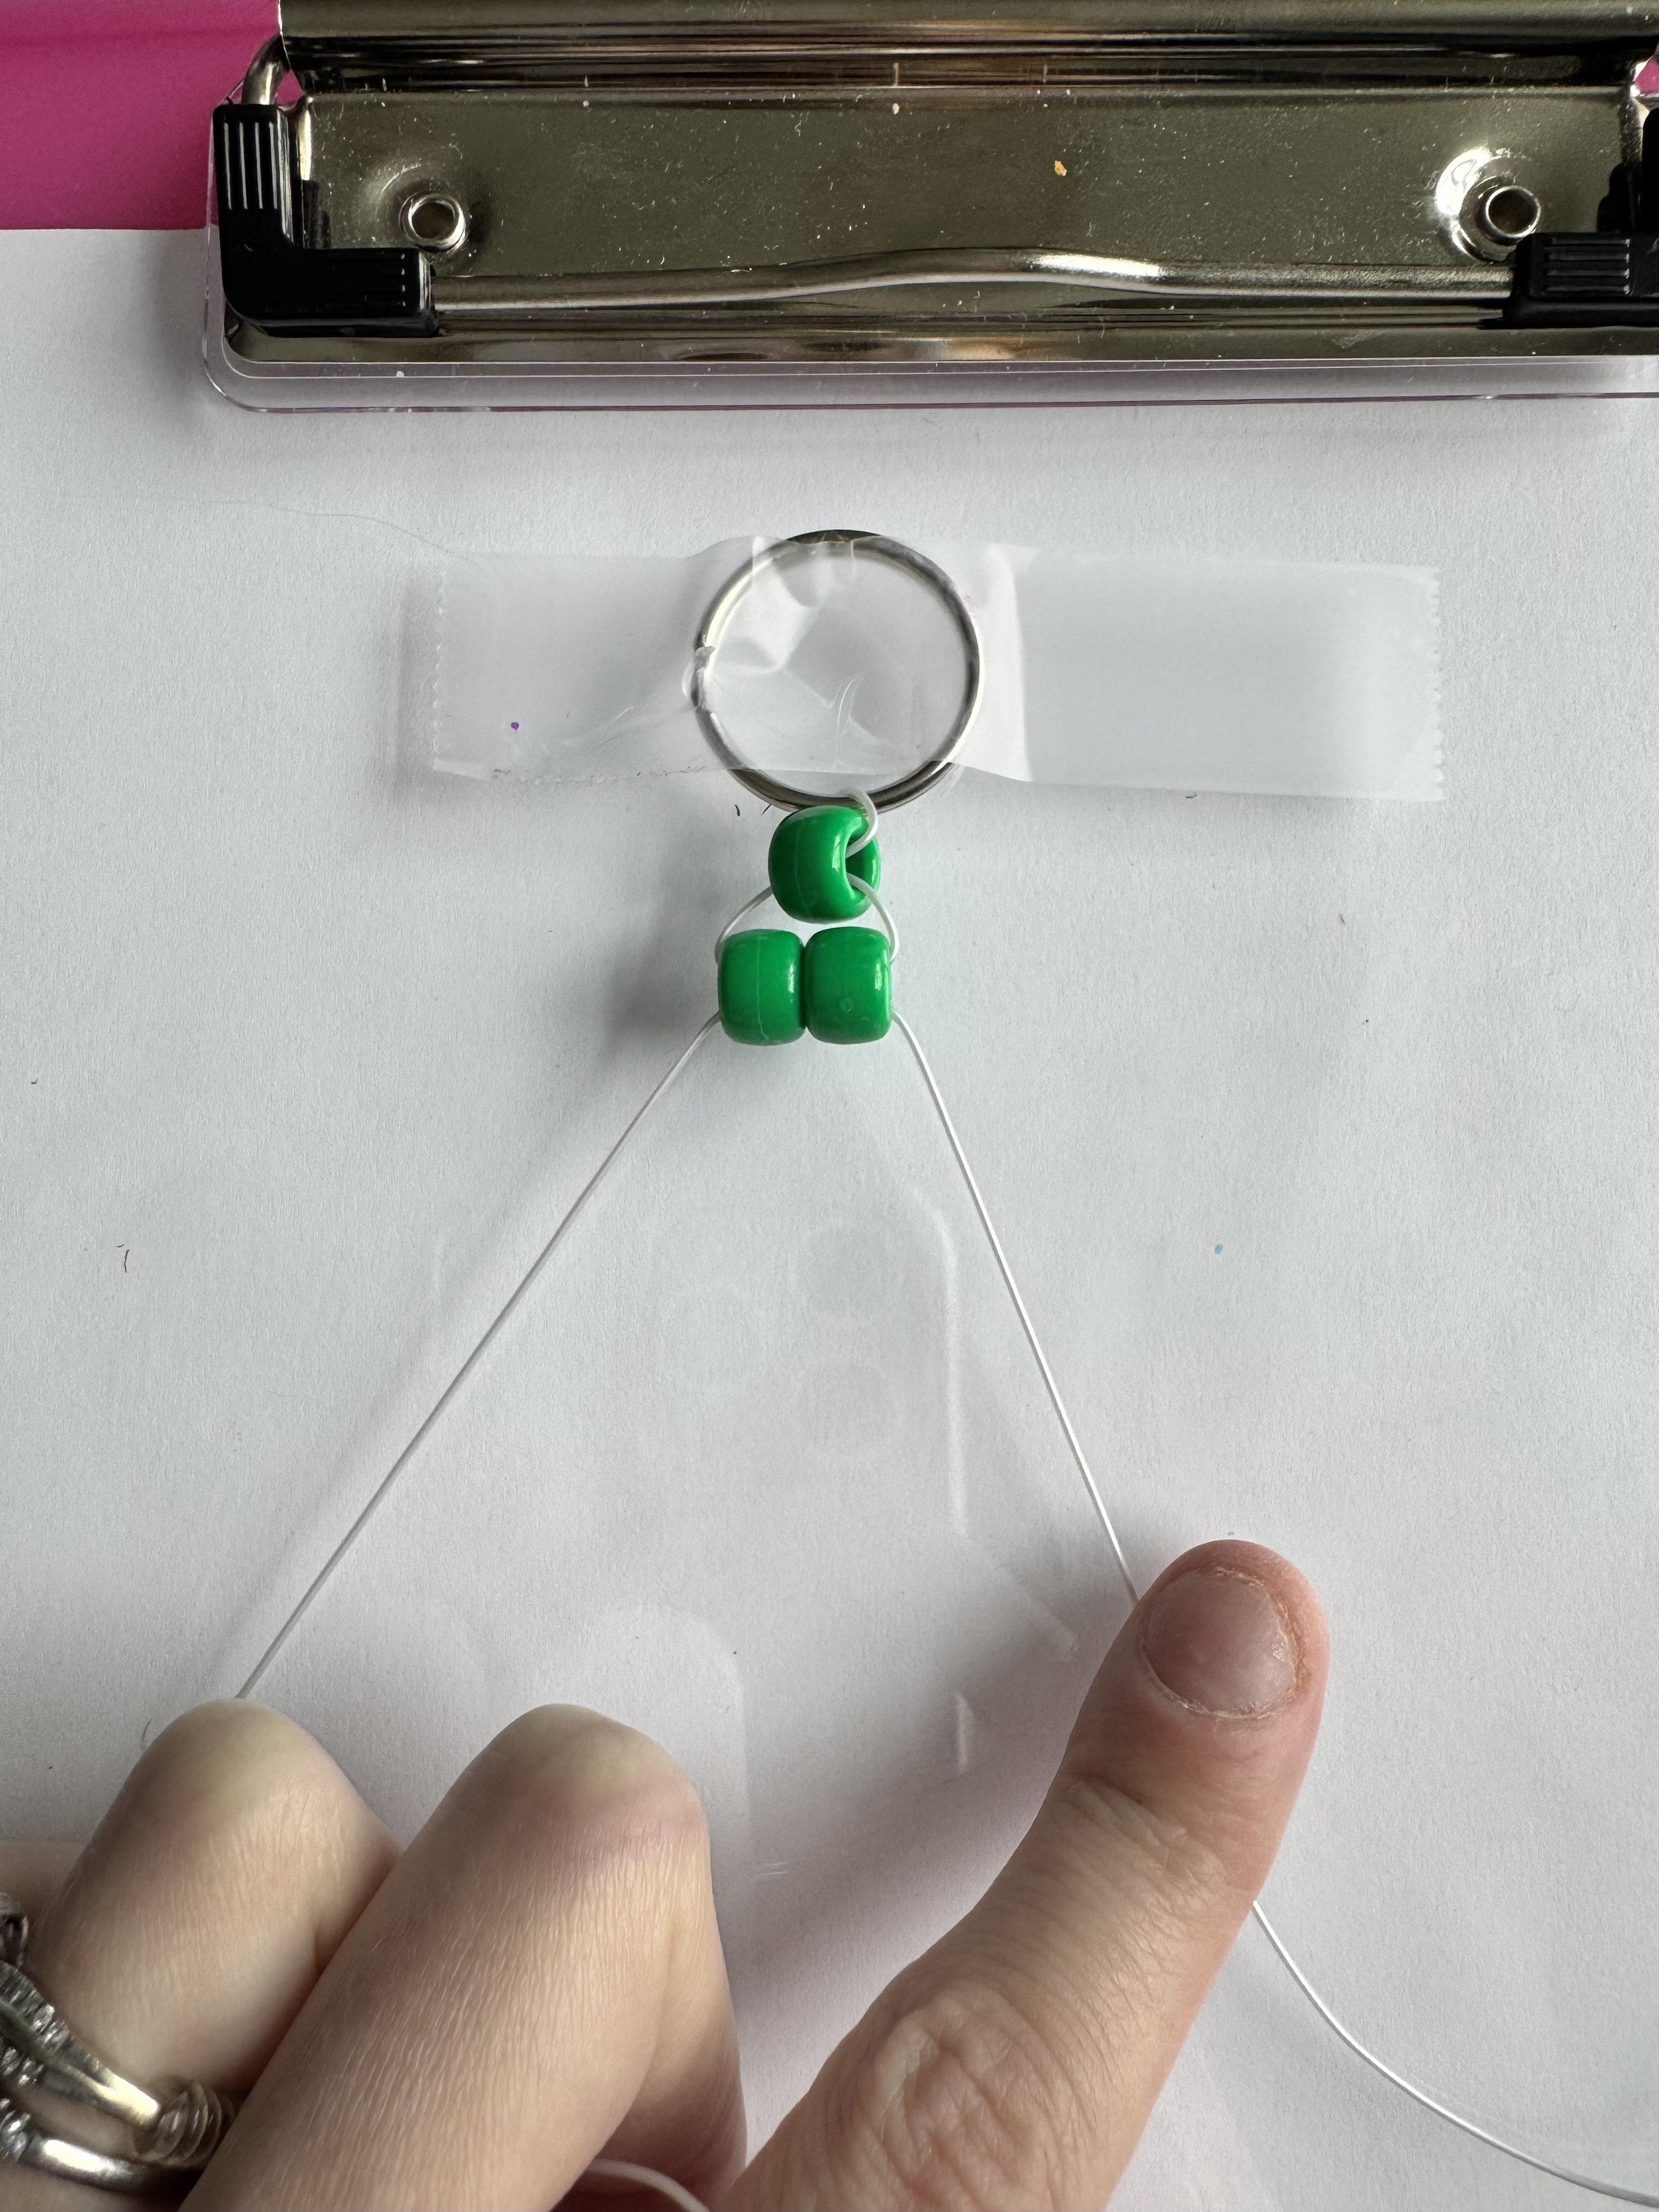
You will repeat the previous step for the next row but this time you will use 2 beads, line them up next to each other as you thread to make it easier.
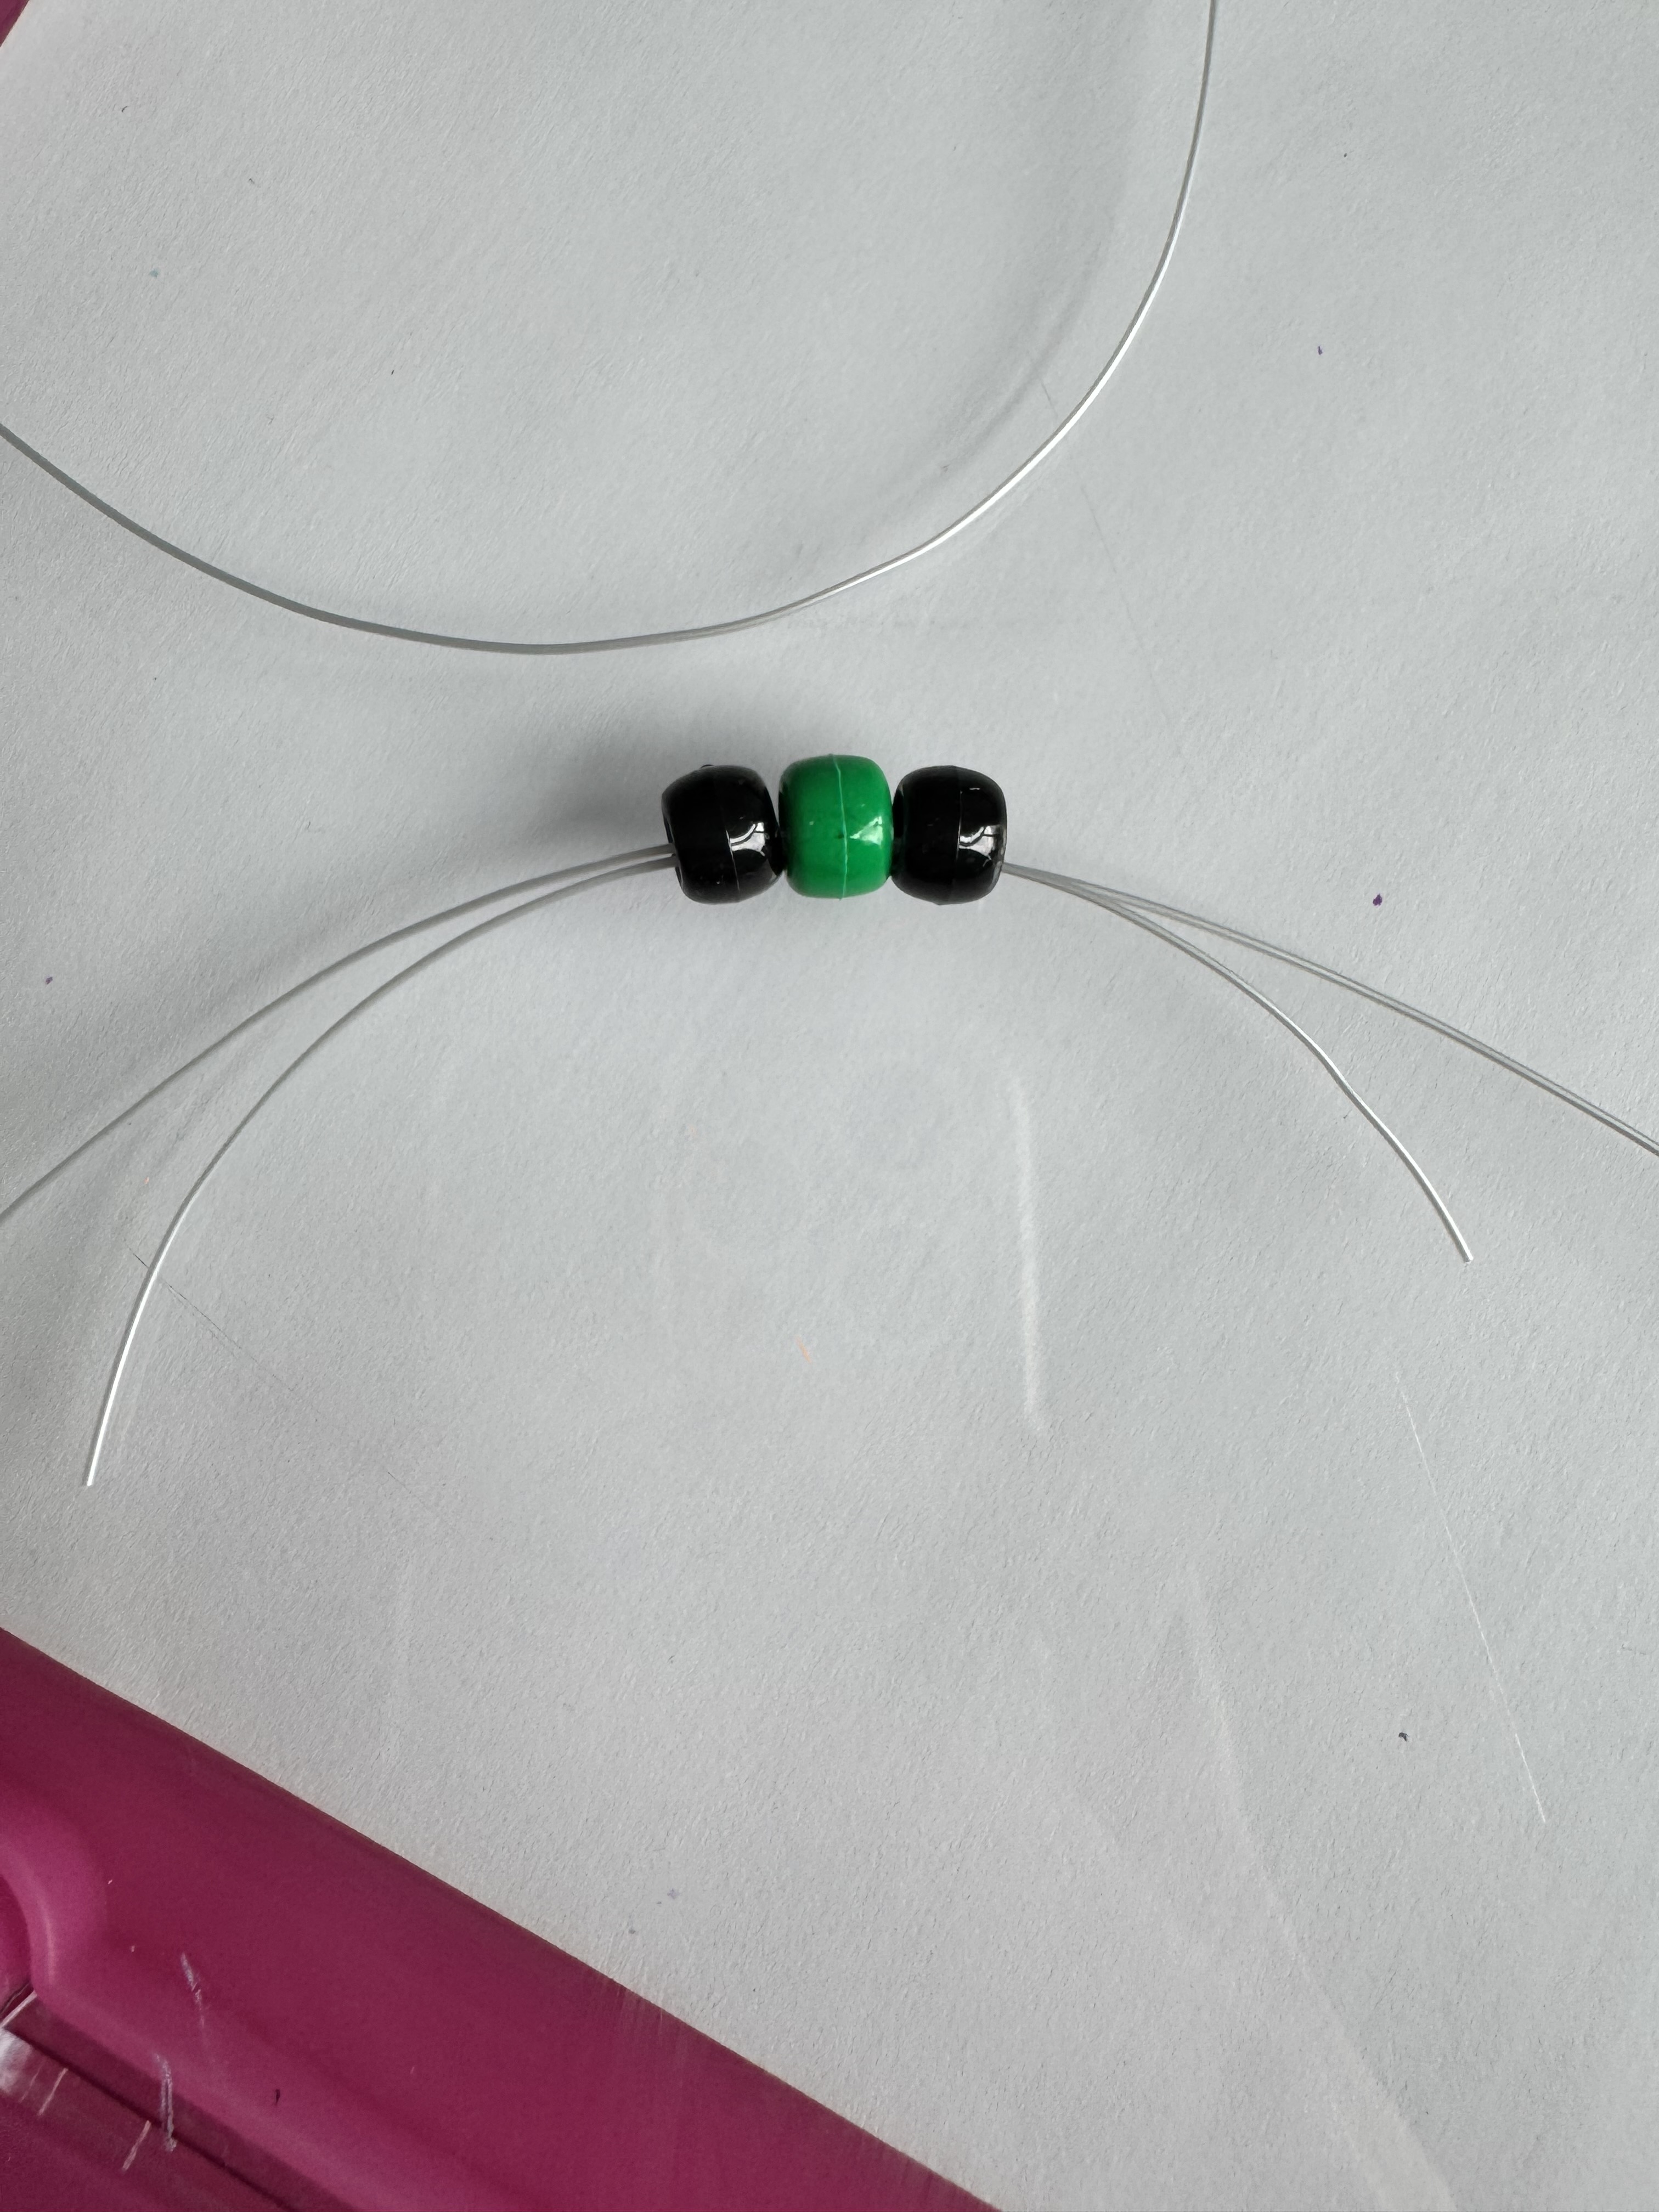
You will repeat the same process of threading both ends of cording through the beads but this time you will use three aligned as black, green, black, as shown in the photo.
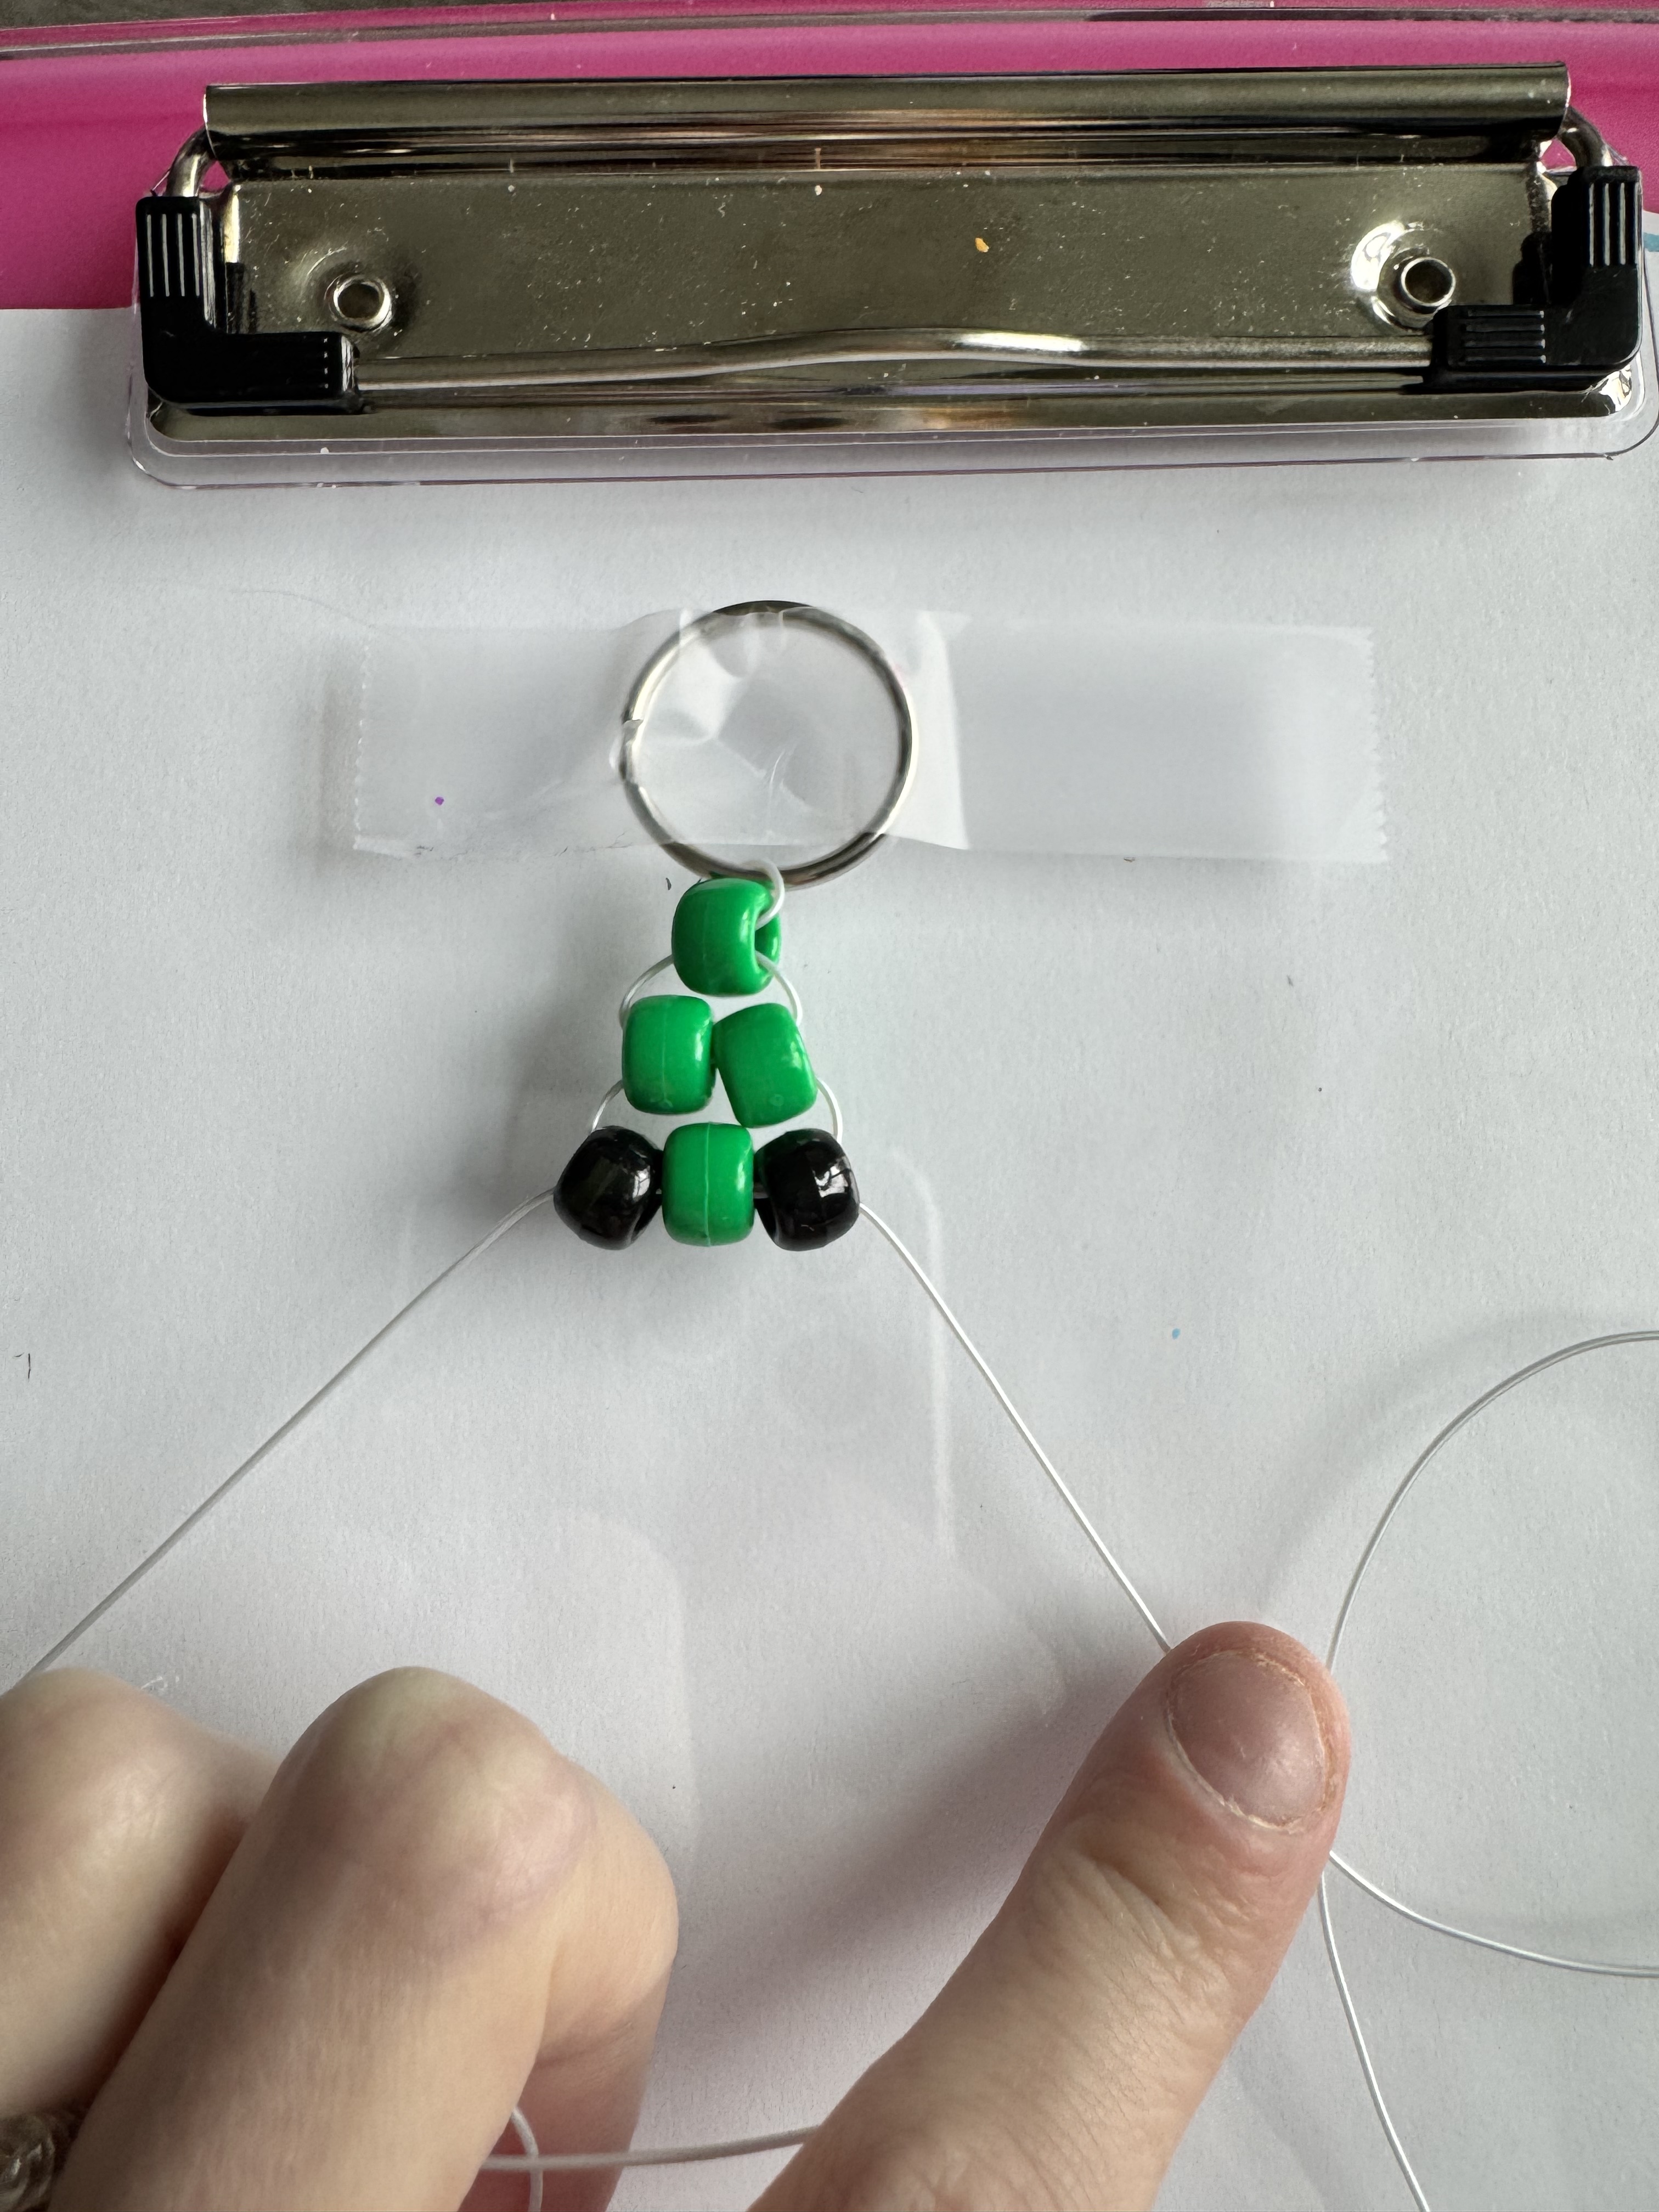
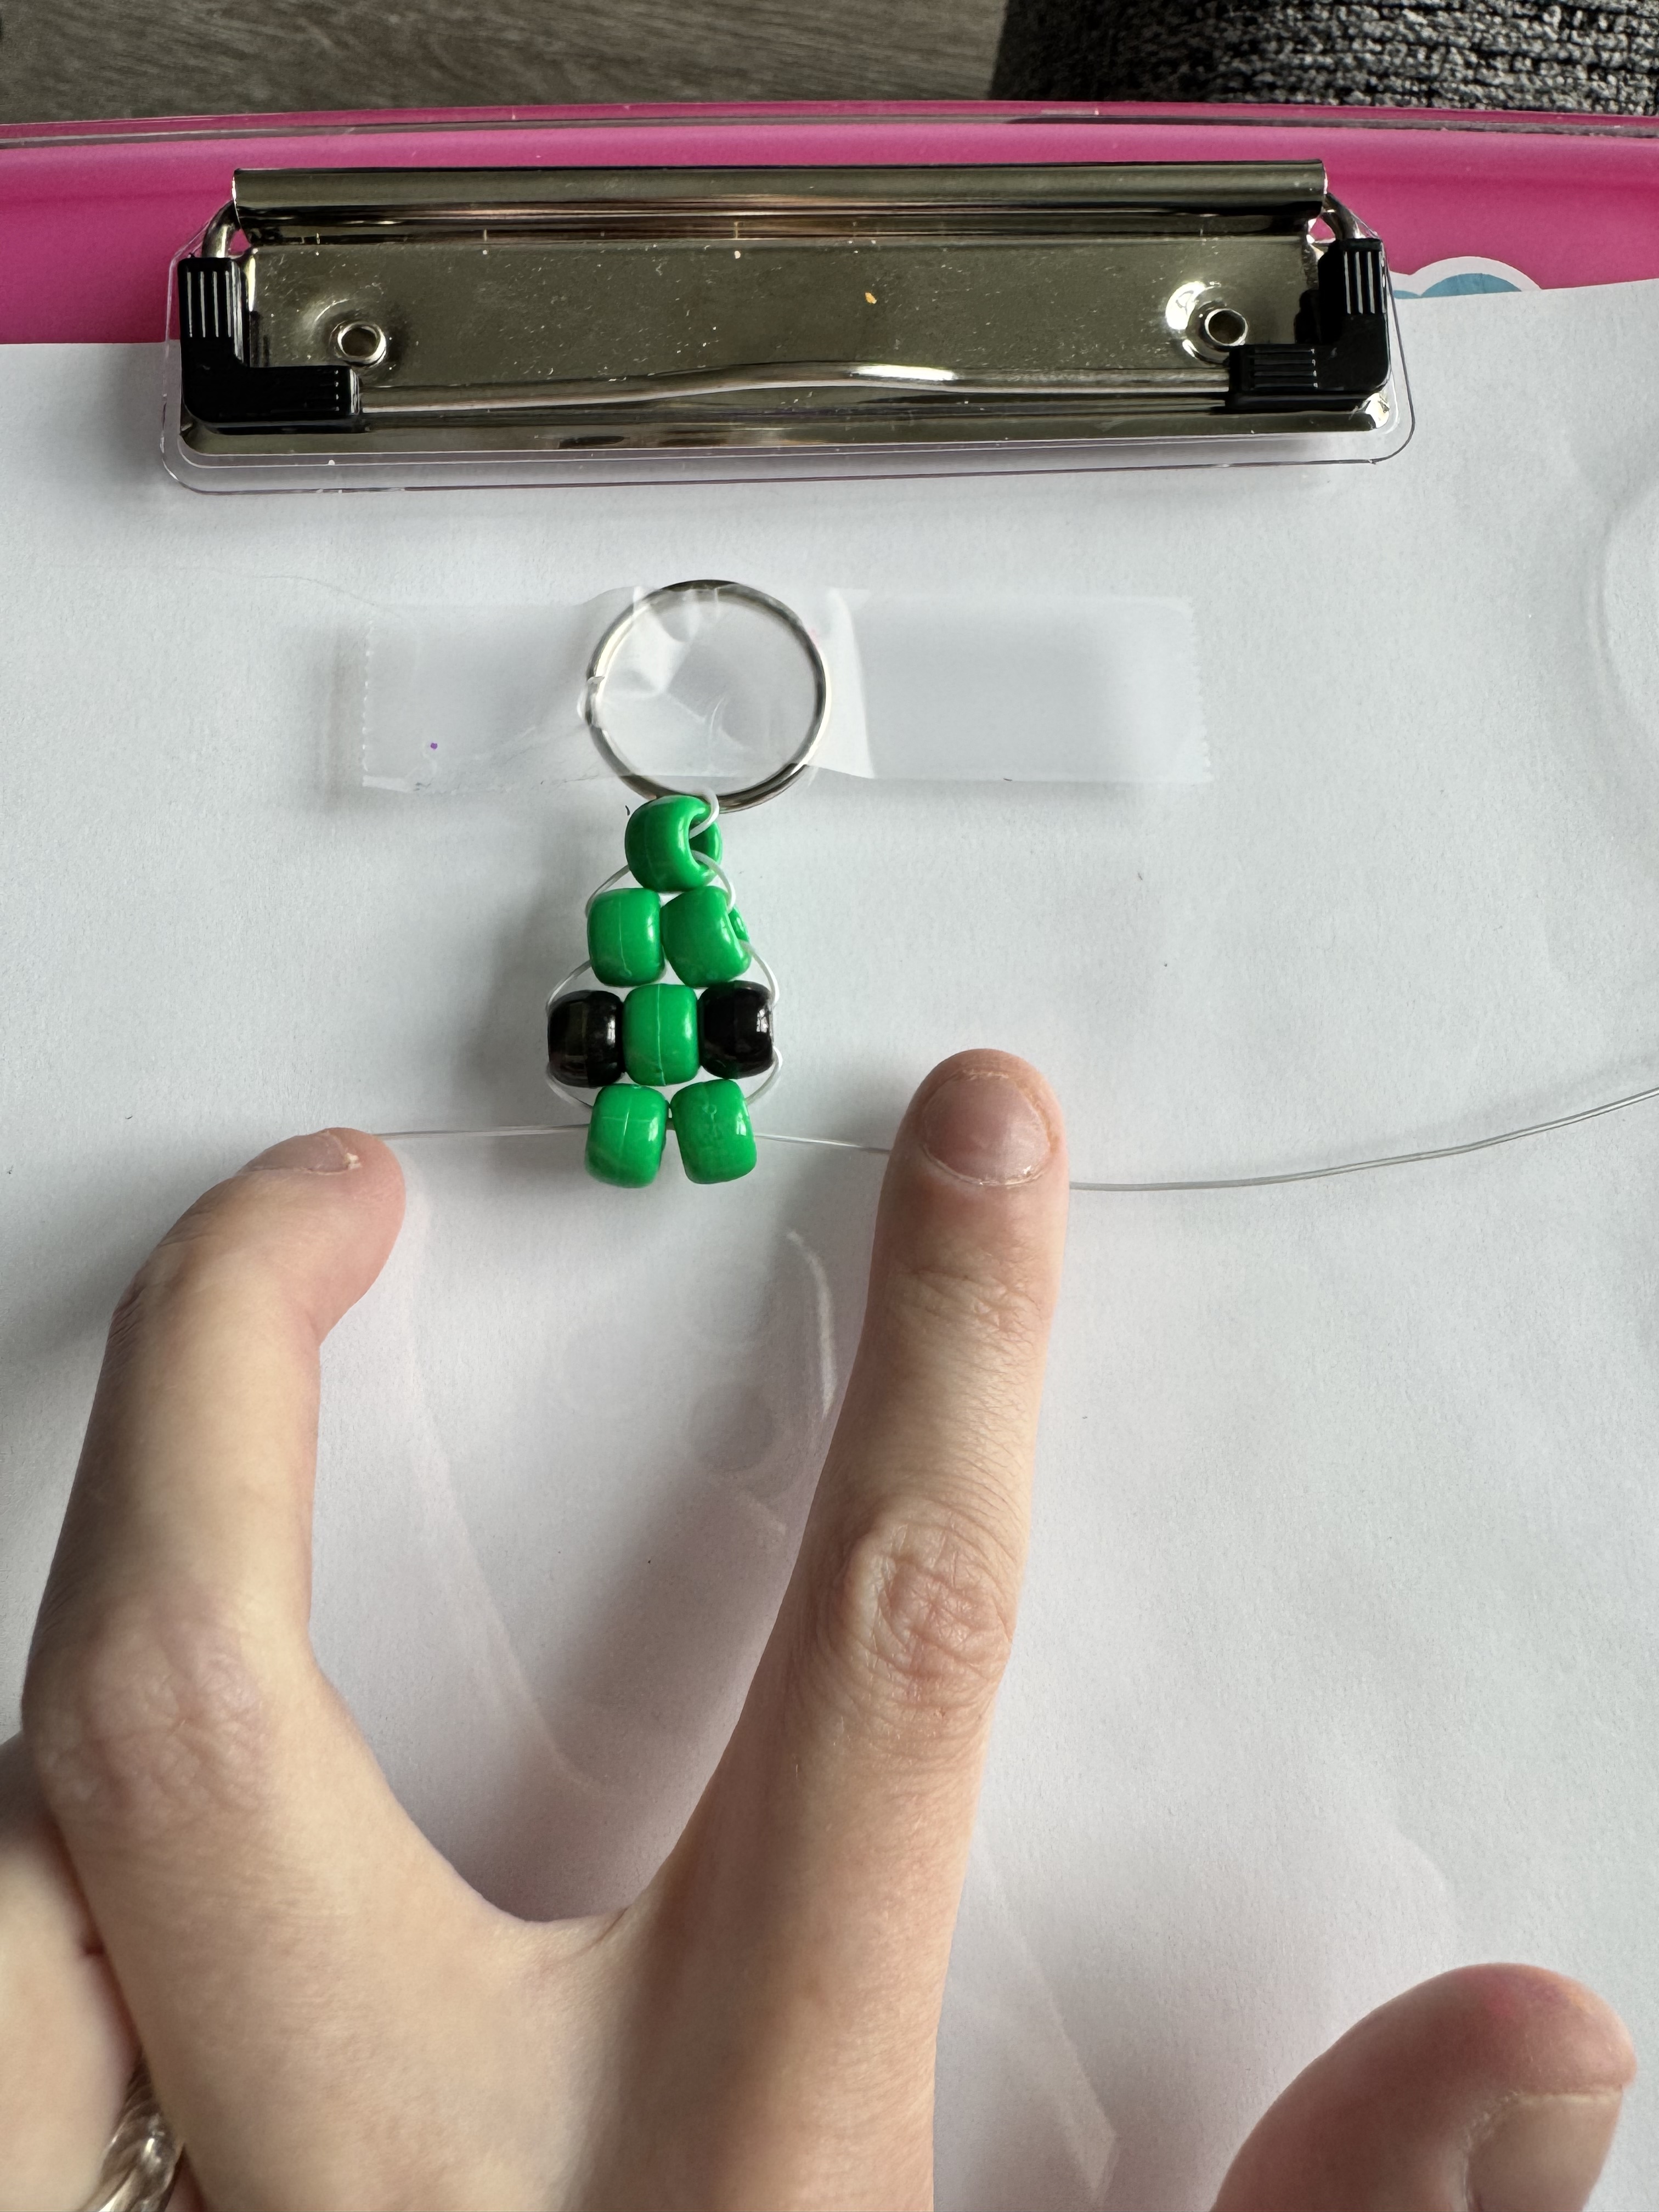
You will now repeat the exact same steps you completed in step/row 2 - You will use 2 beads, line them up next to each other as you thread to make it easier.
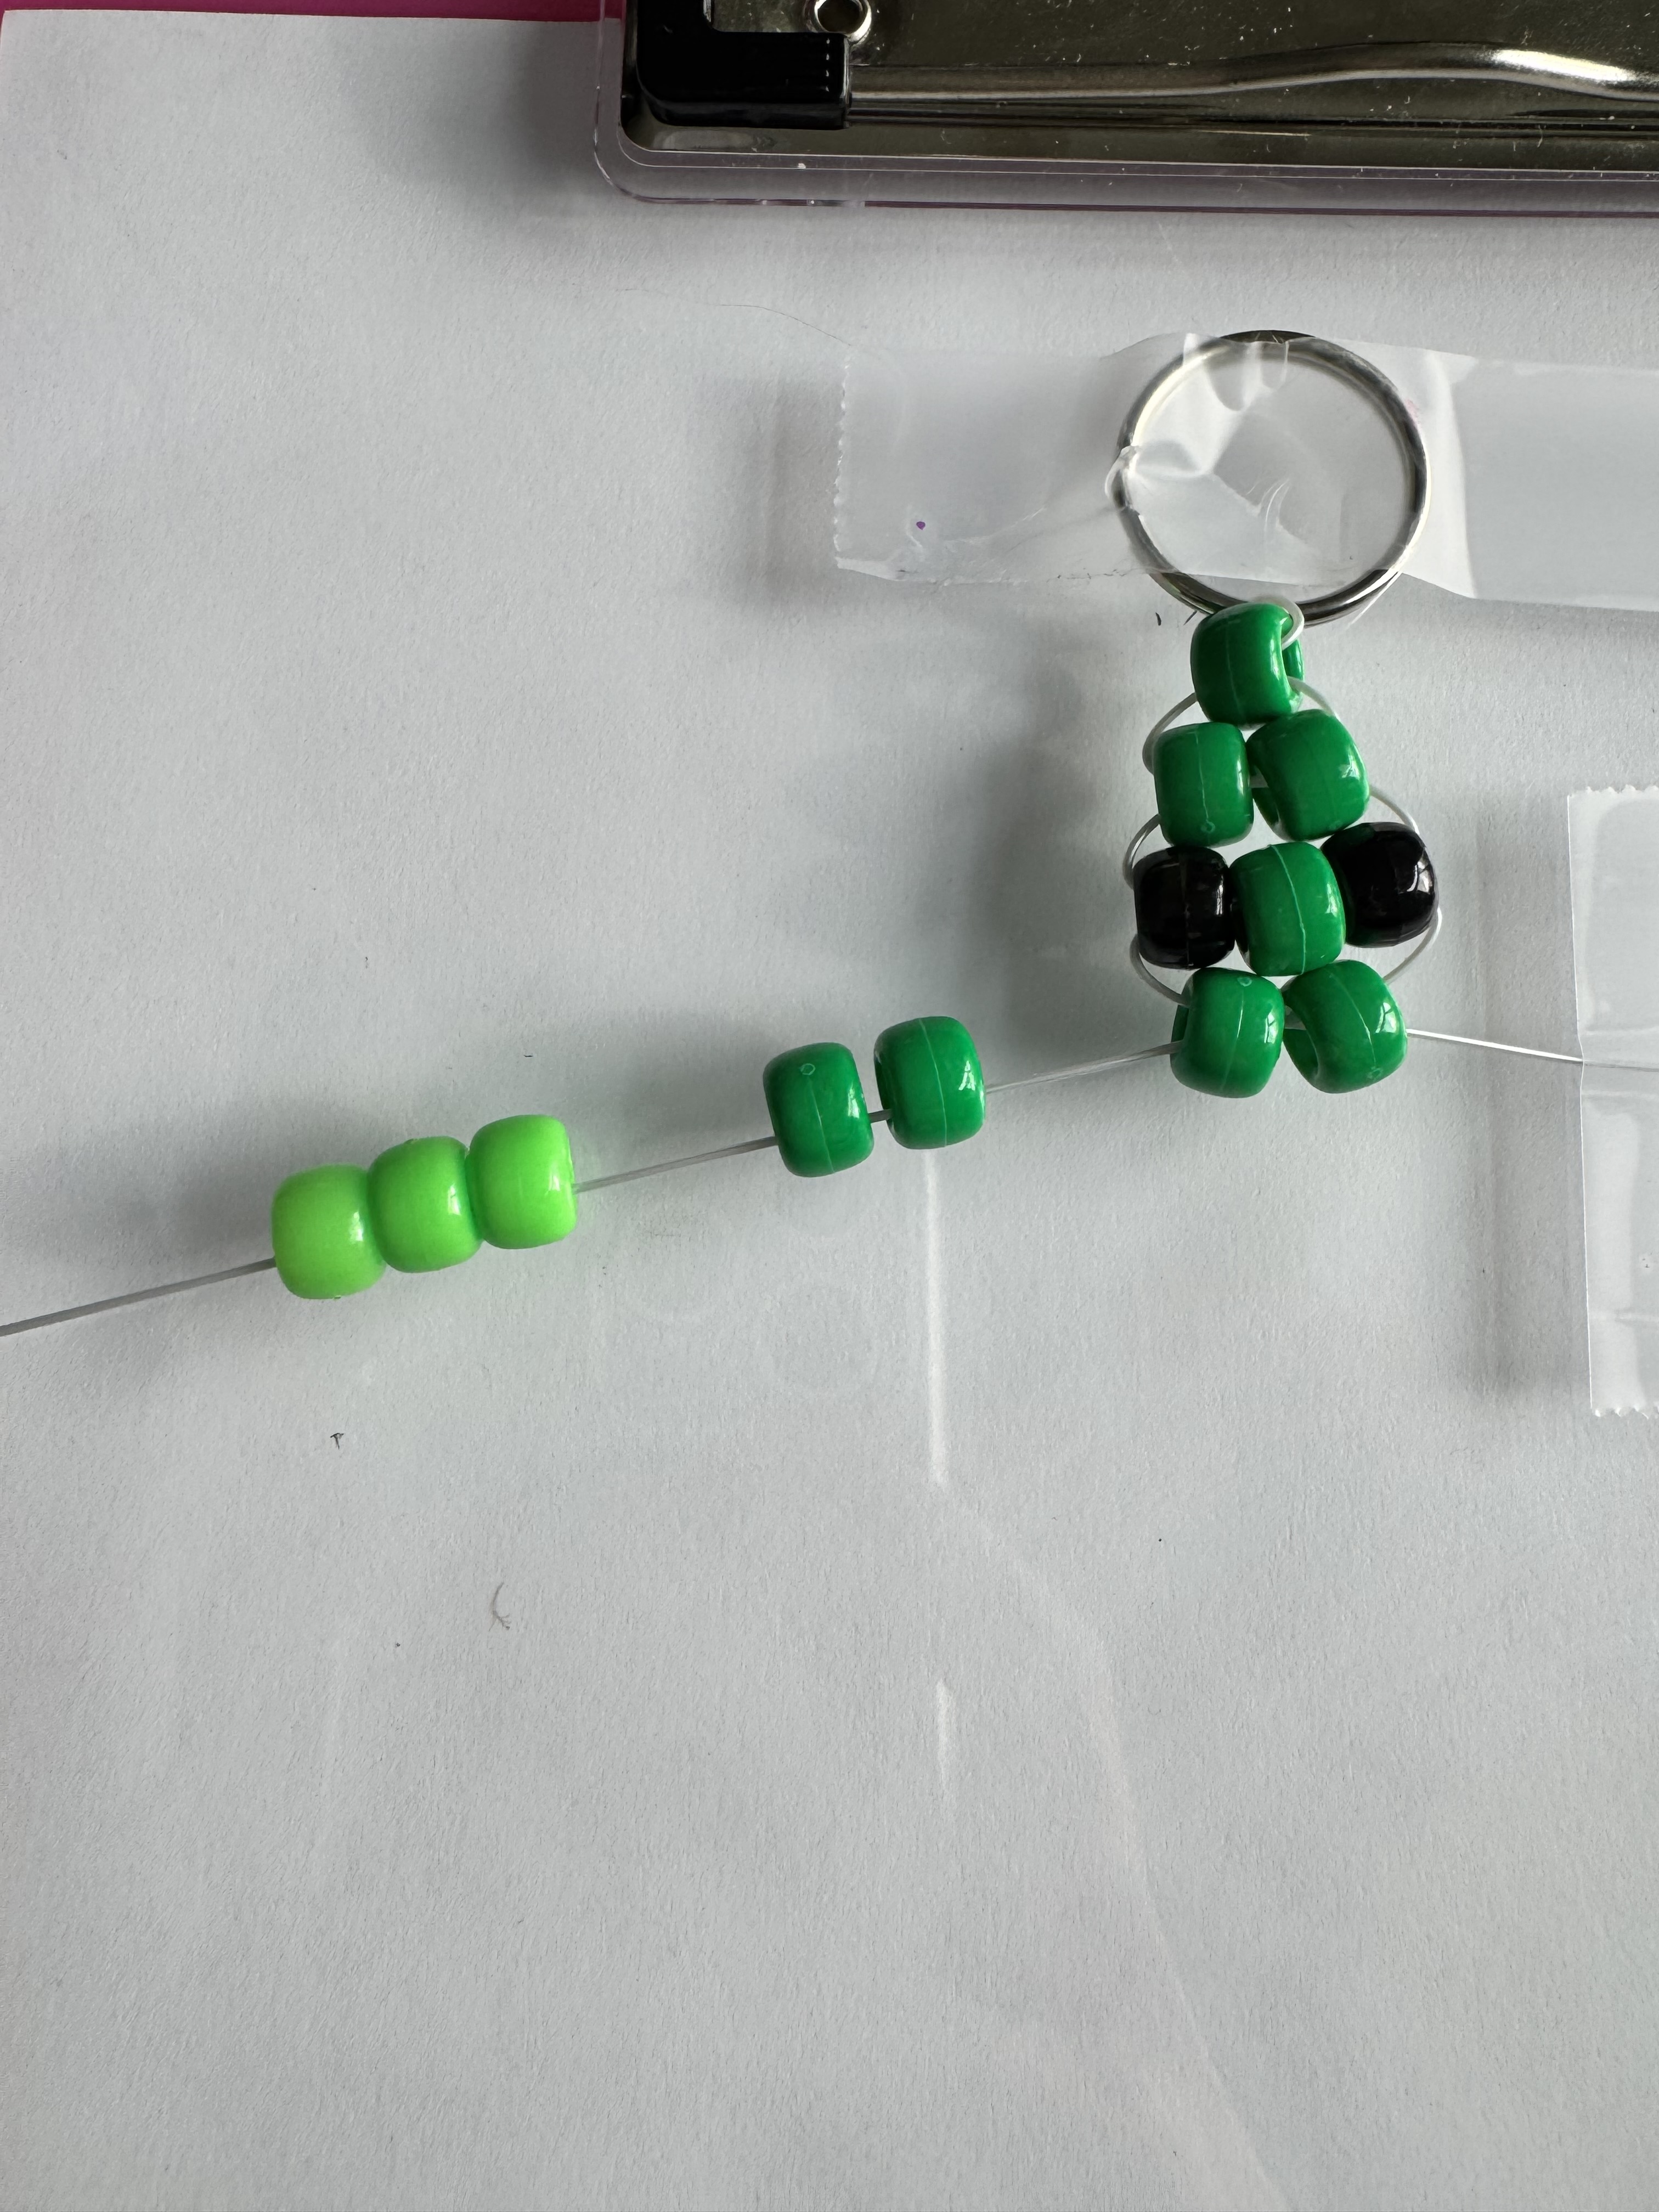
using only the left strand of elastic, thread 5 beads, 2 dark green followed by 3 light green.
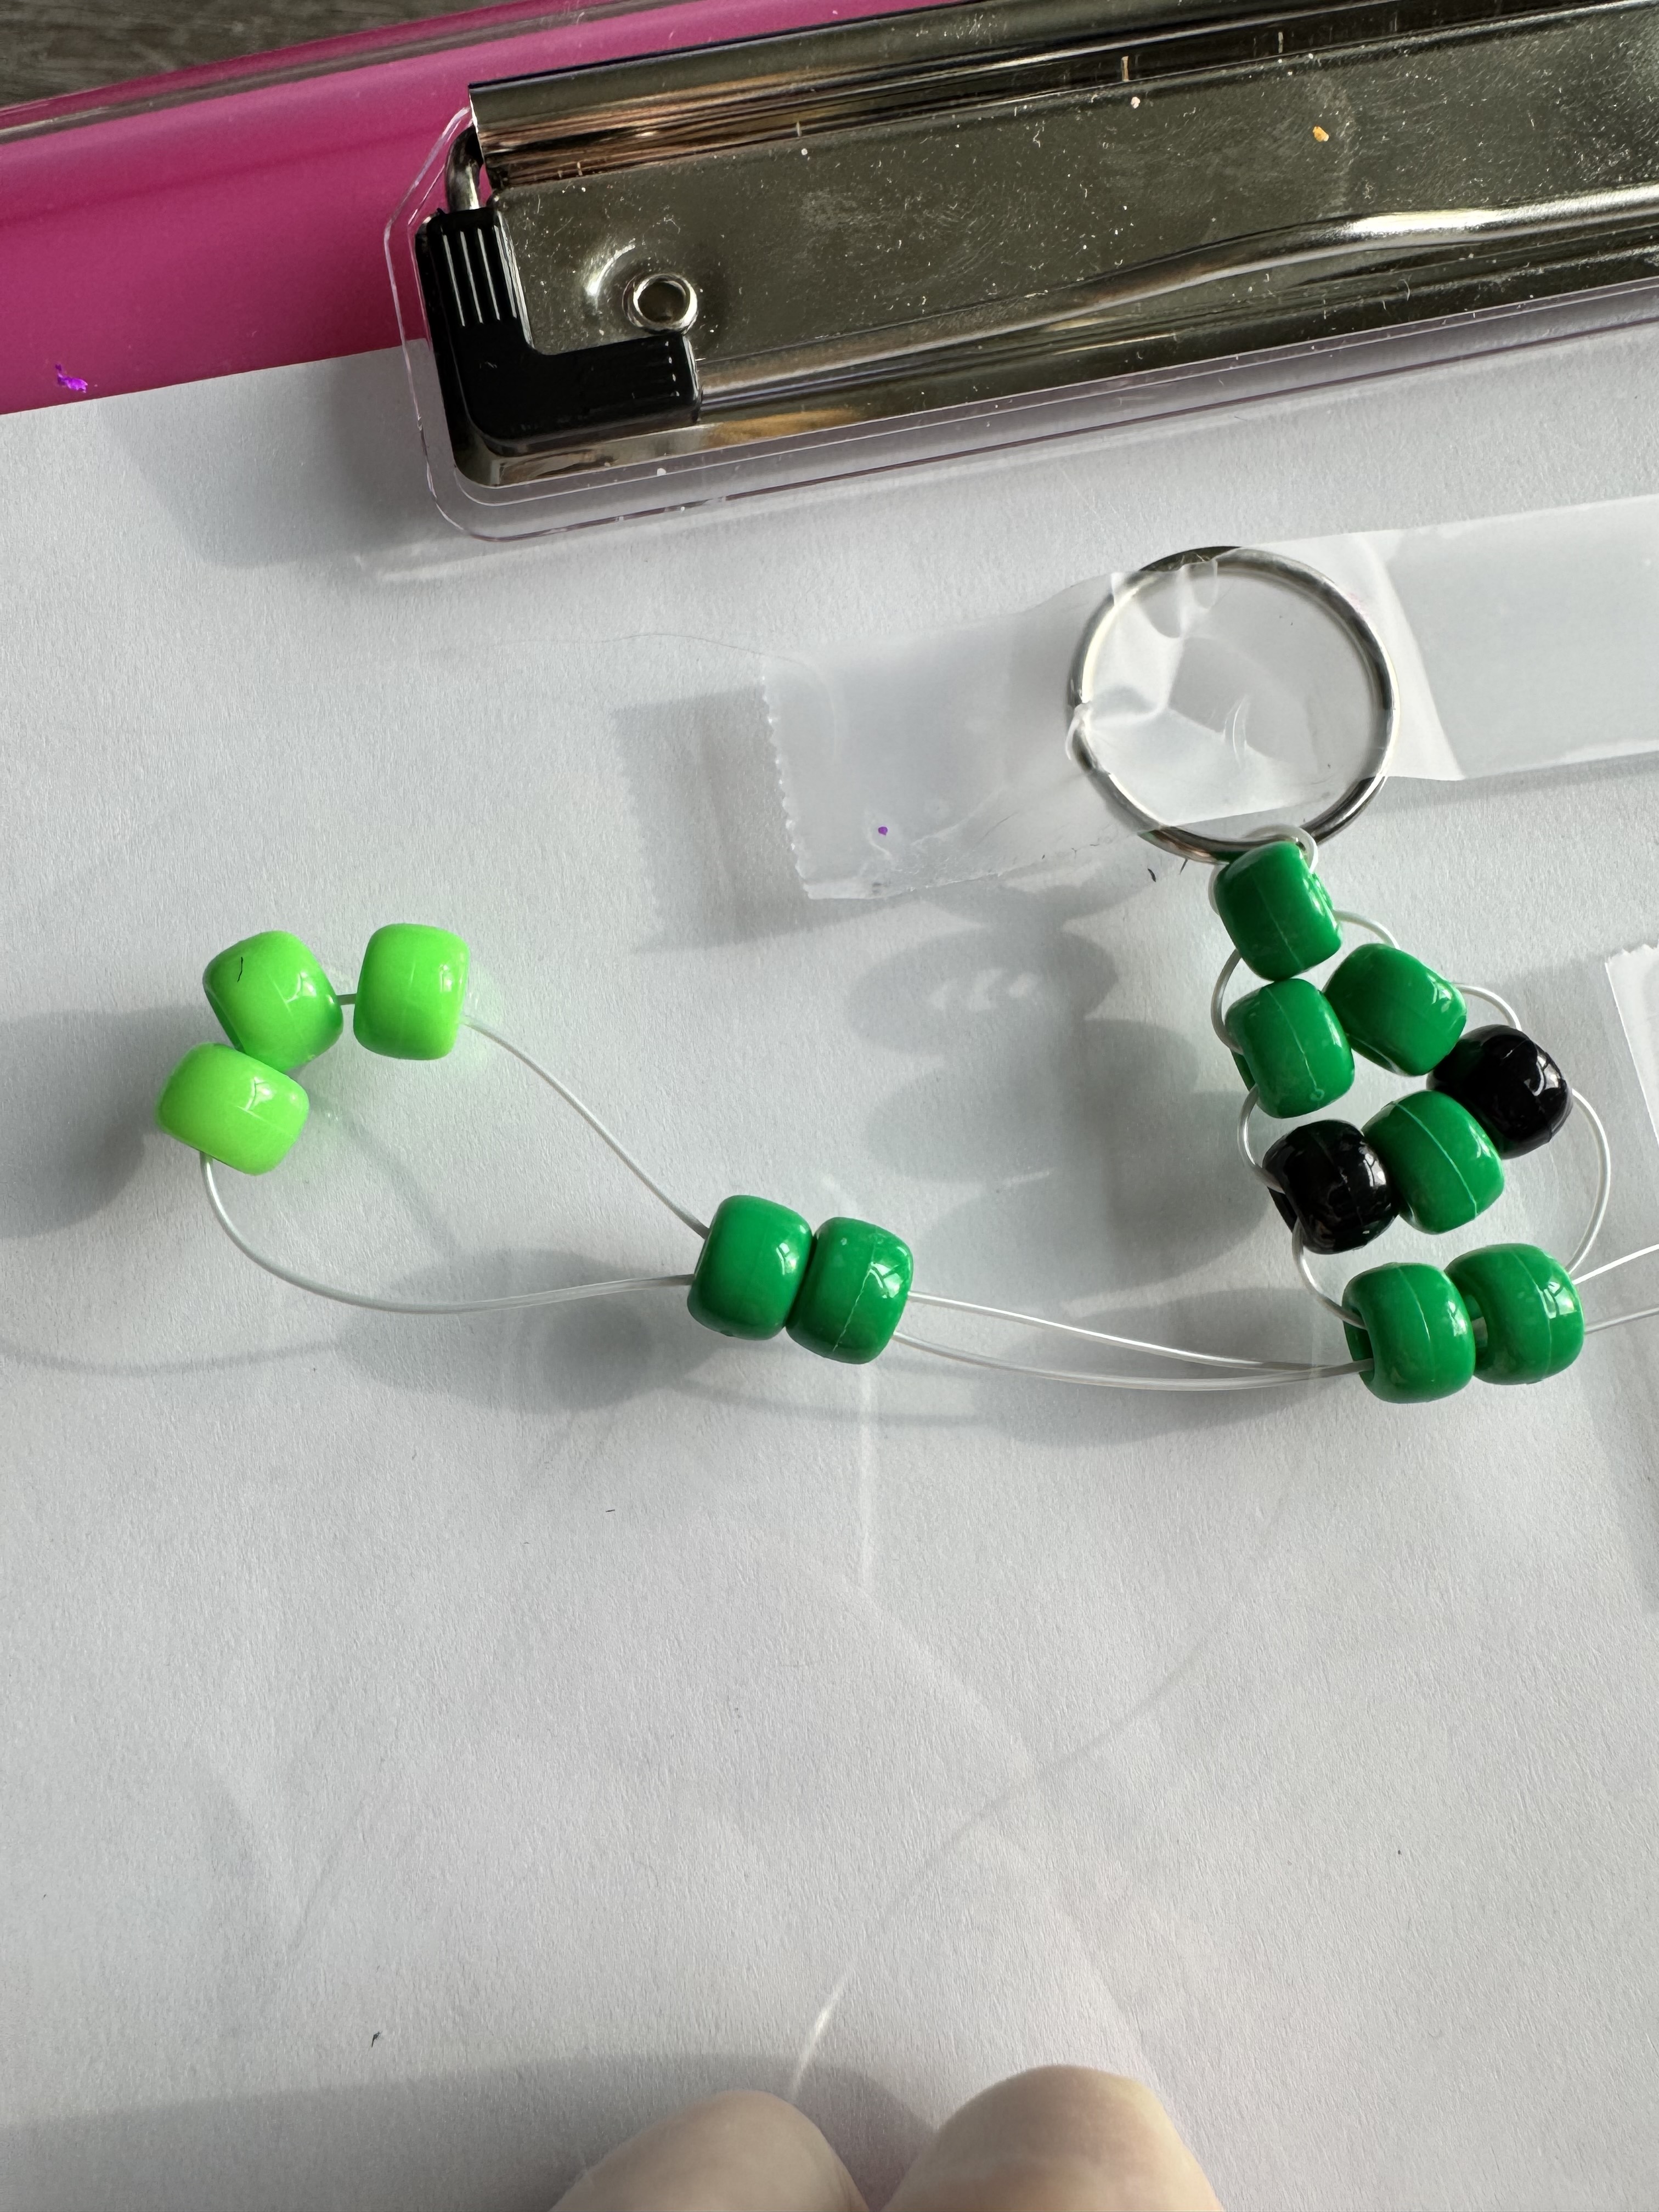
Now take the end of that strand and thread it back through the first two dark green beads, skipping the three lighter. when pulled tight the arm should form.
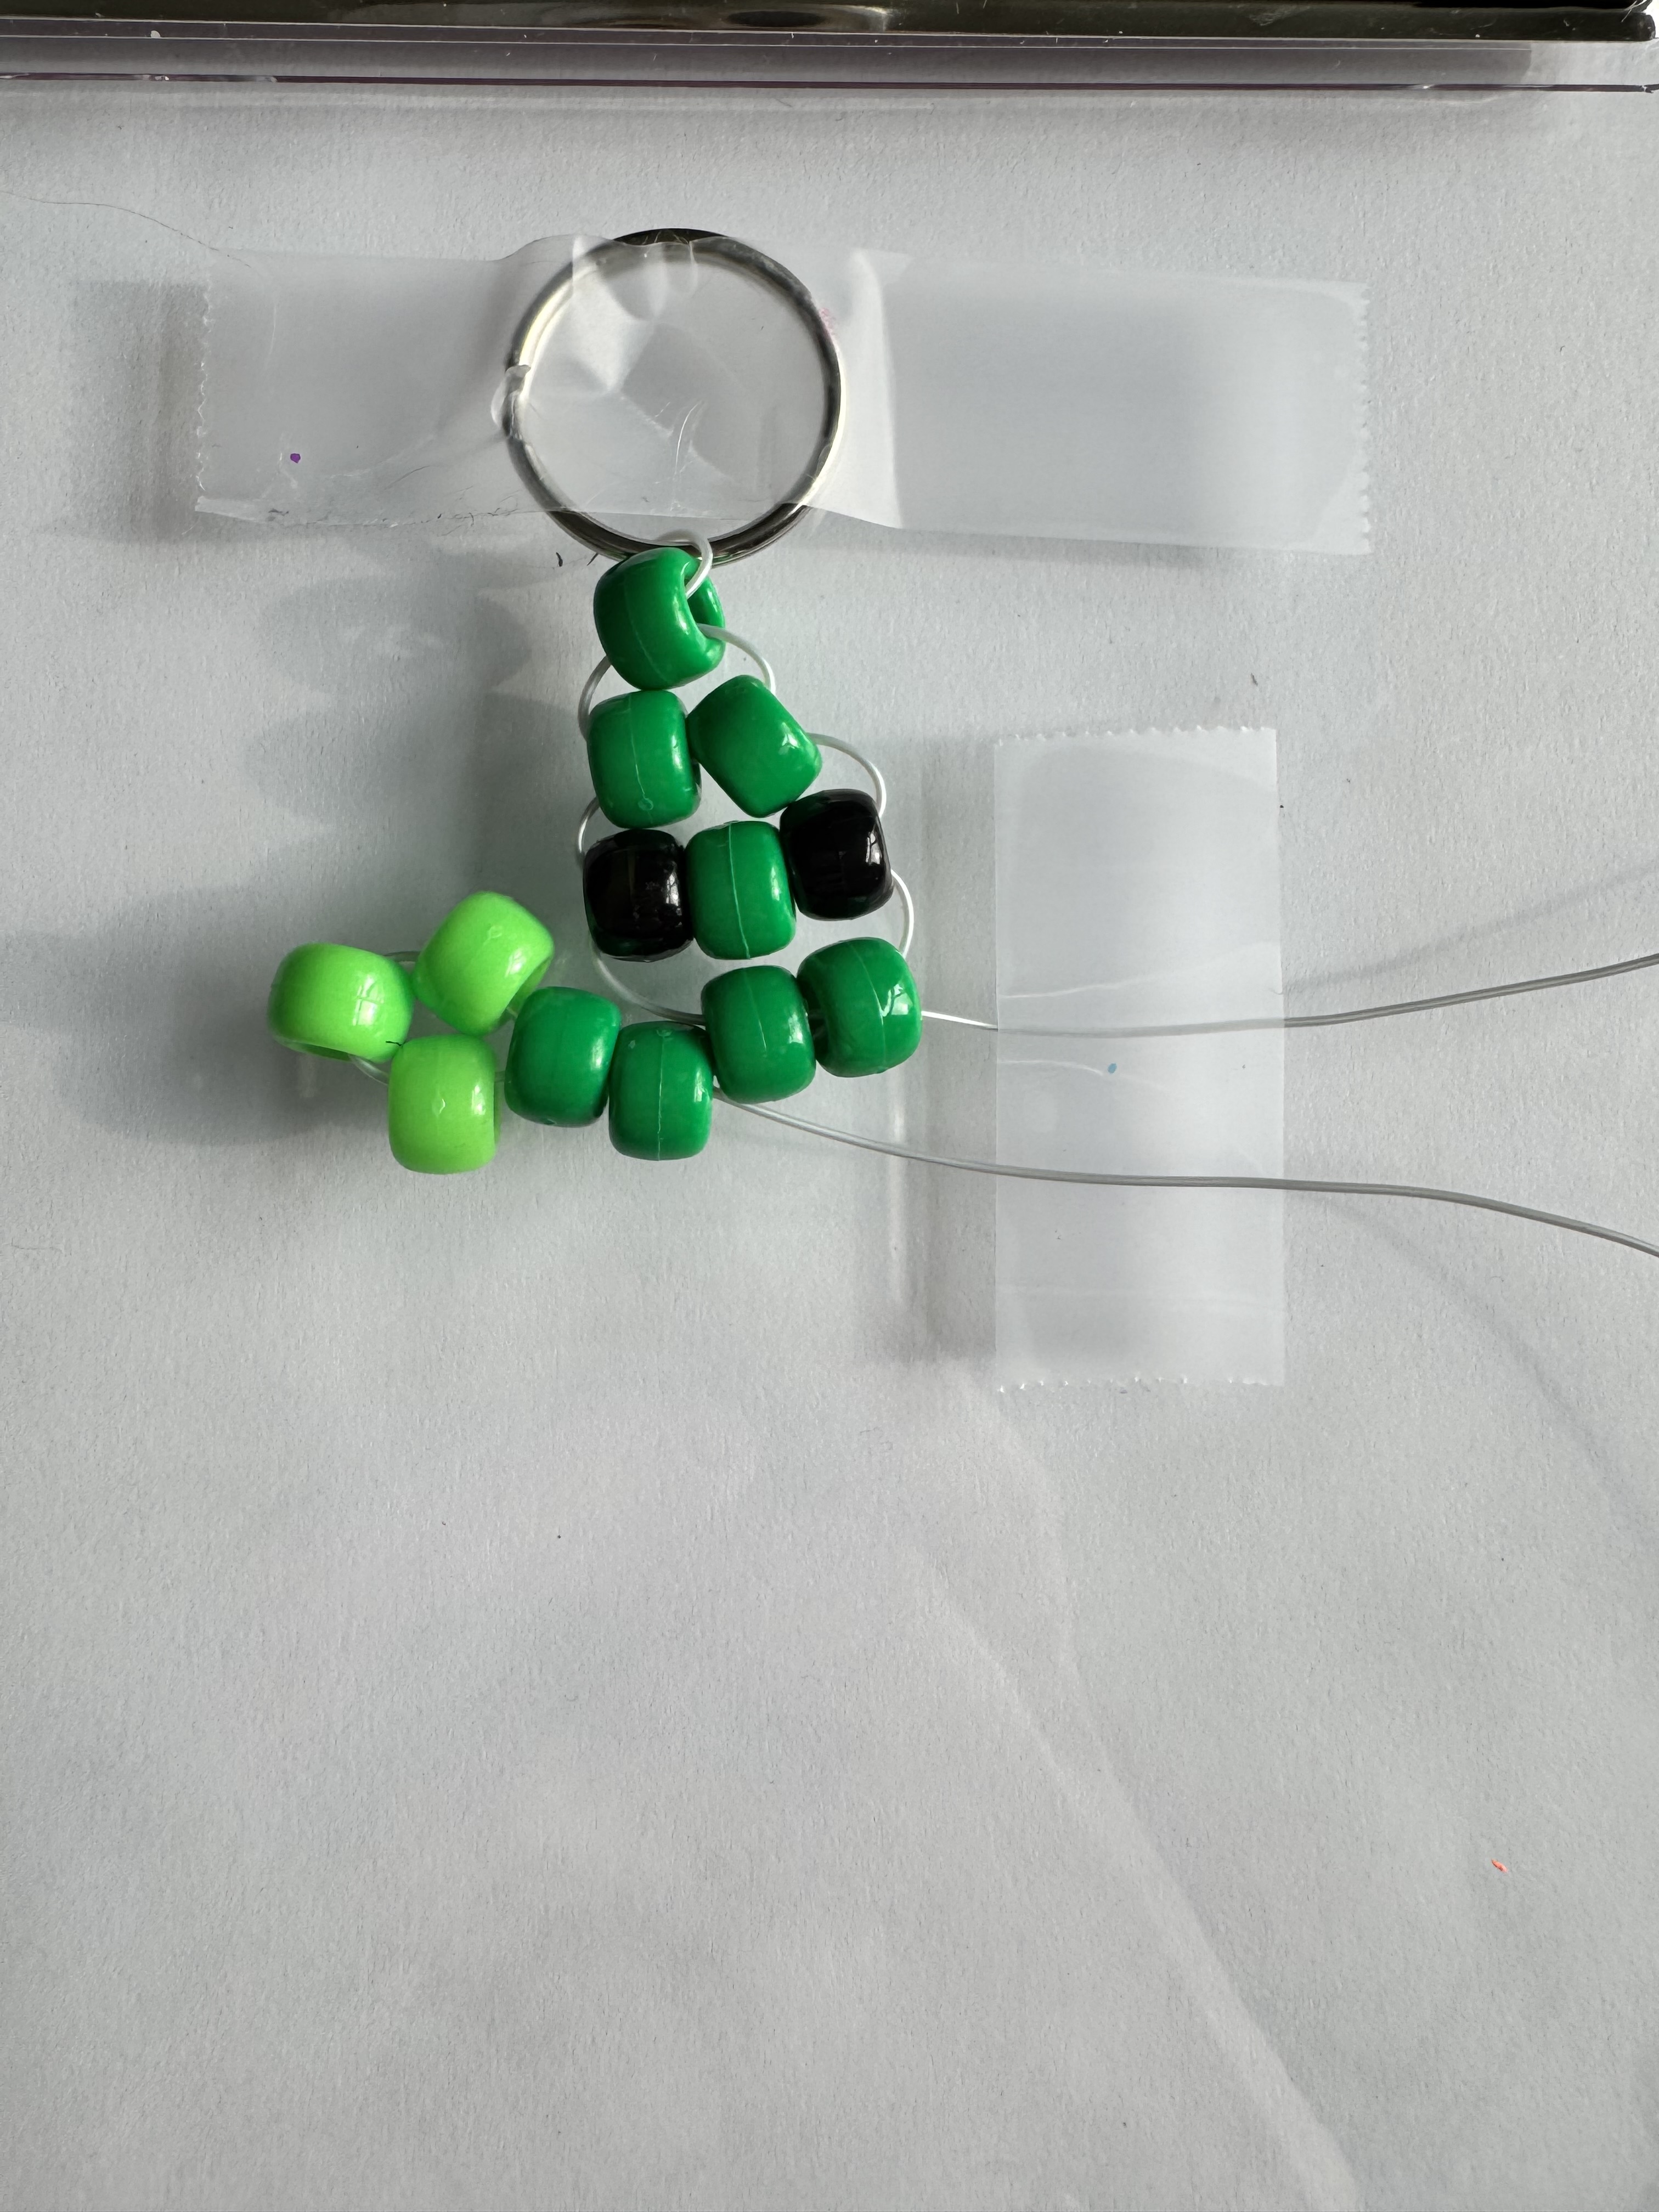
Your keychain should look like the image with the left arm fully formed. Next we will create the right arm.
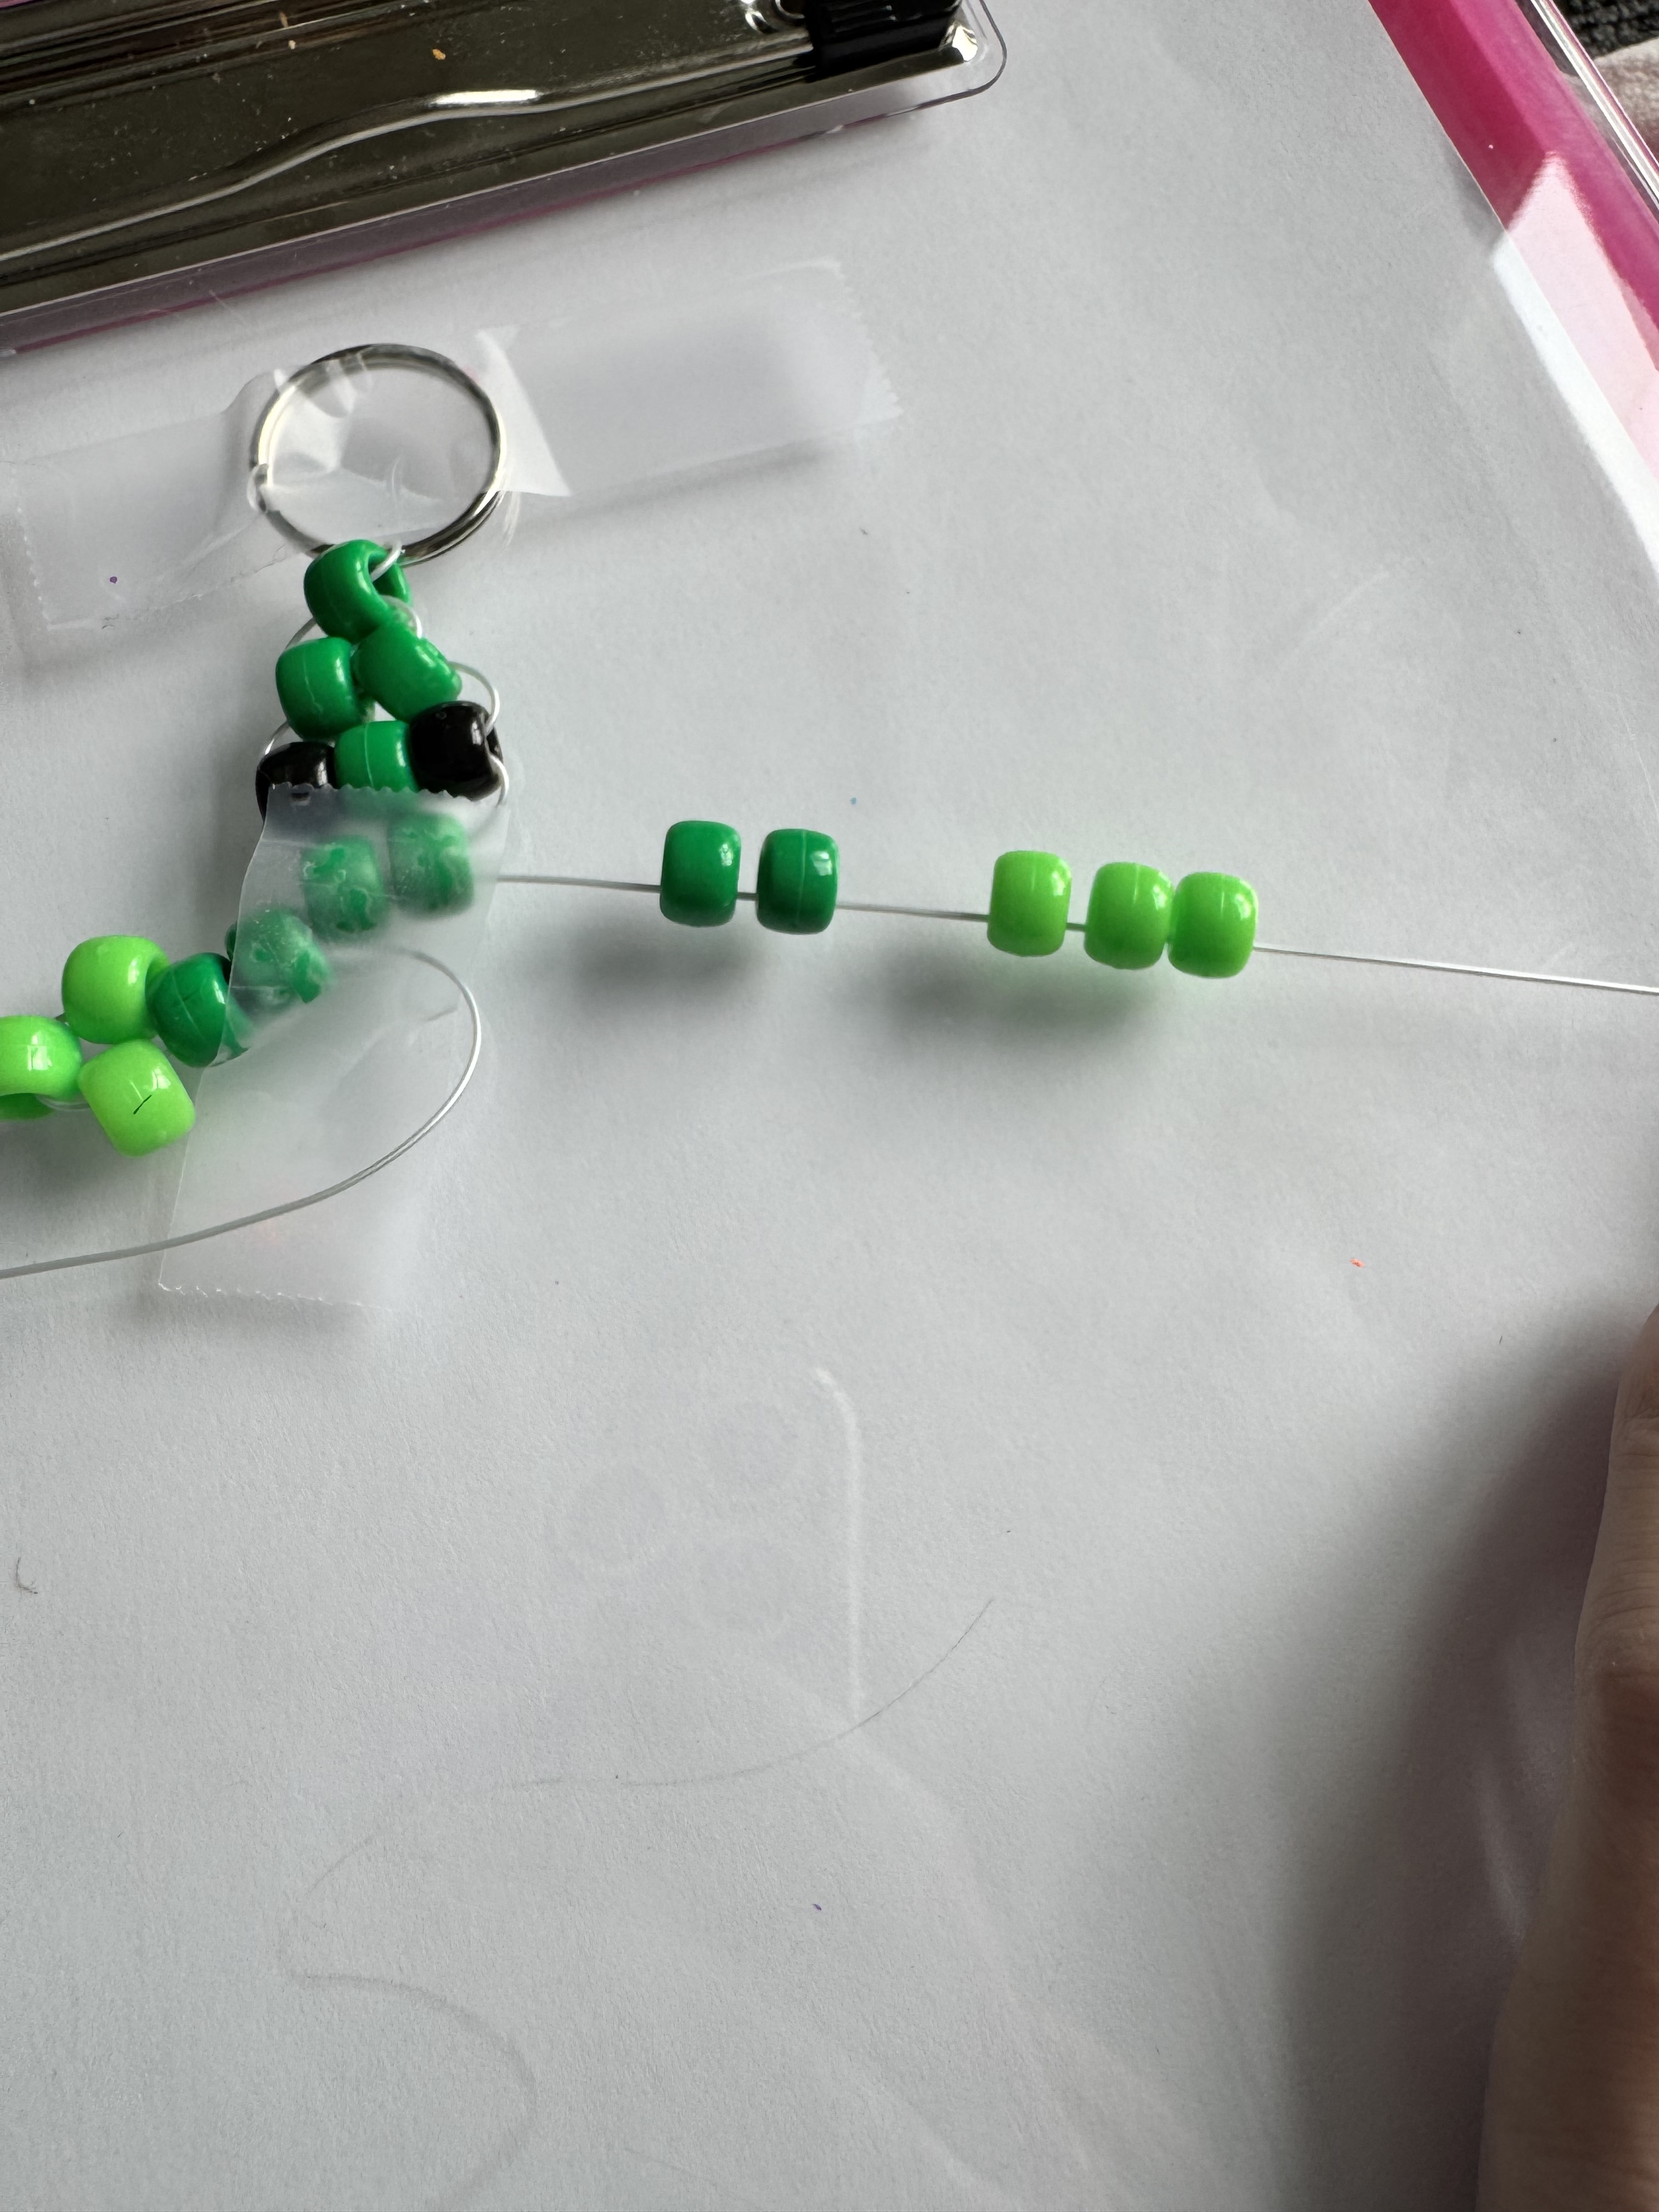
You will repeat the previous step using only the right strand of elastic, thread 5 beads, 2 dark green followed by 3 light green.
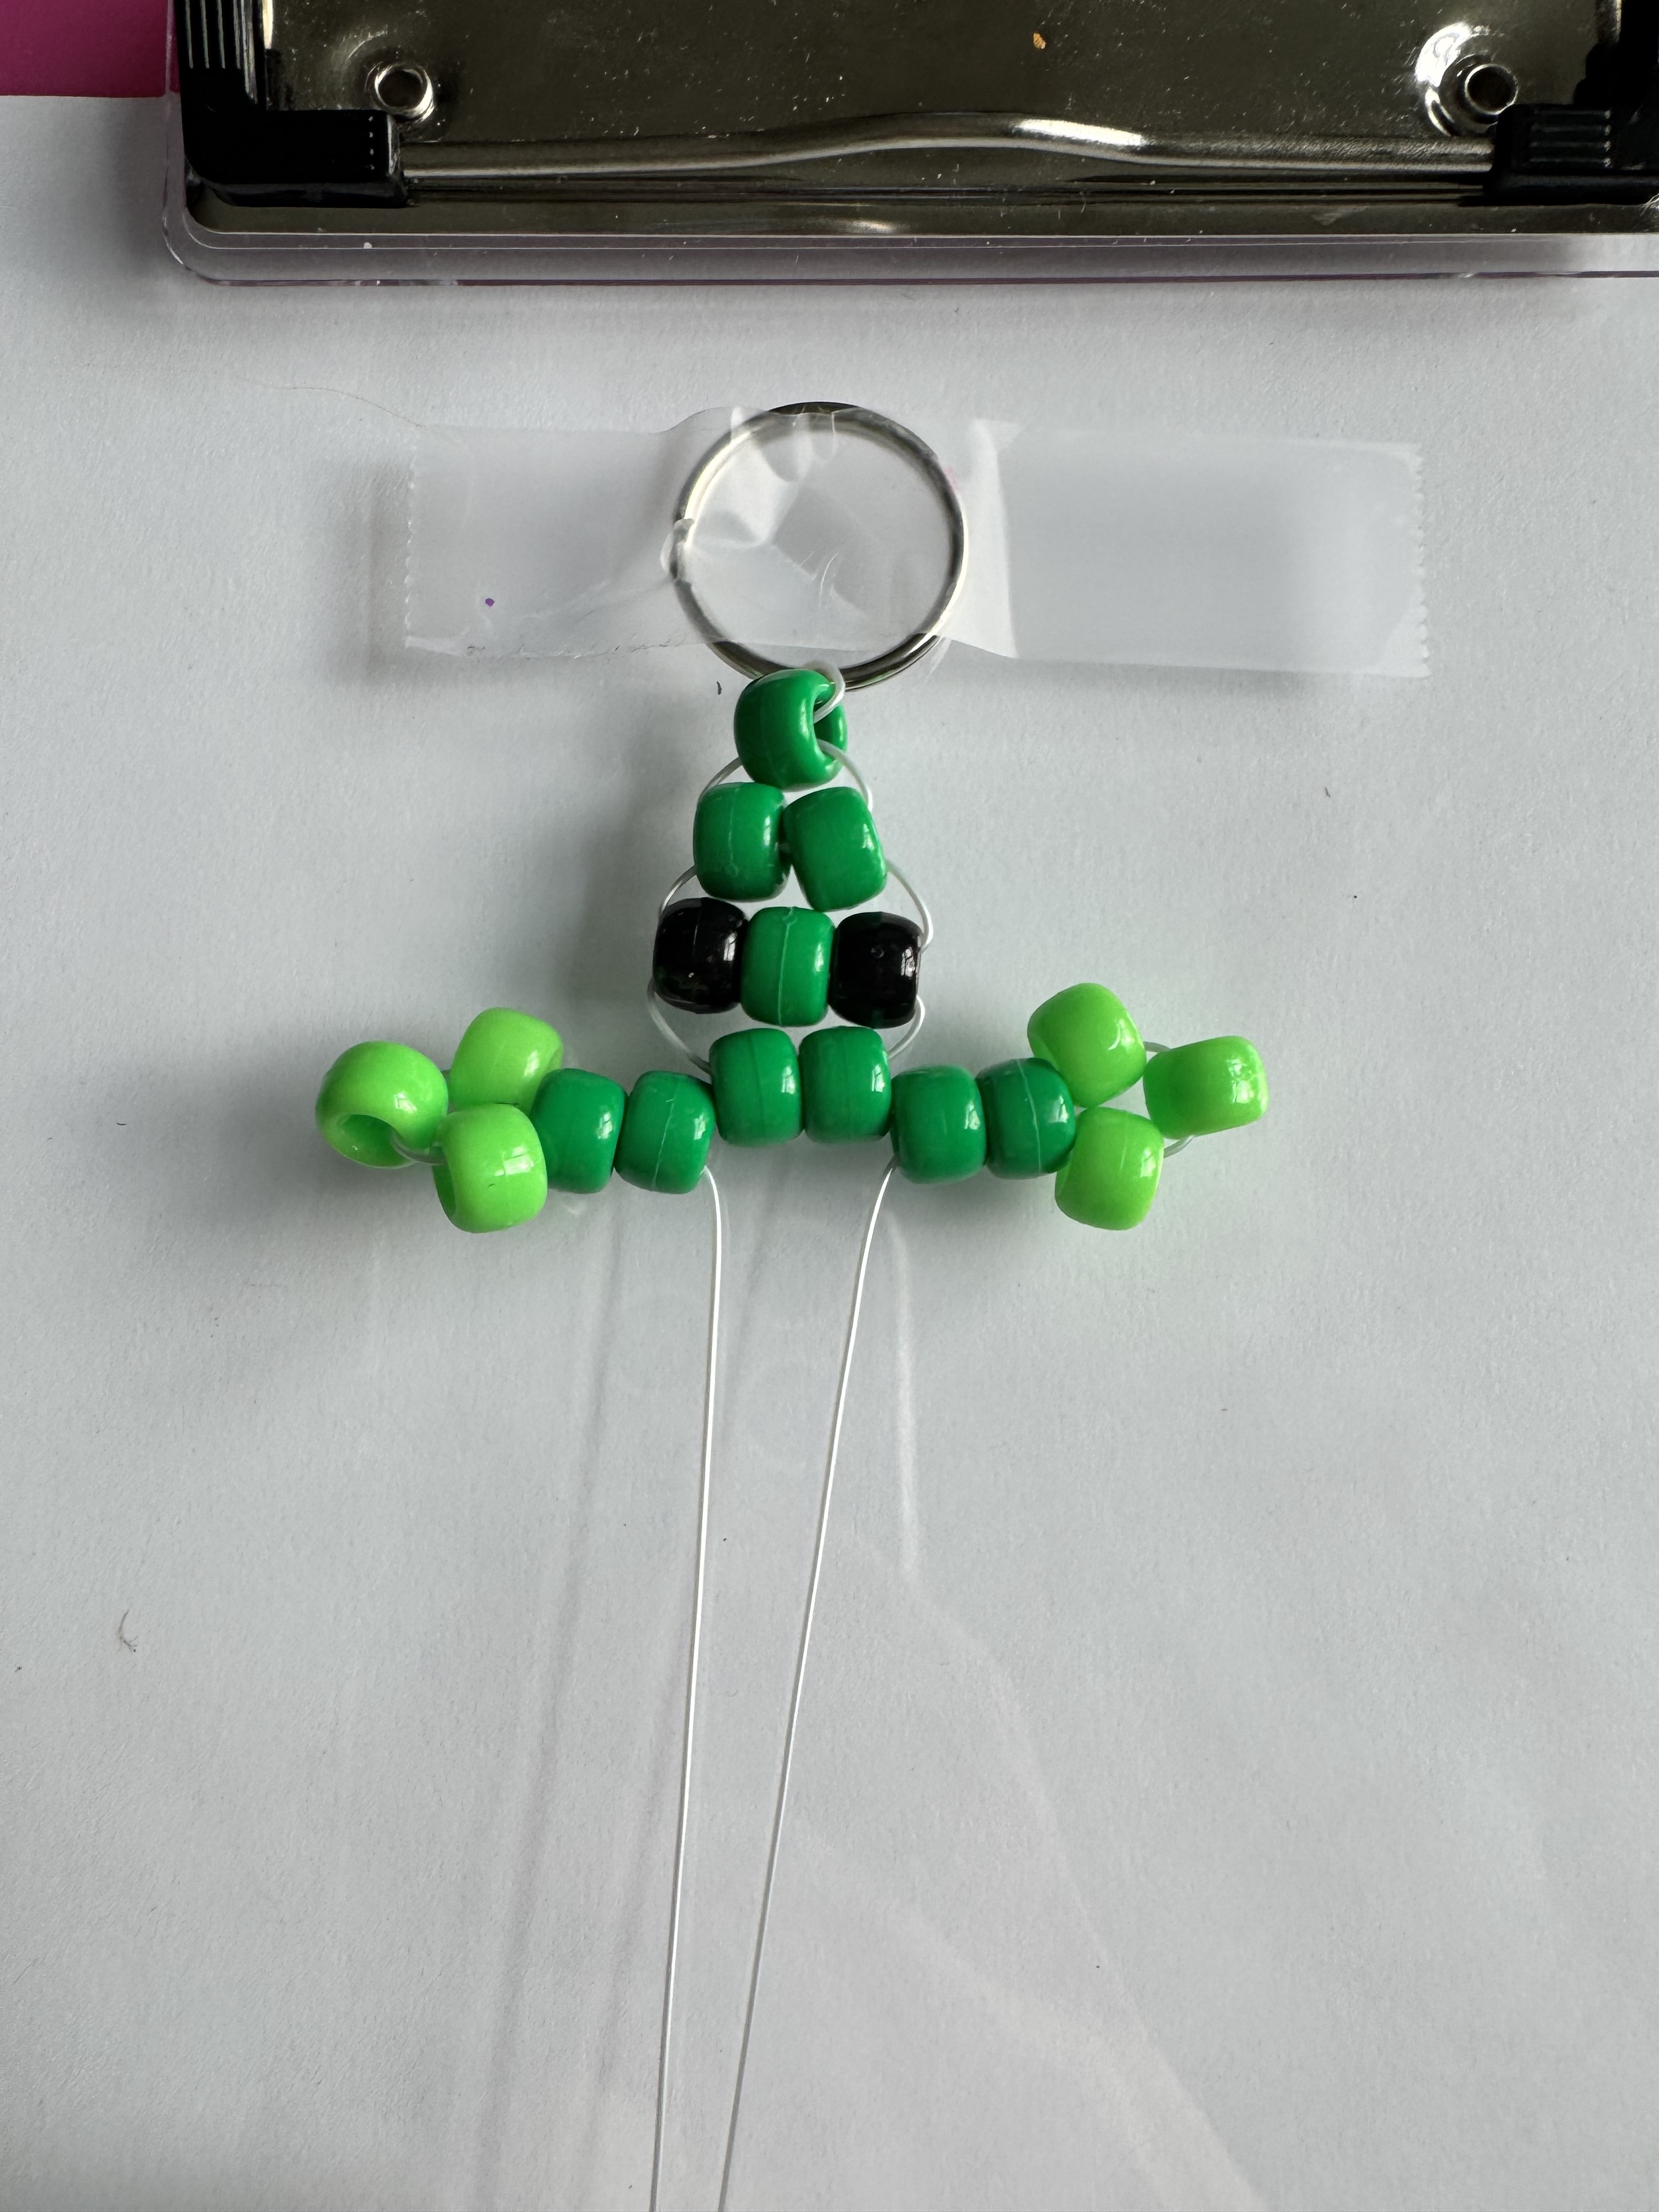
Now take the end of the right strand and thread it back through the first two dark green beads, skipping the three lighter. when pulled tight the arm should form on the right side. Your keychain should now have two arms on either side.
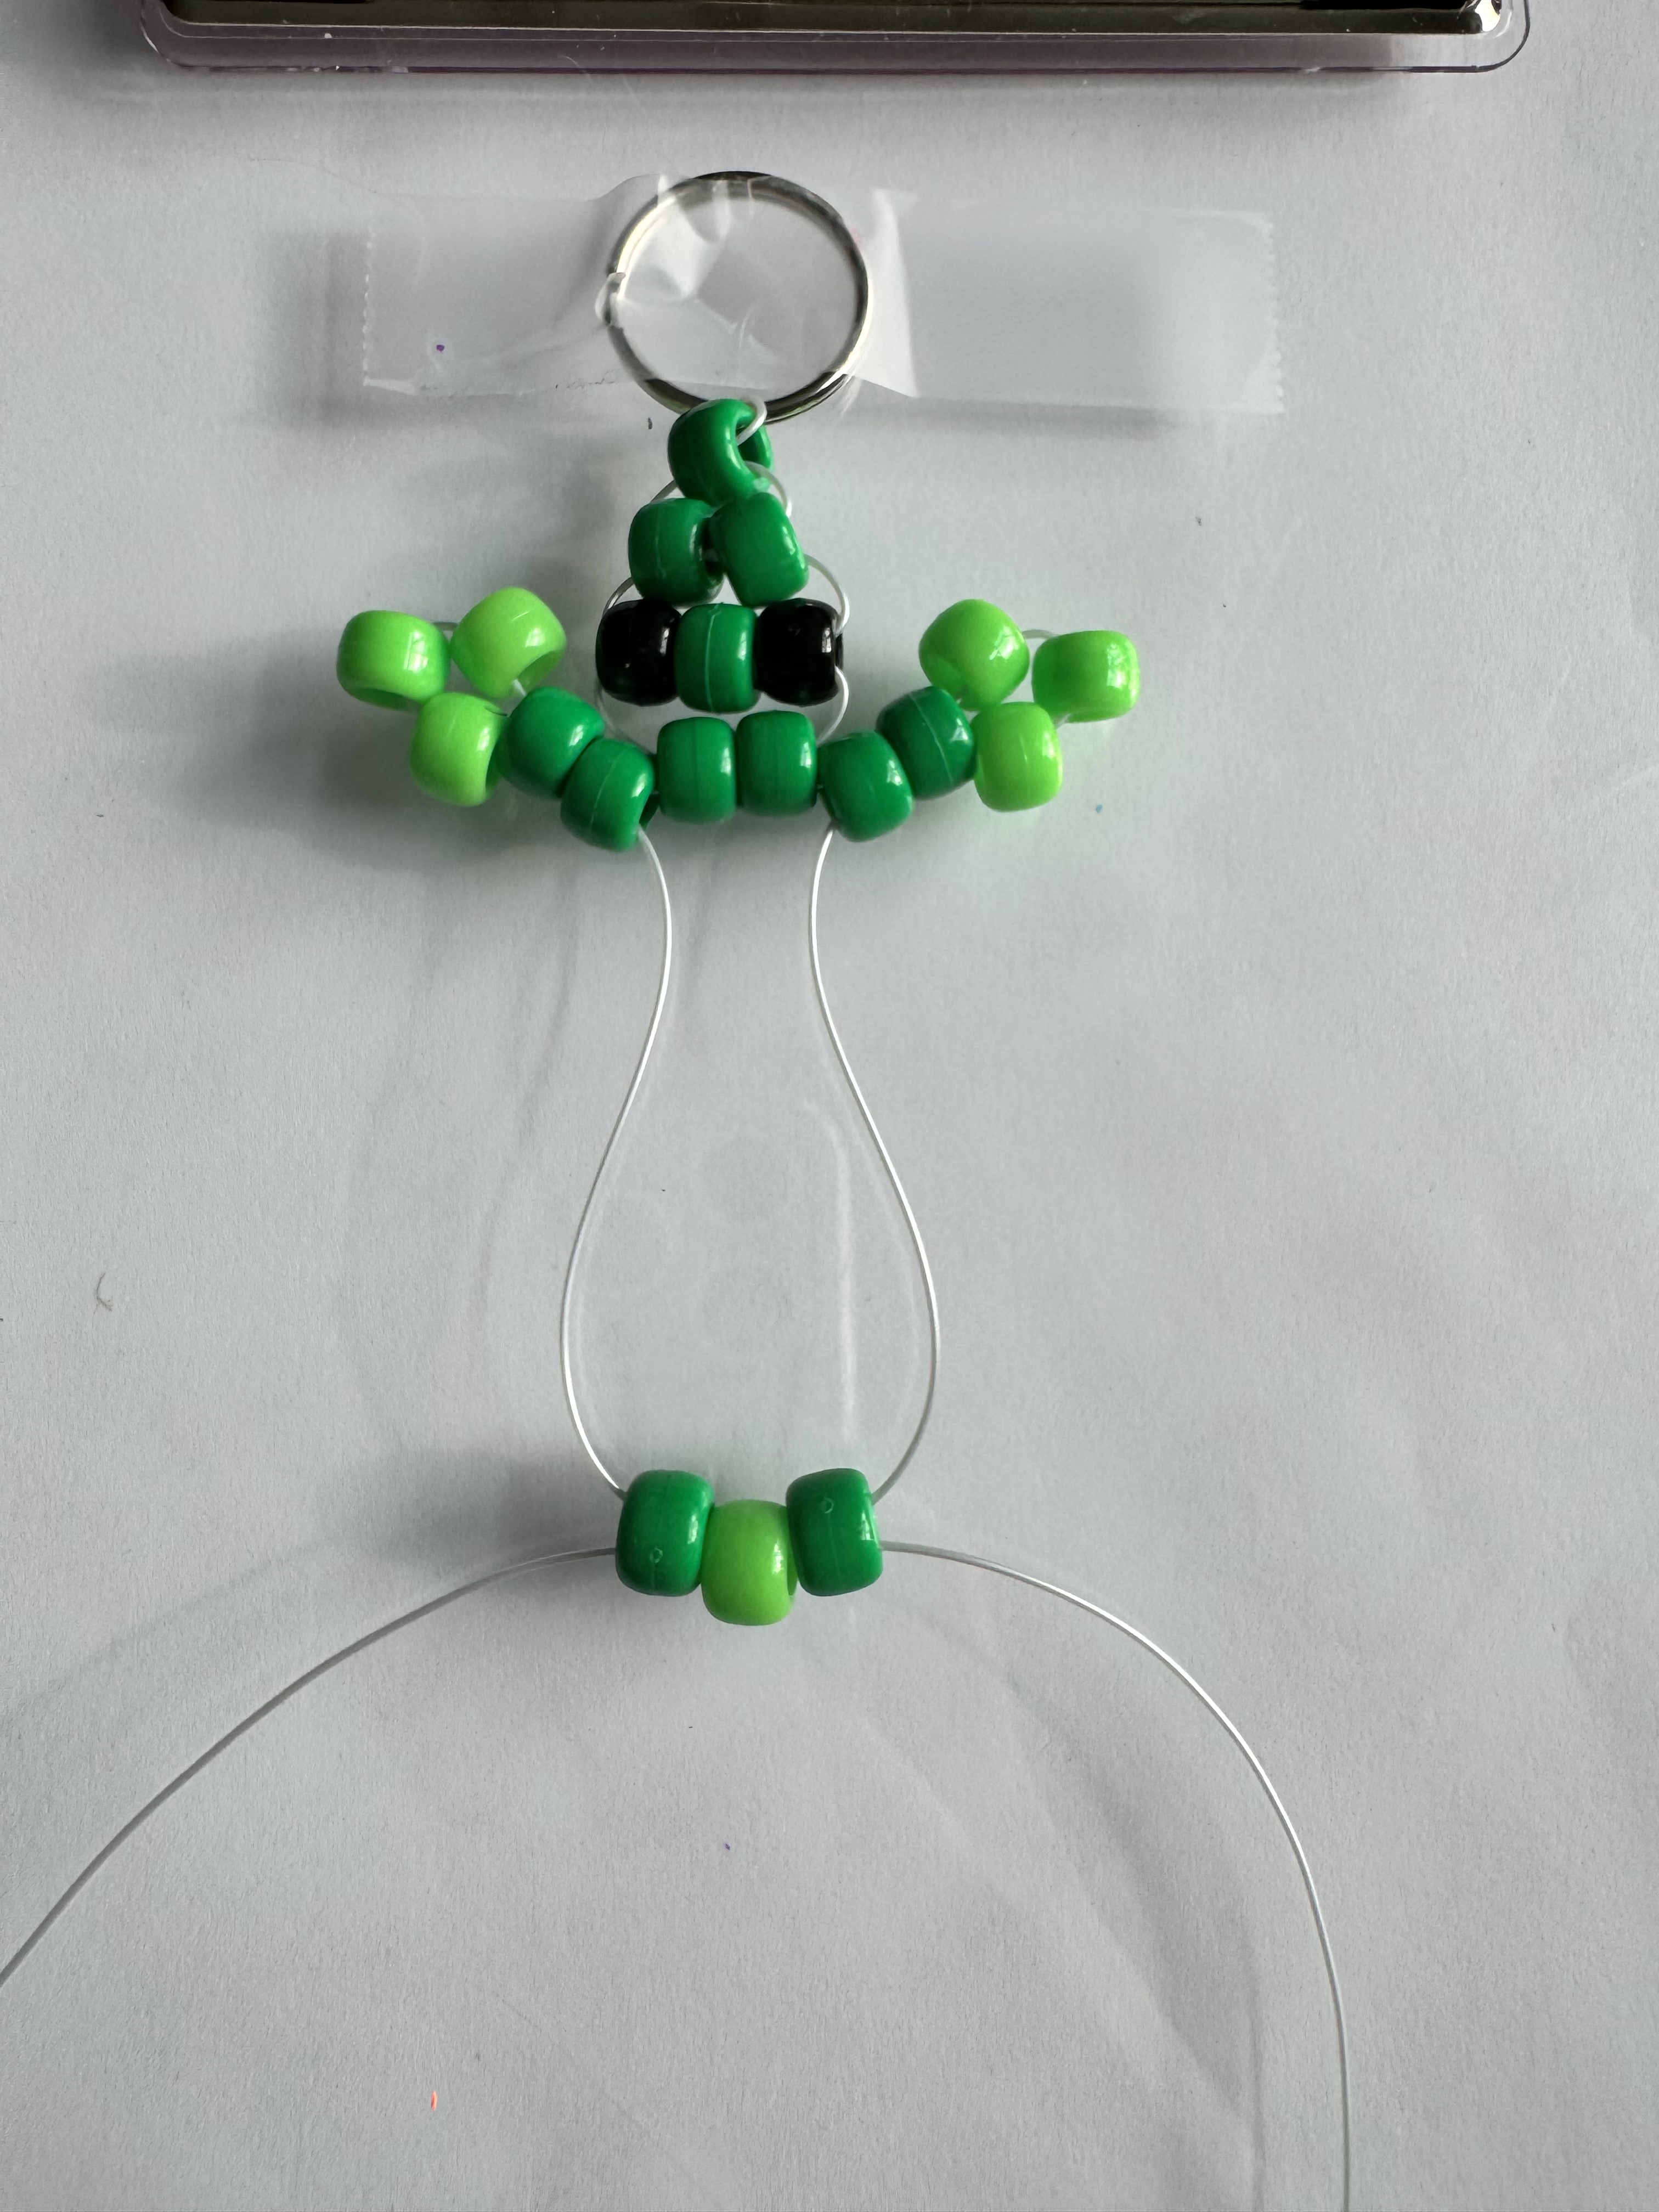
We will now begin the body. You will need three beads 2 dark green and 1 light green in the middle, again threading both ends through all 3 beads together
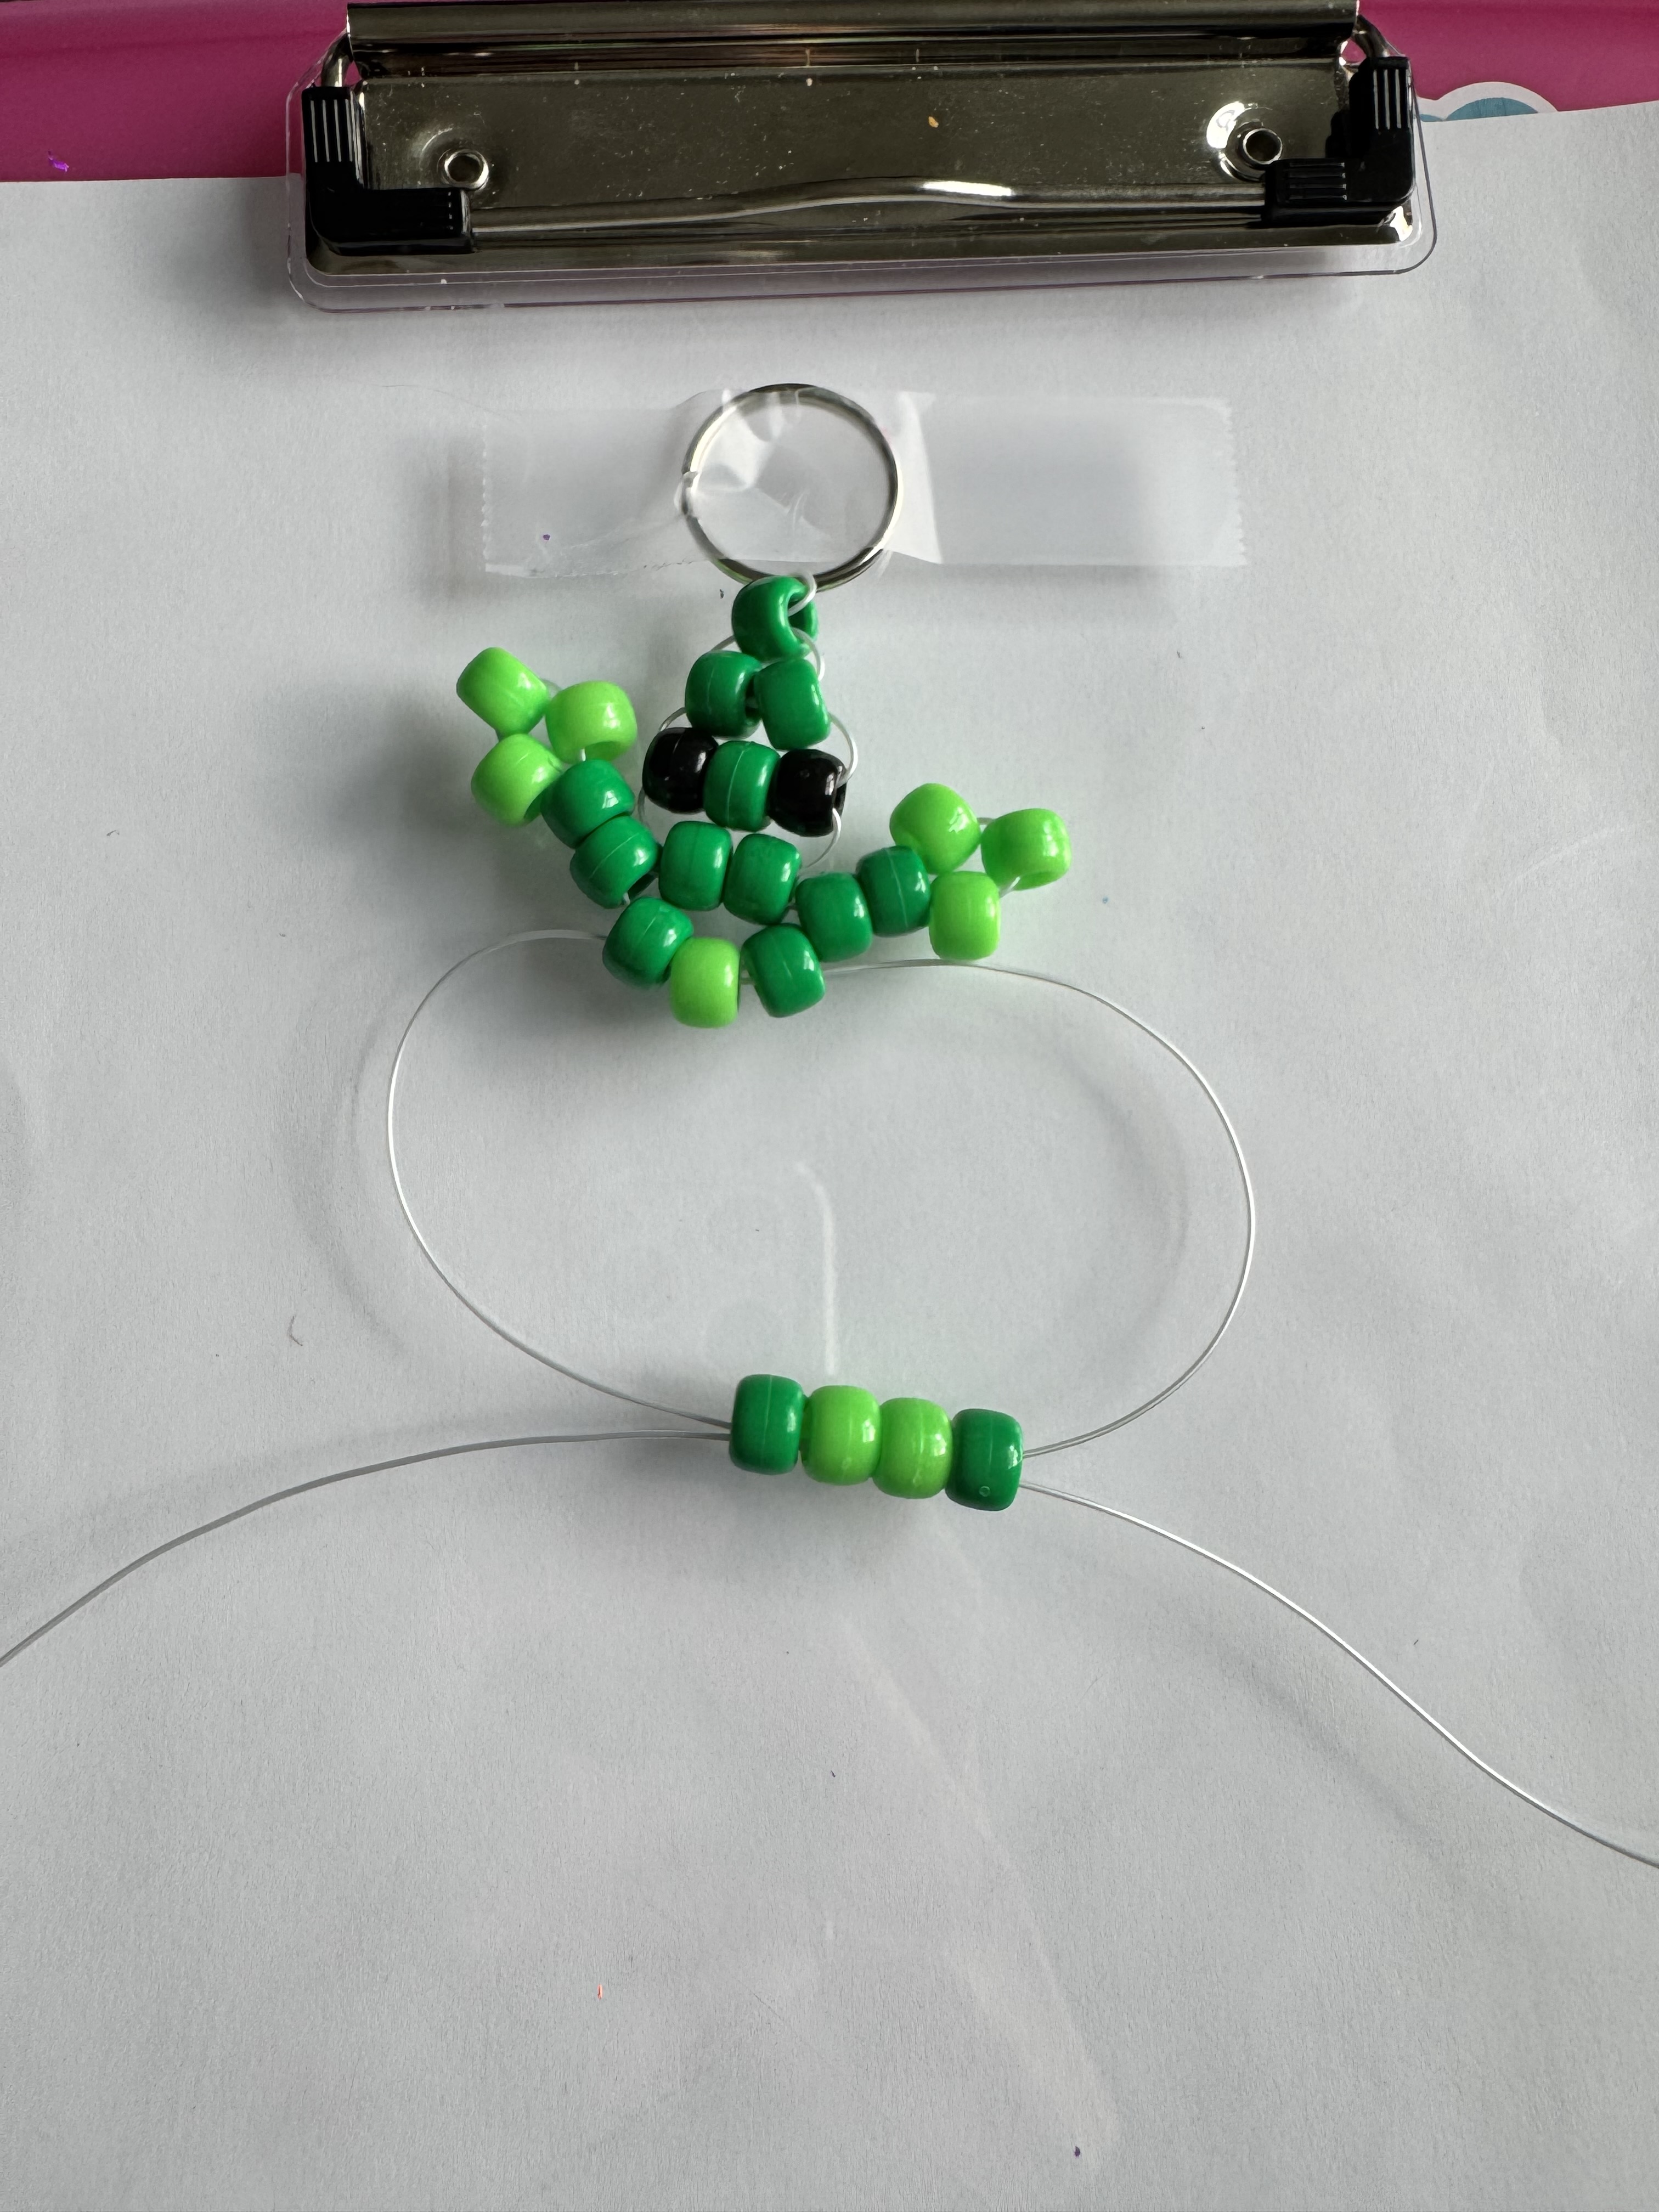
We will again thread the beads the same way, but this time we will use 4, 2 two dark green and two light green in the middle. Pull taught.
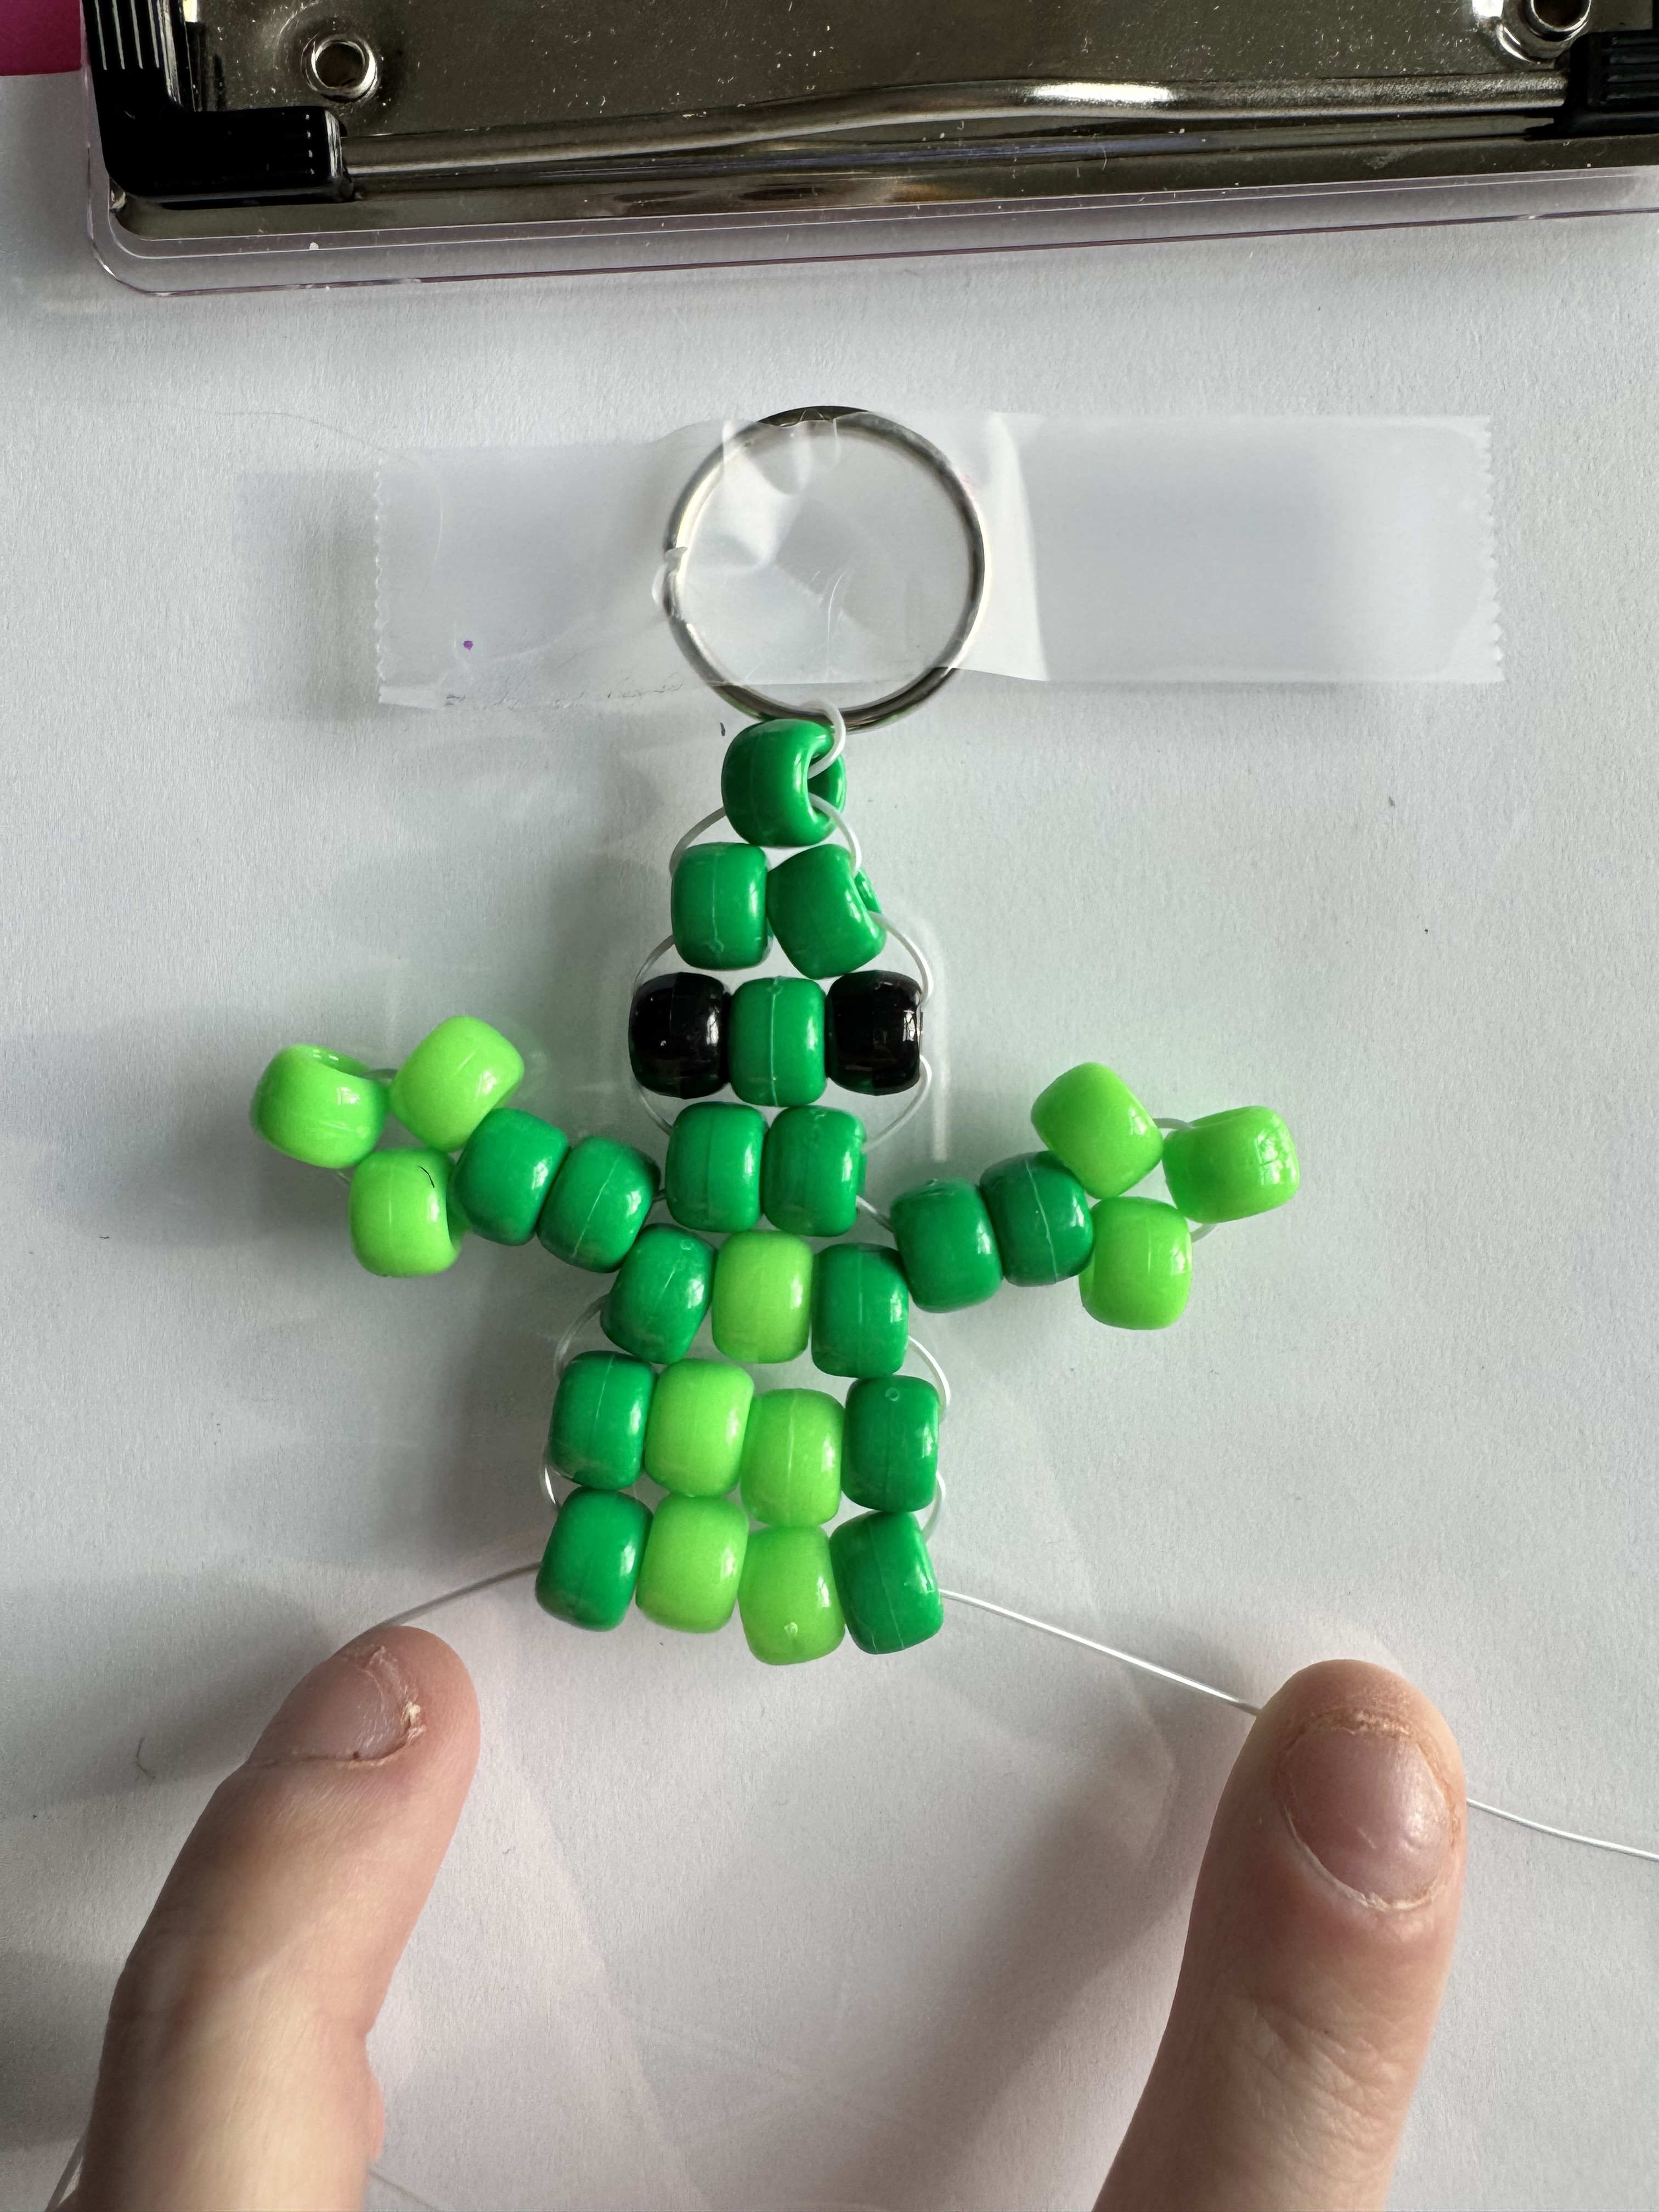
Repeat the previous 4 bead row.
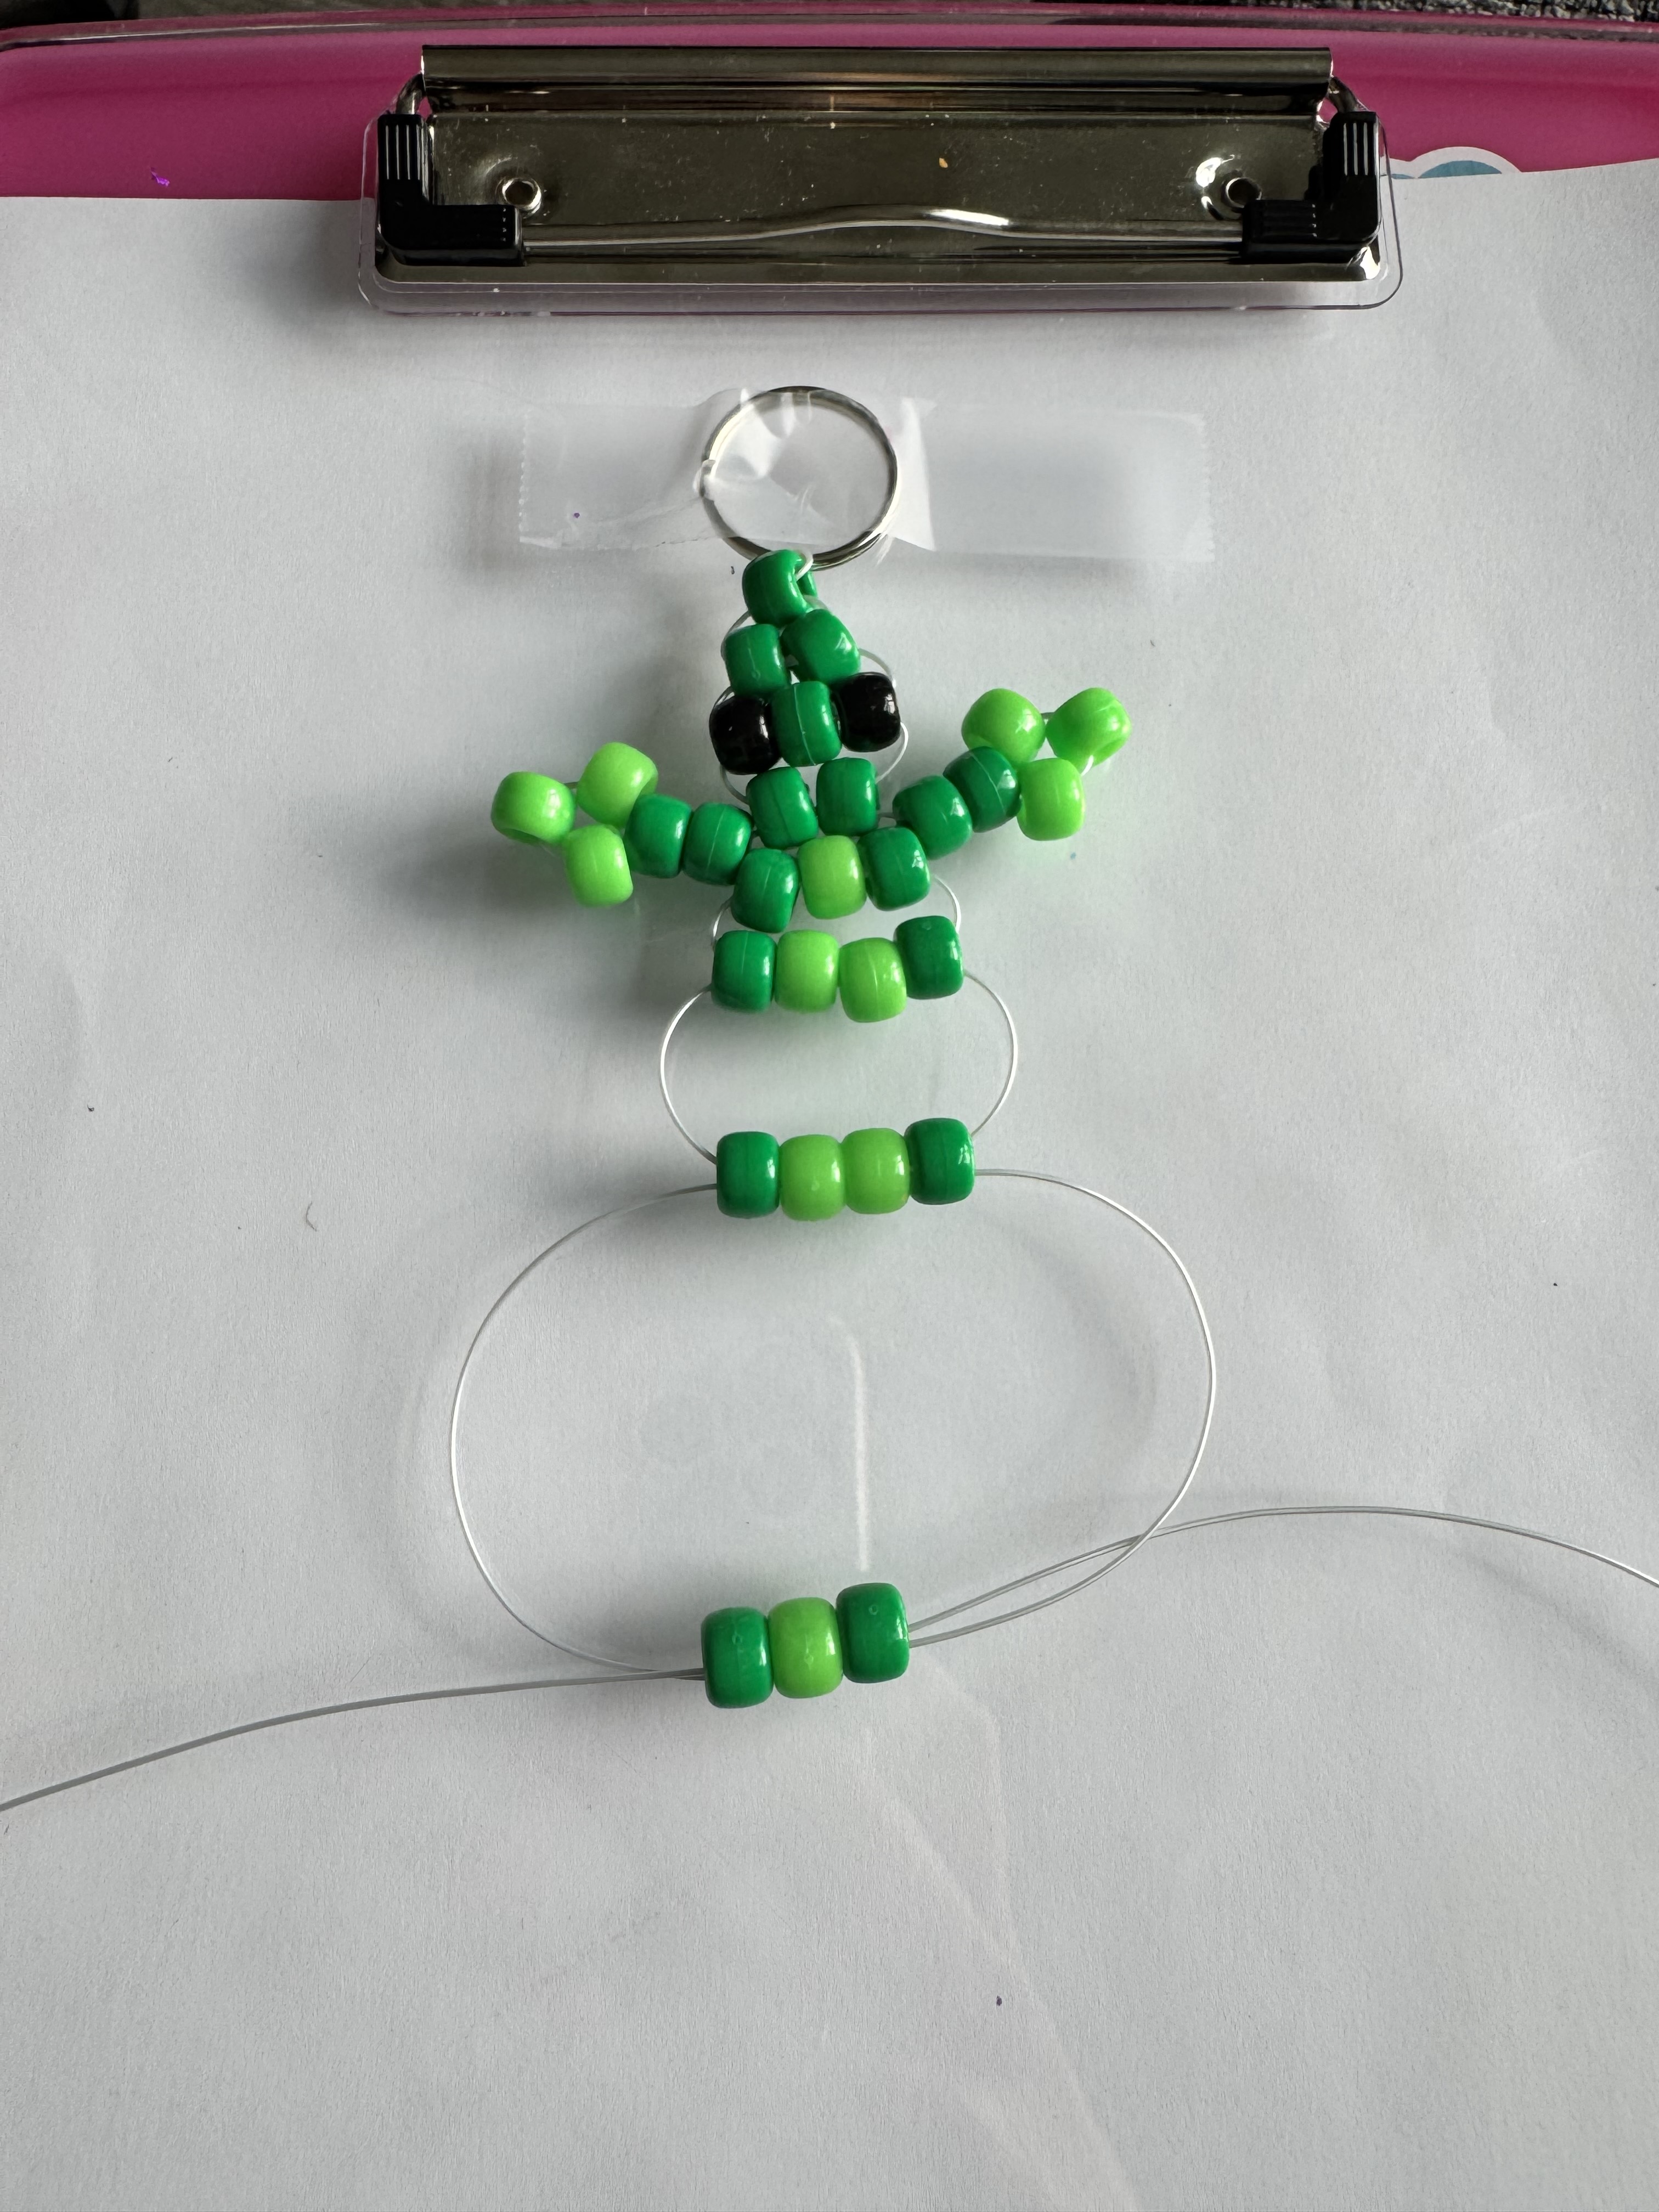
We will now finish the body. You will need three beads 2 dark green and 1 light green in the middle, again threading both ends through all 3 beads together
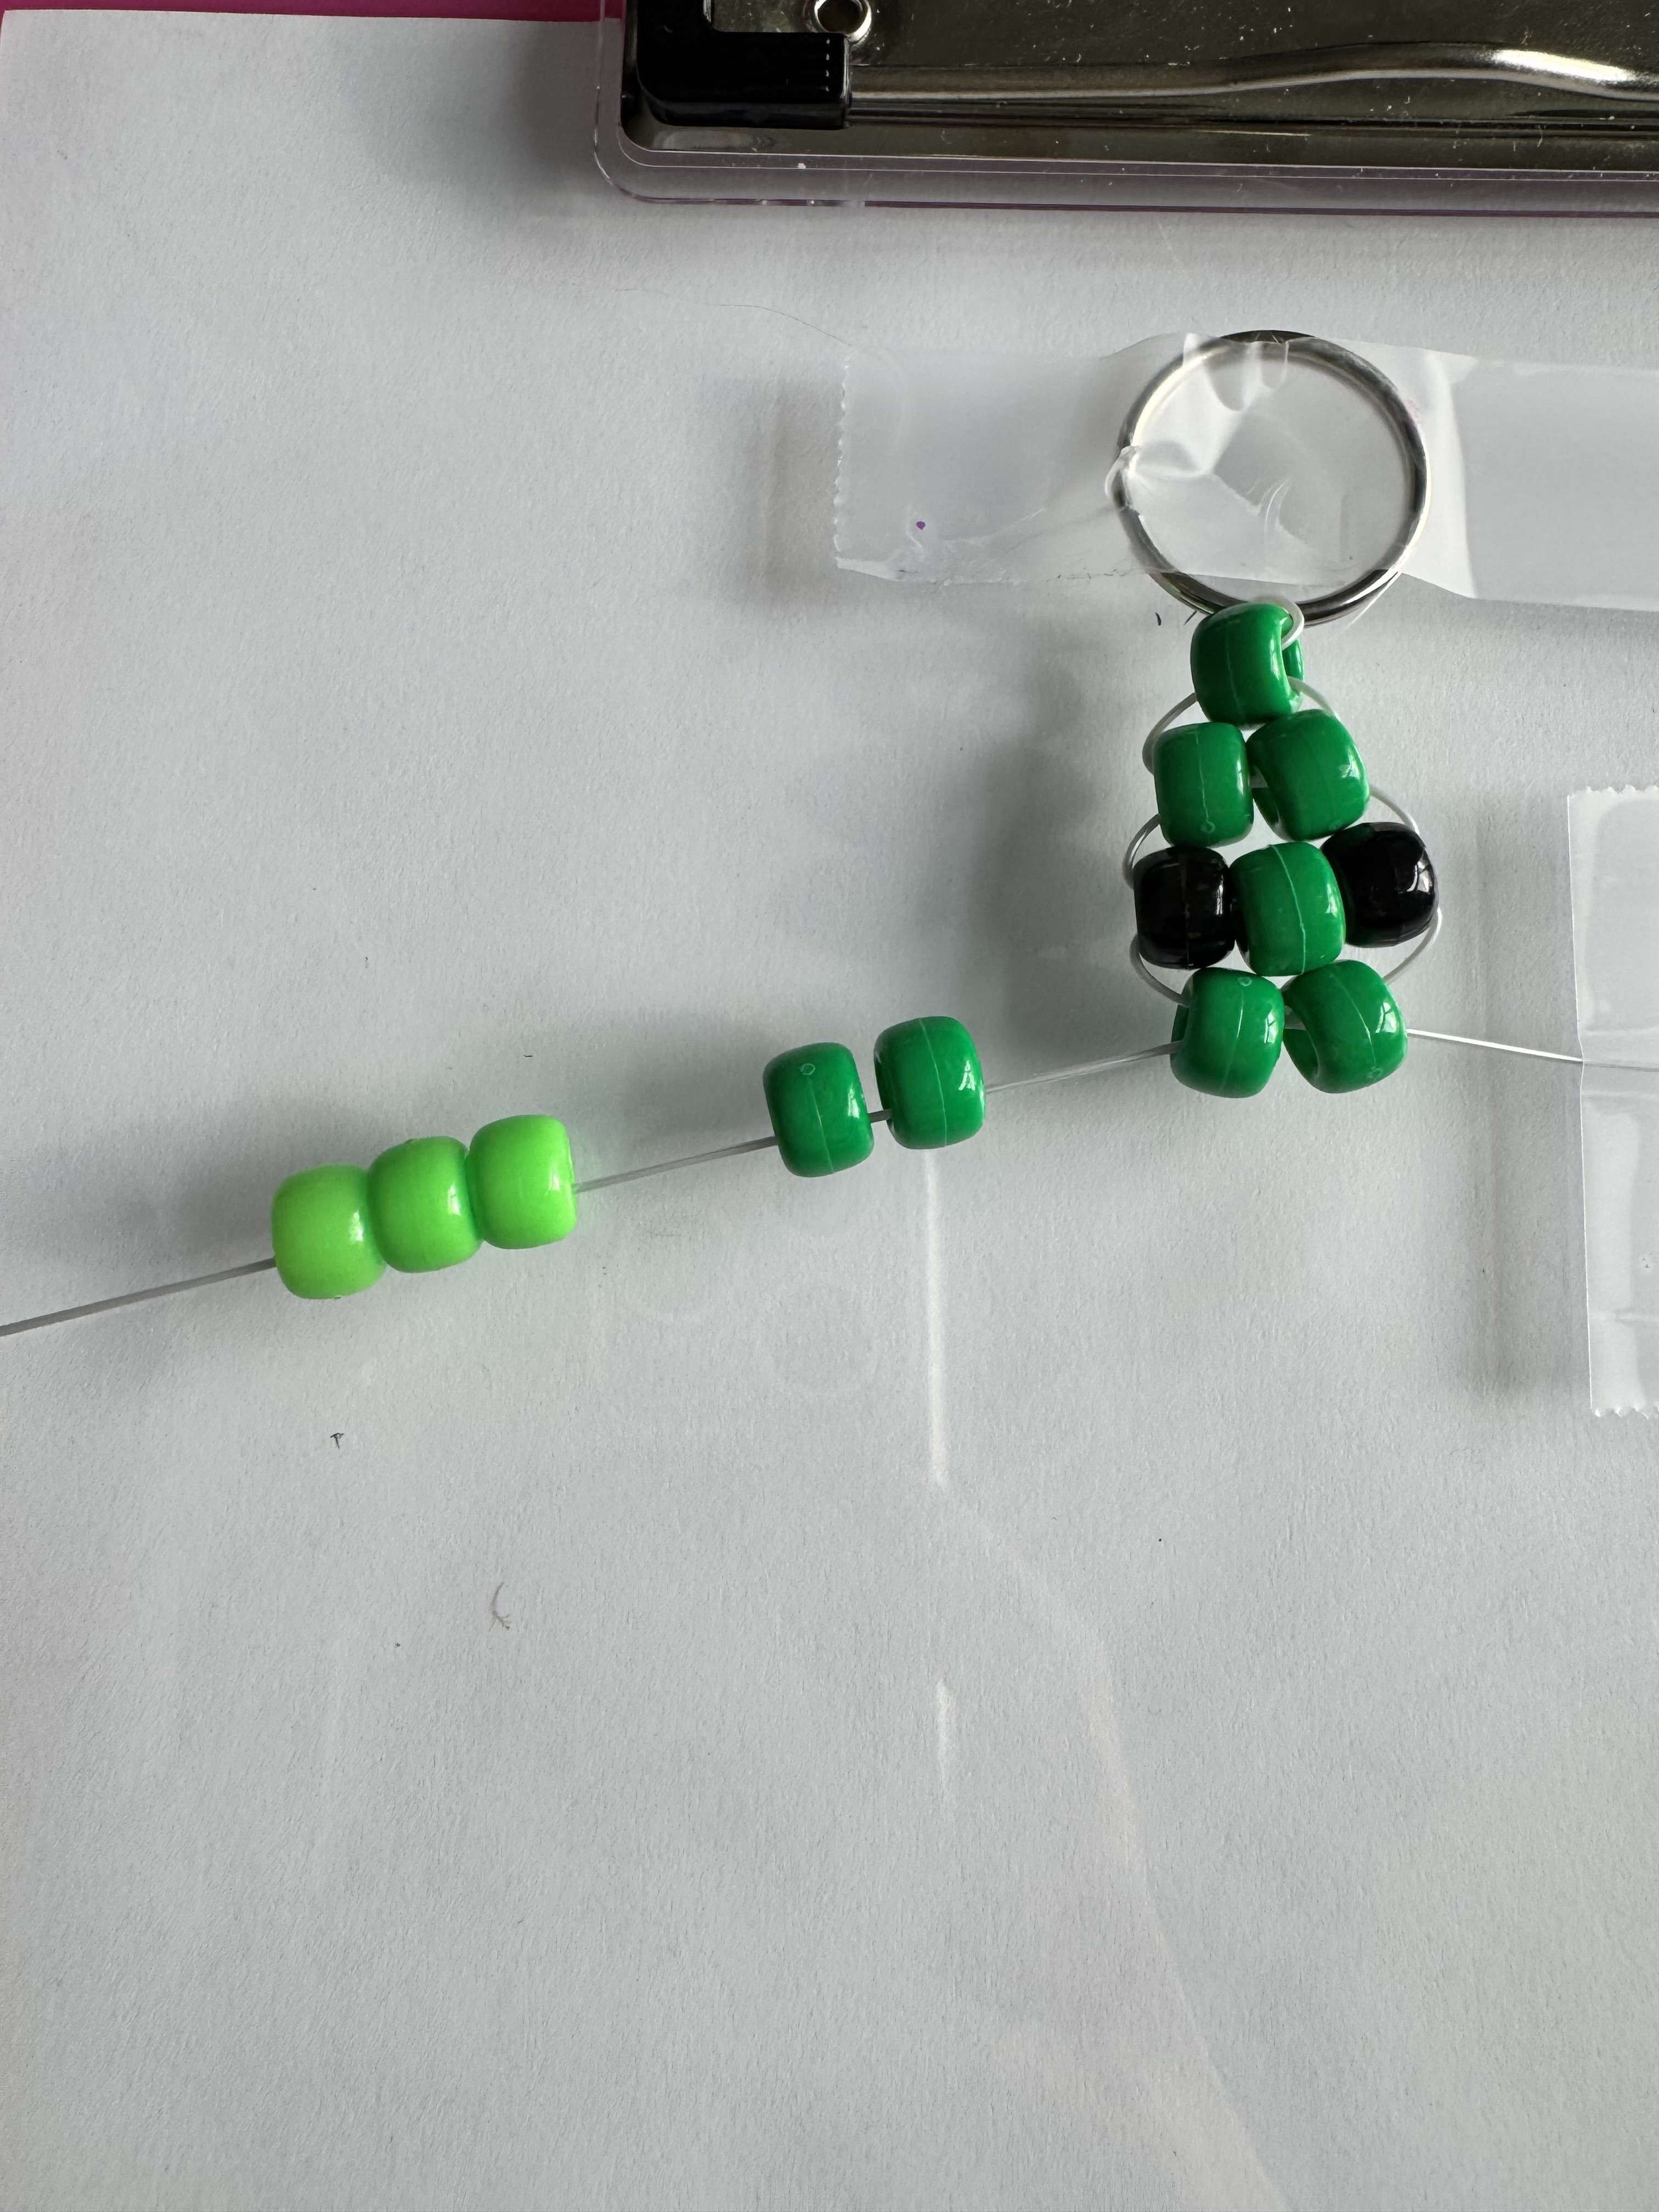
using only the left strand of elastic, thread 5 beads, 2 dark green followed by 3 light green. This should be done the exact way you did it for the left arm as pictured.
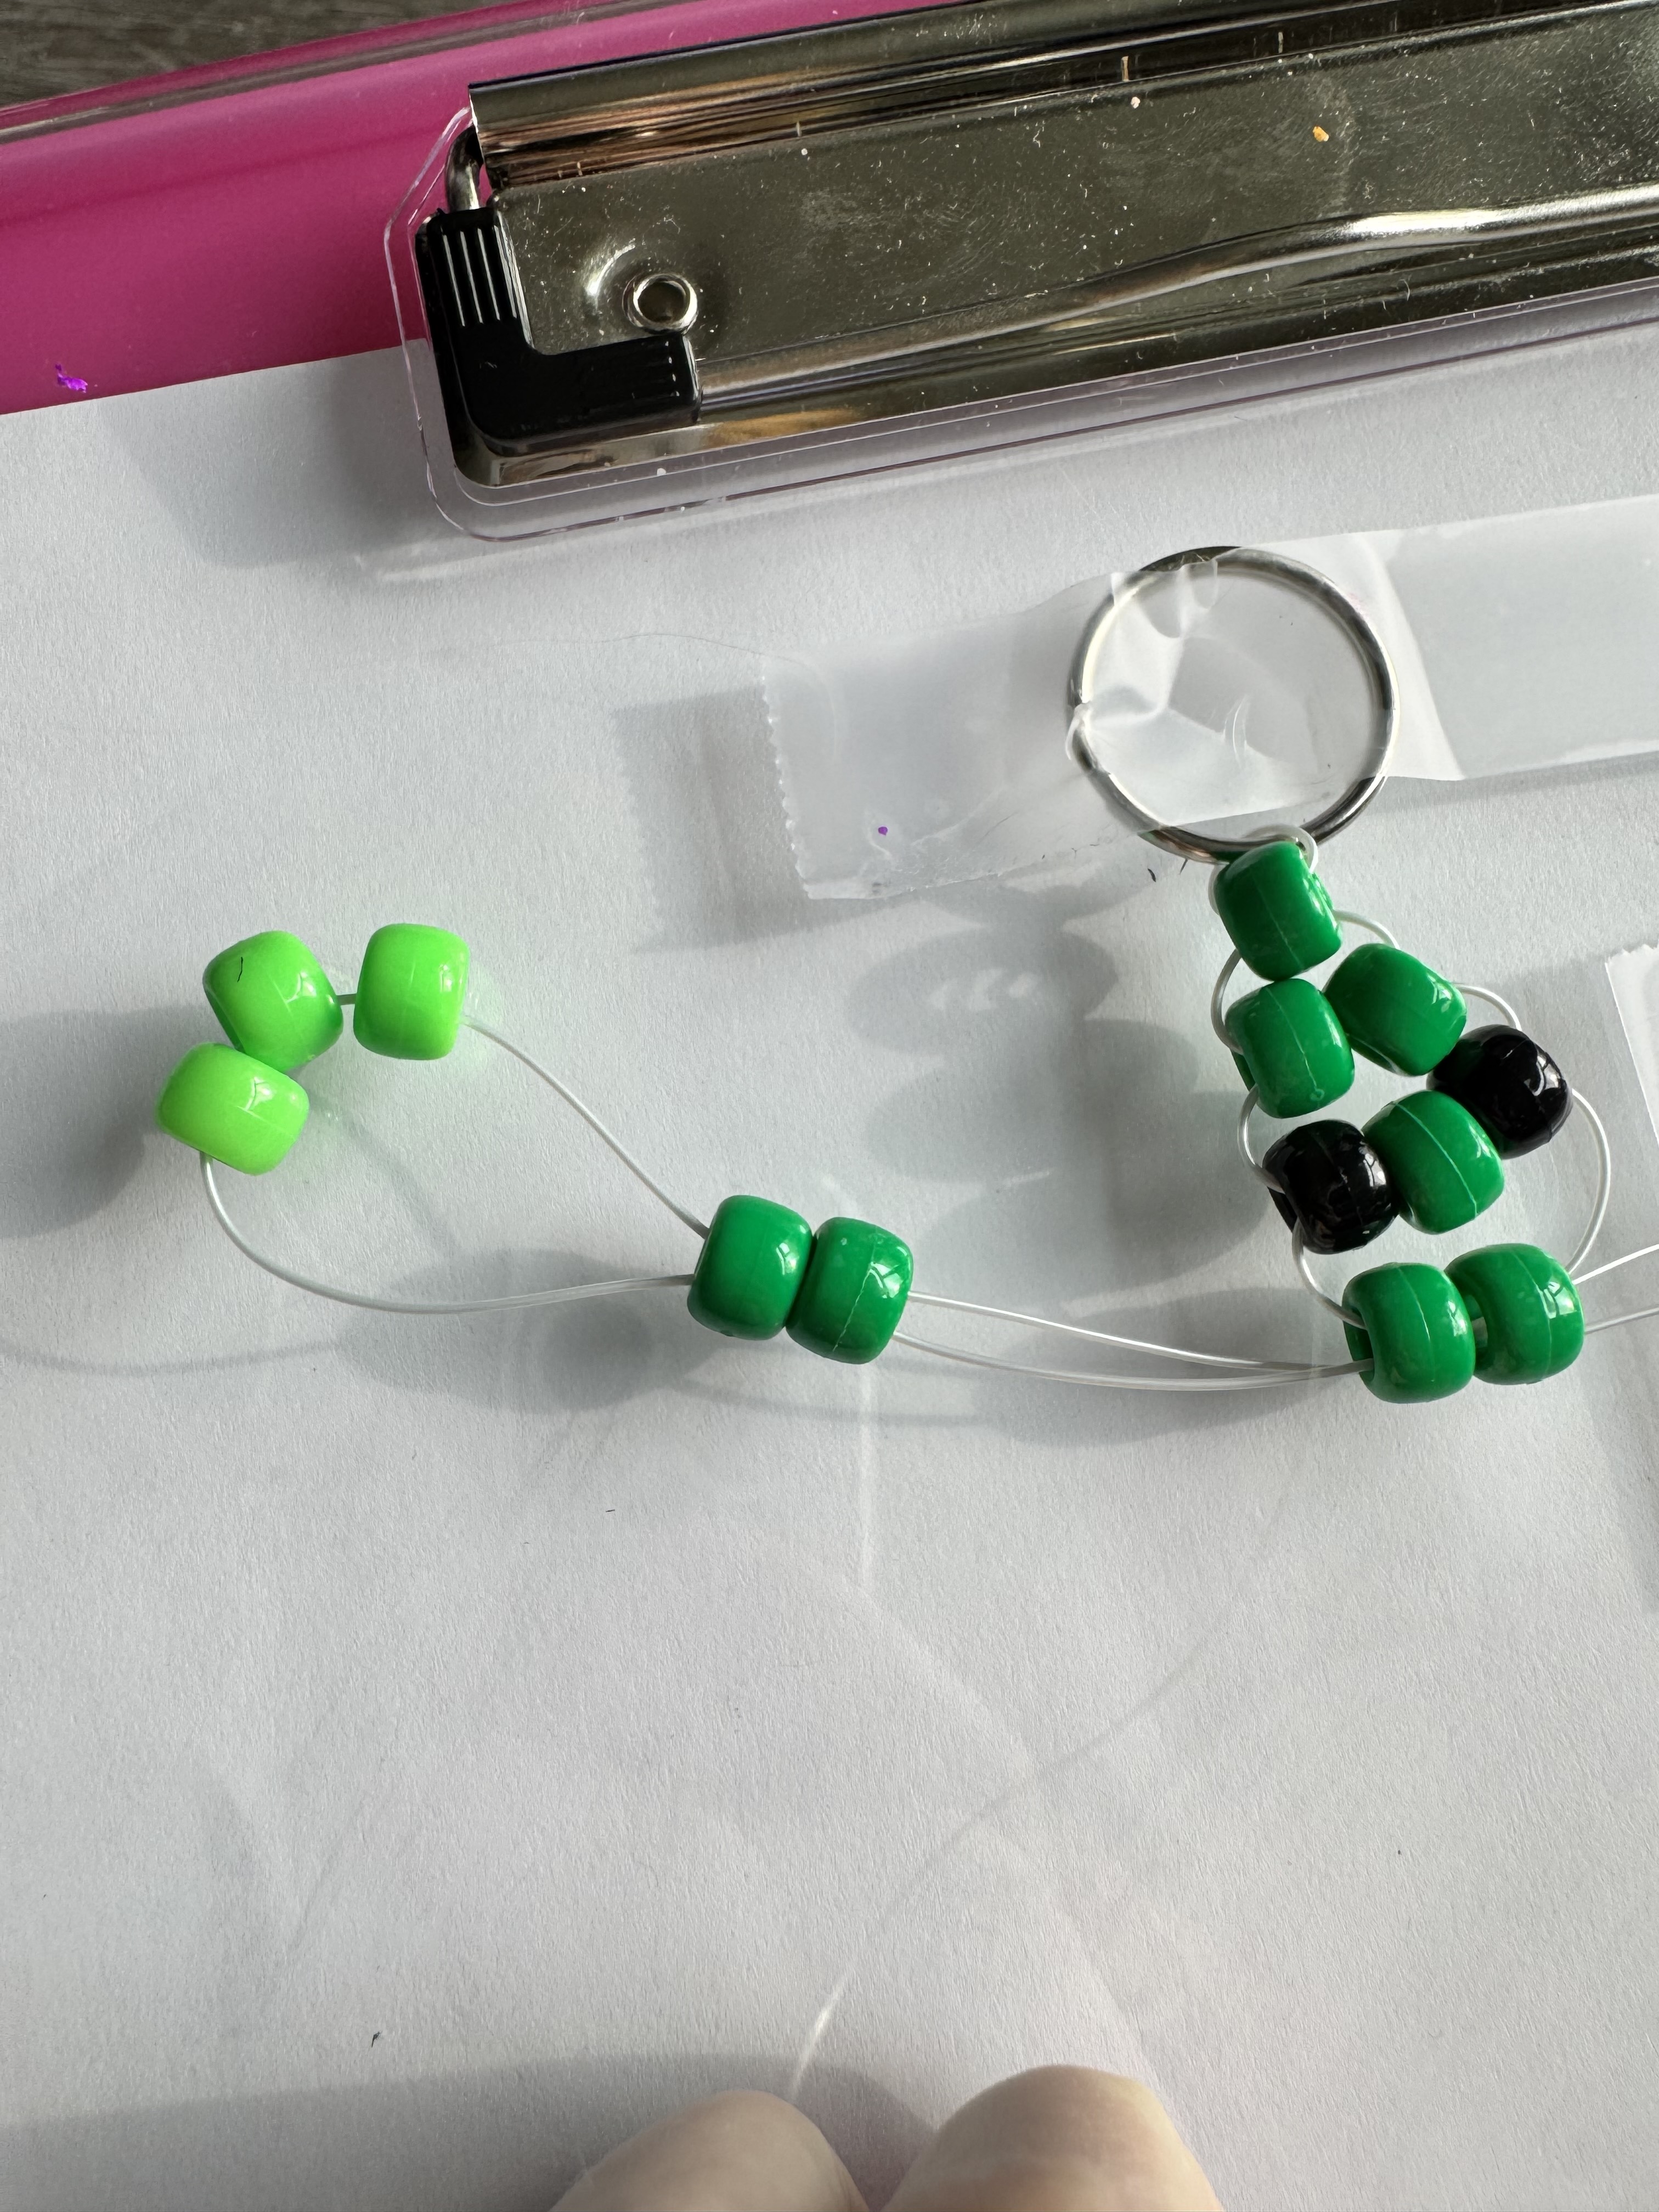
Now take the end of that strand and thread it back through the first two dark green beads, skipping the three lighter. when pulled tight the arm should form just as it did before (as shown) but at the bottom of the body.
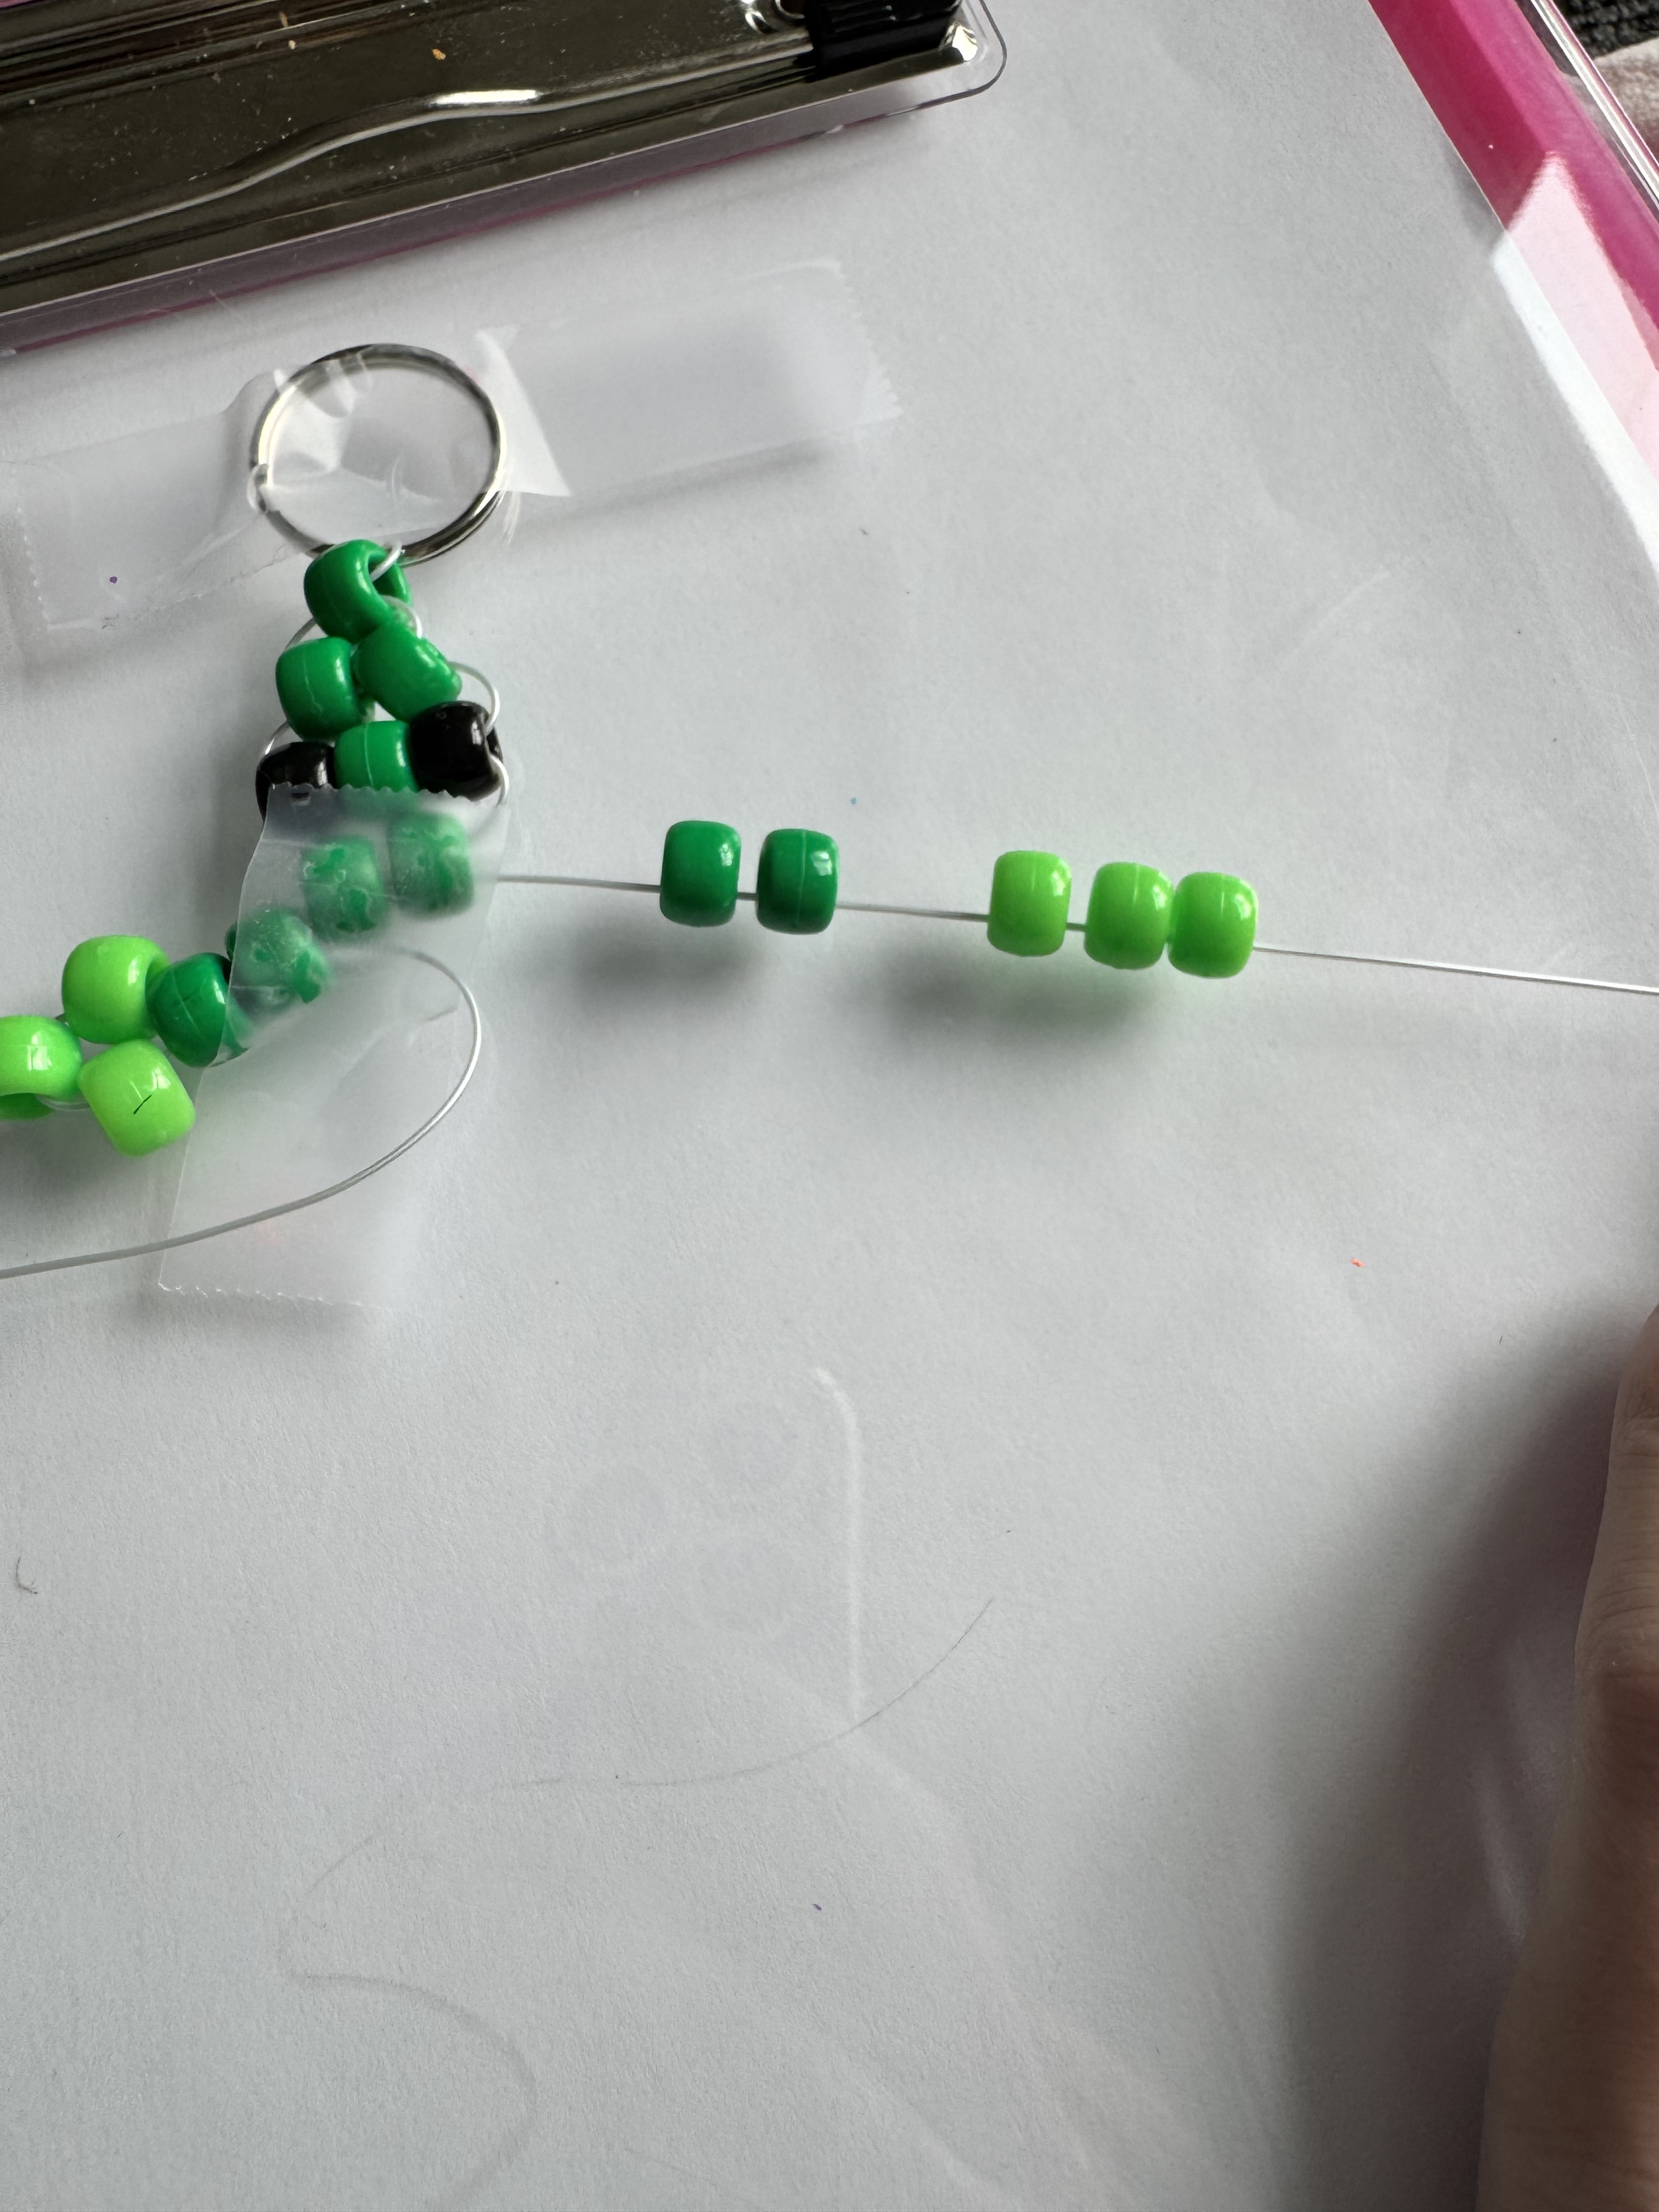
You will repeat the previous step using only the right strand of elastic, thread 5 beads, 2 dark green followed by 3 light green.
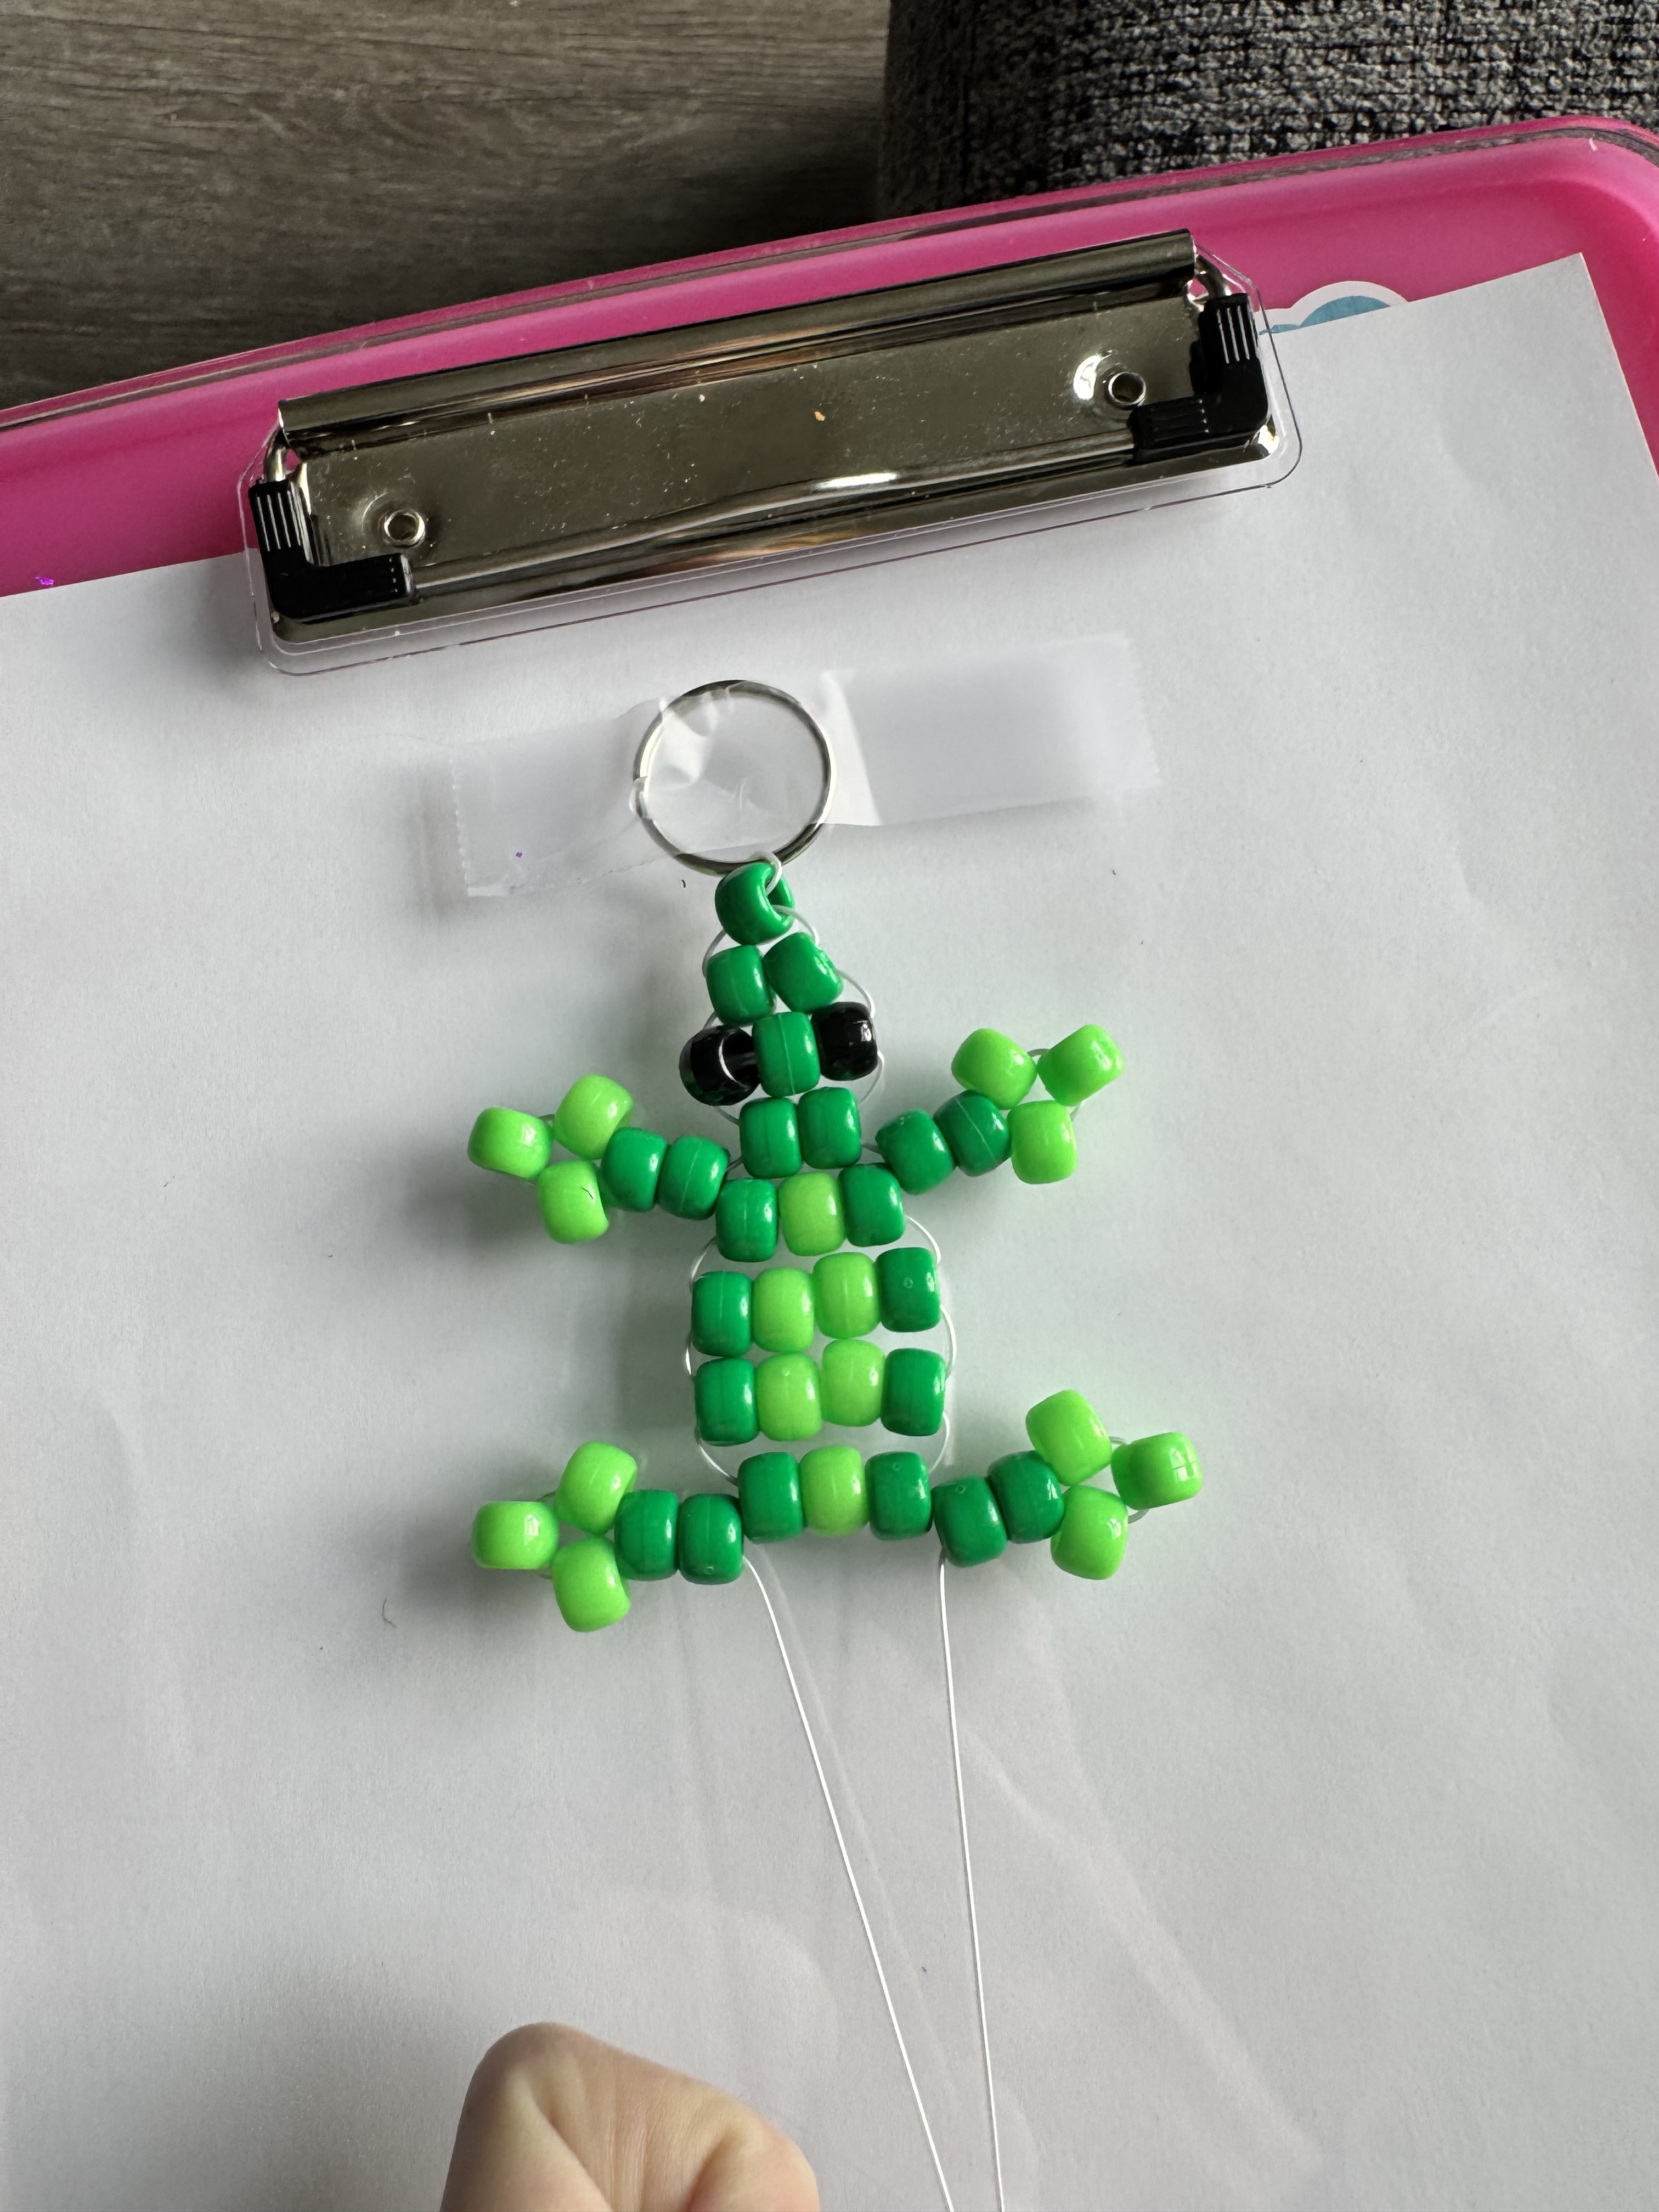
Now take the end of the right strand and thread it back through the first two dark green beads, skipping the three lighter. when pulled tight the arm should form on the right side. Your keychain should now have two legs on either side. It should look the same as the first two but at the other end of the body.
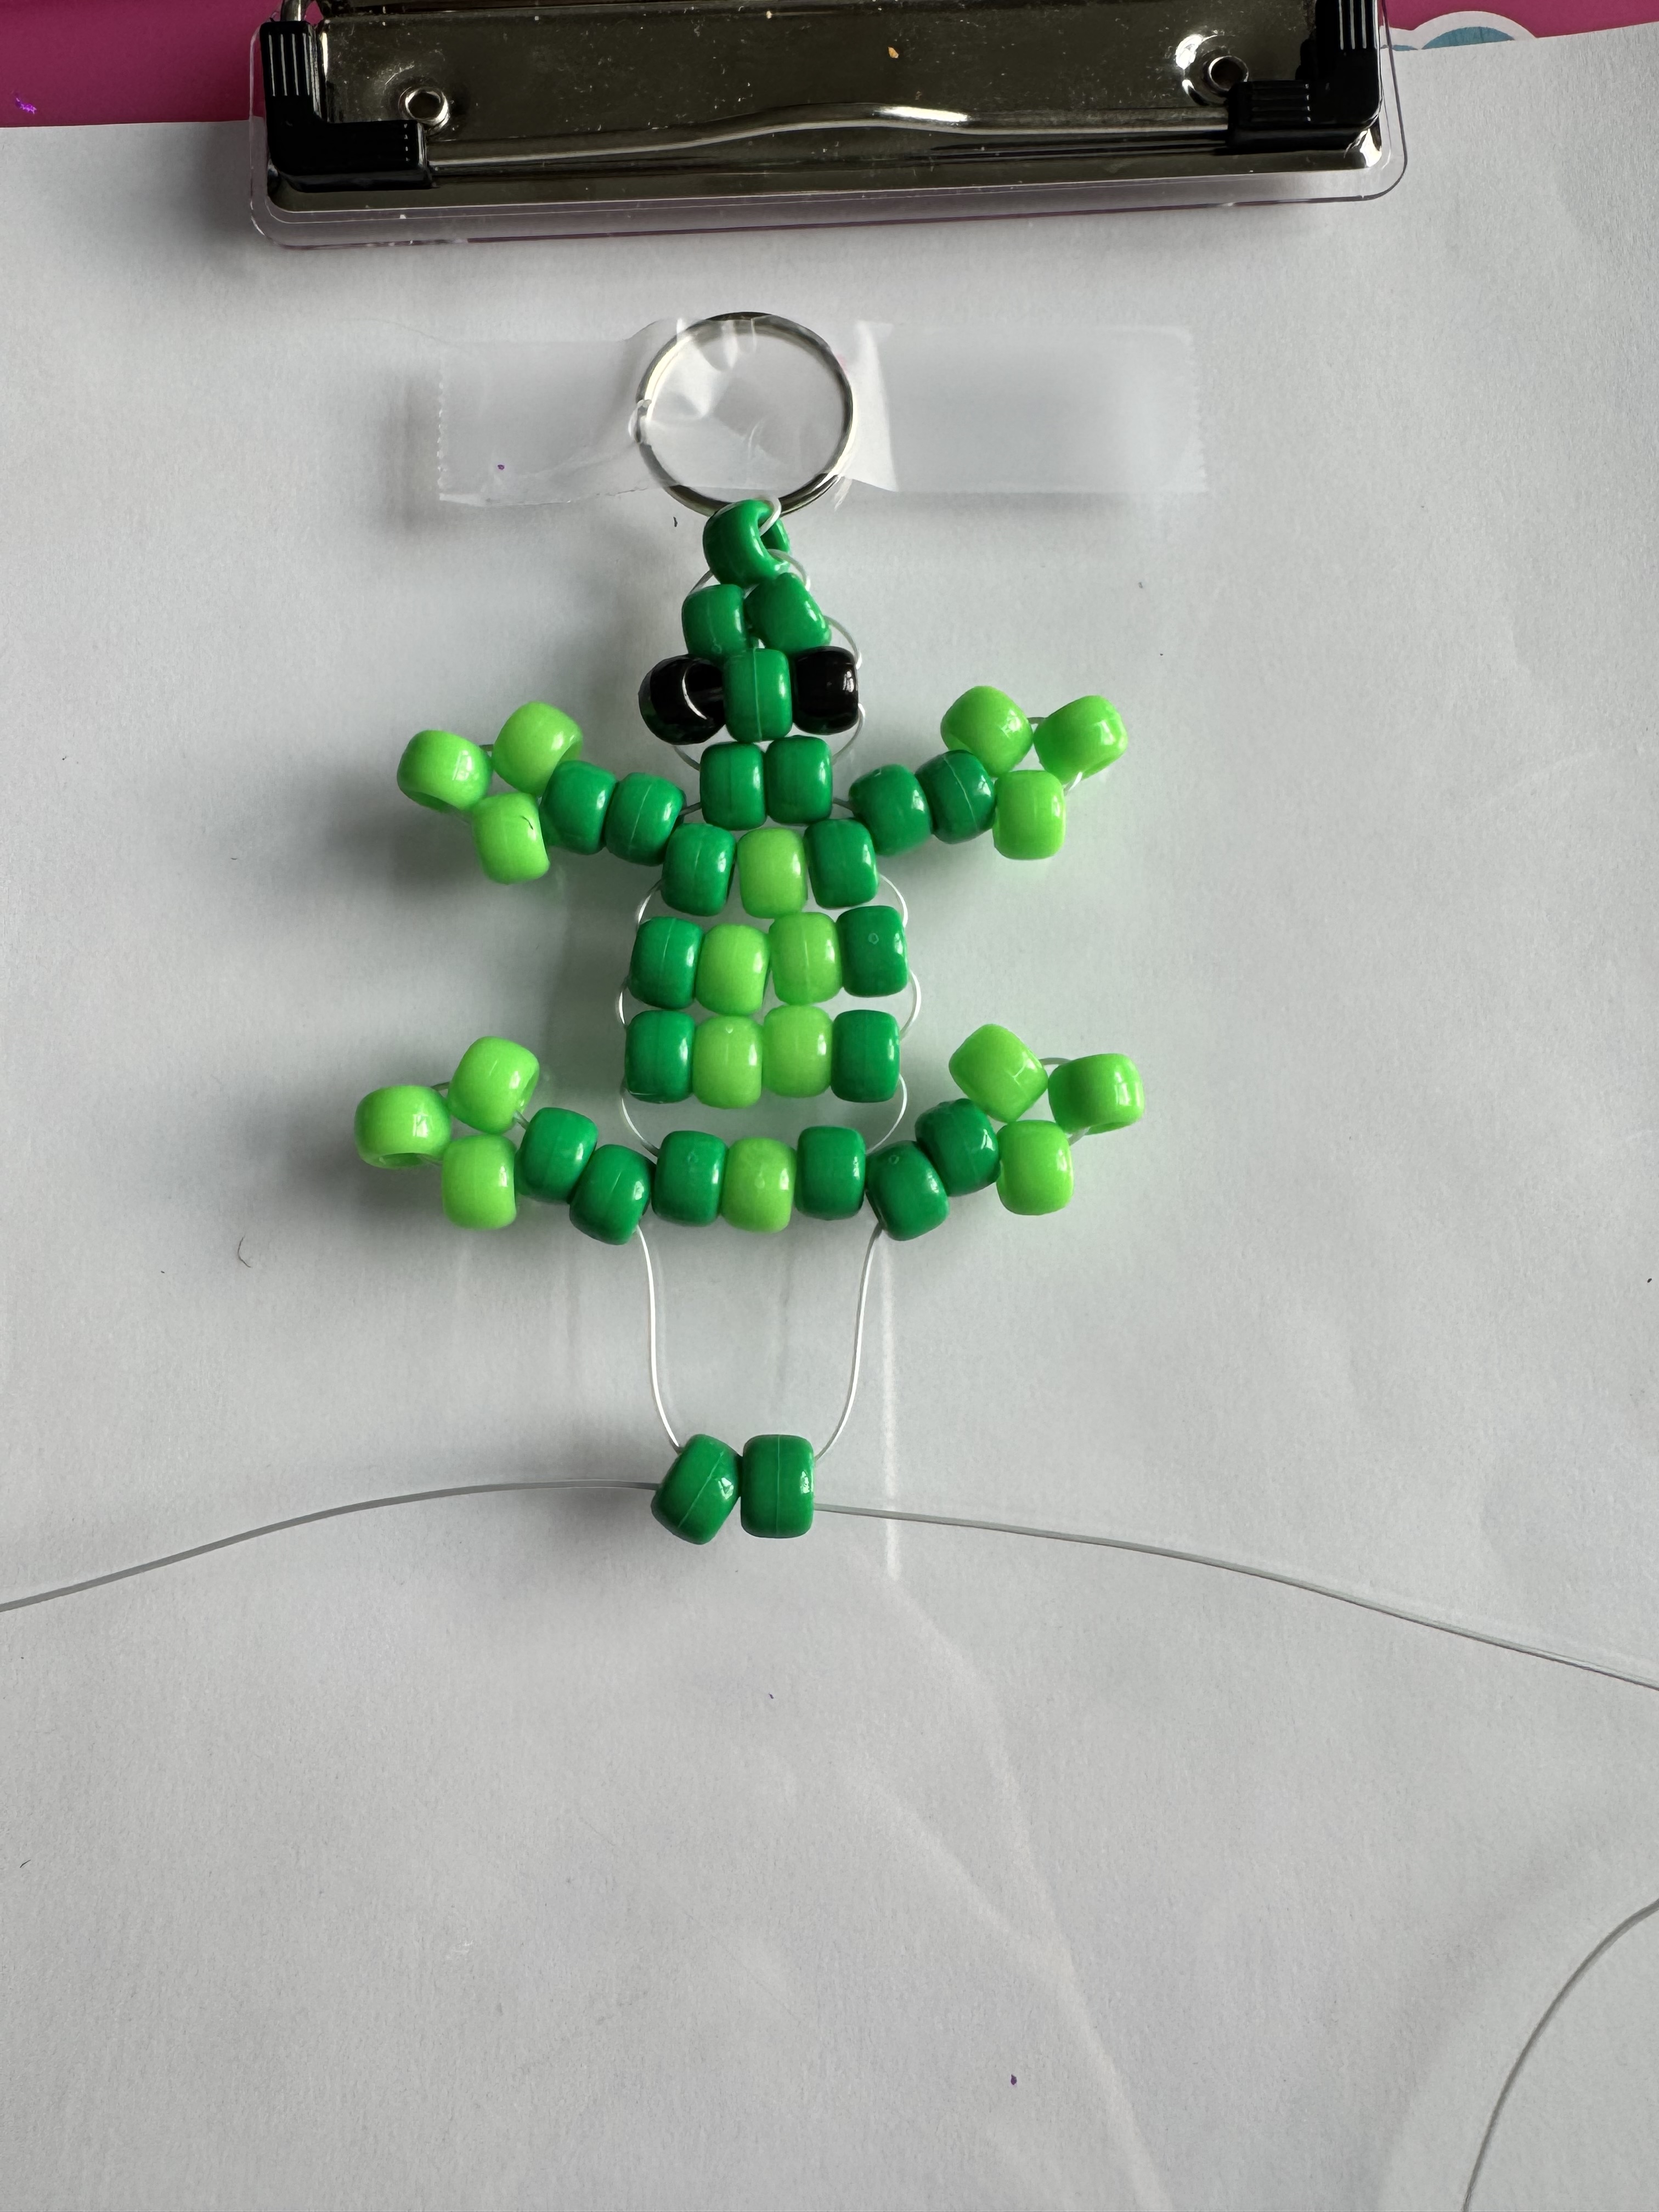
Again, thread both ends through two dark green beads. Pull tight.
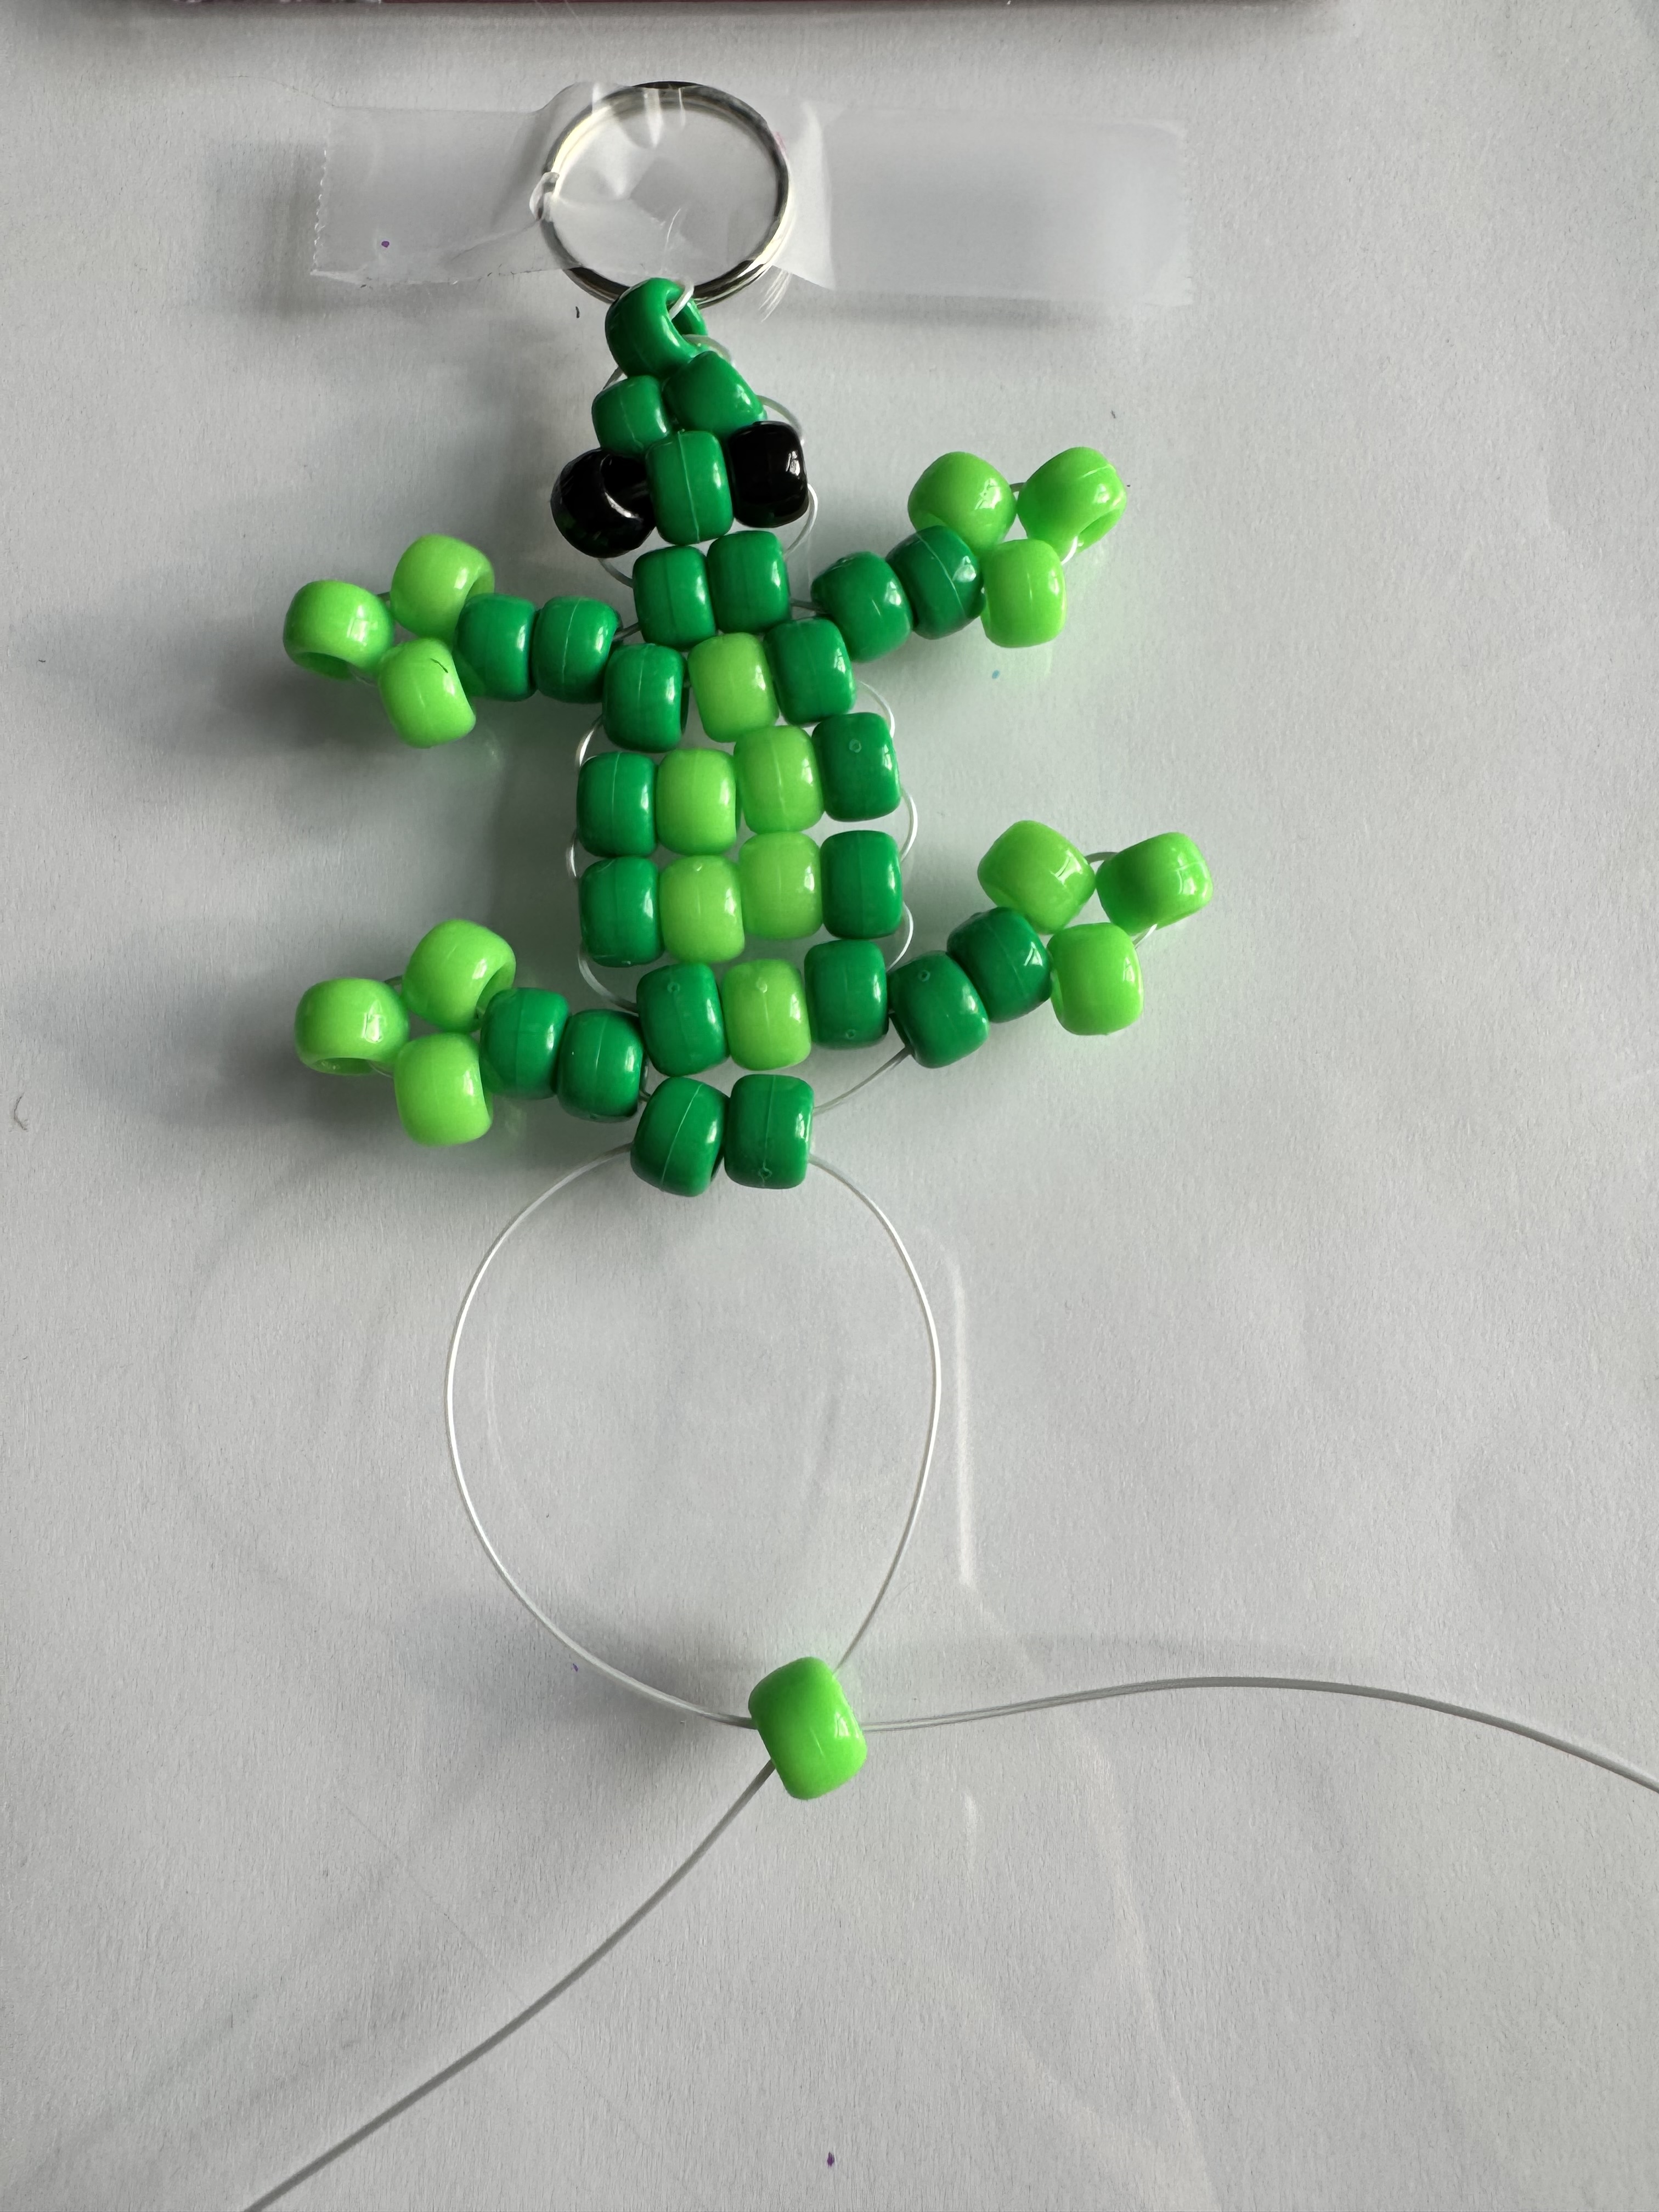
Begin the tail with one light green bead and thread as you have been,
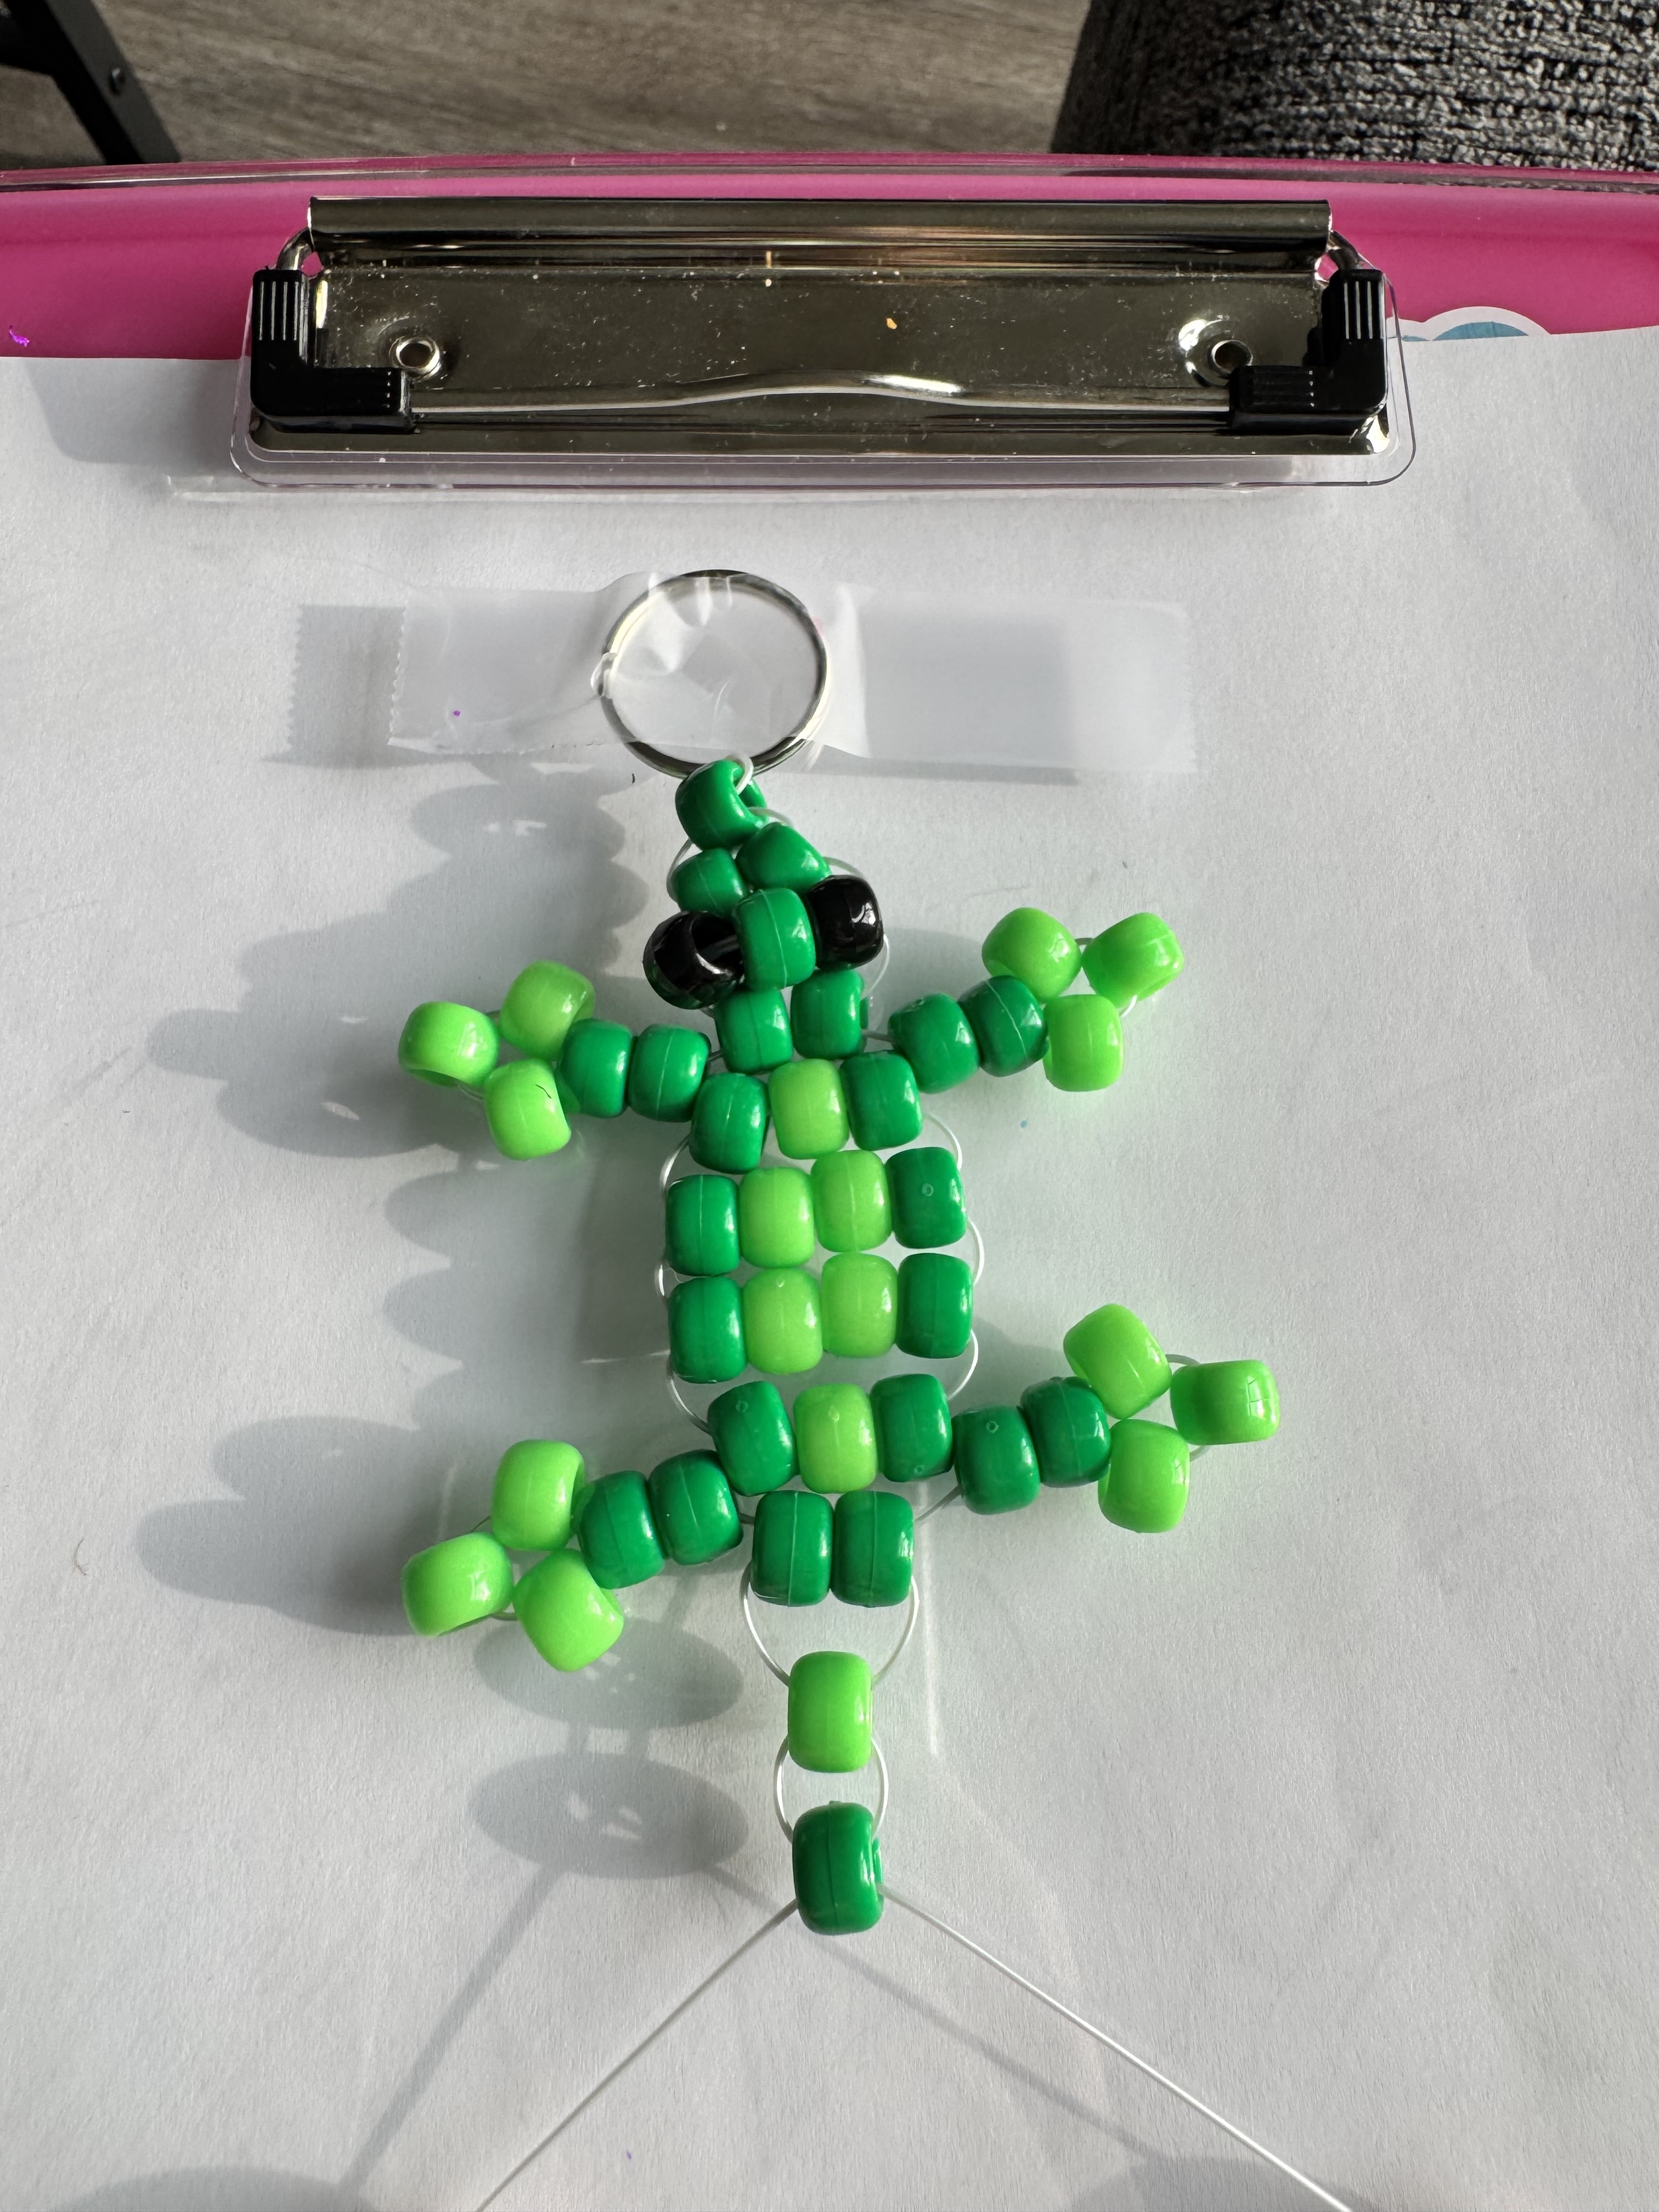
Continue beading in the same alternating one dark, one light green.
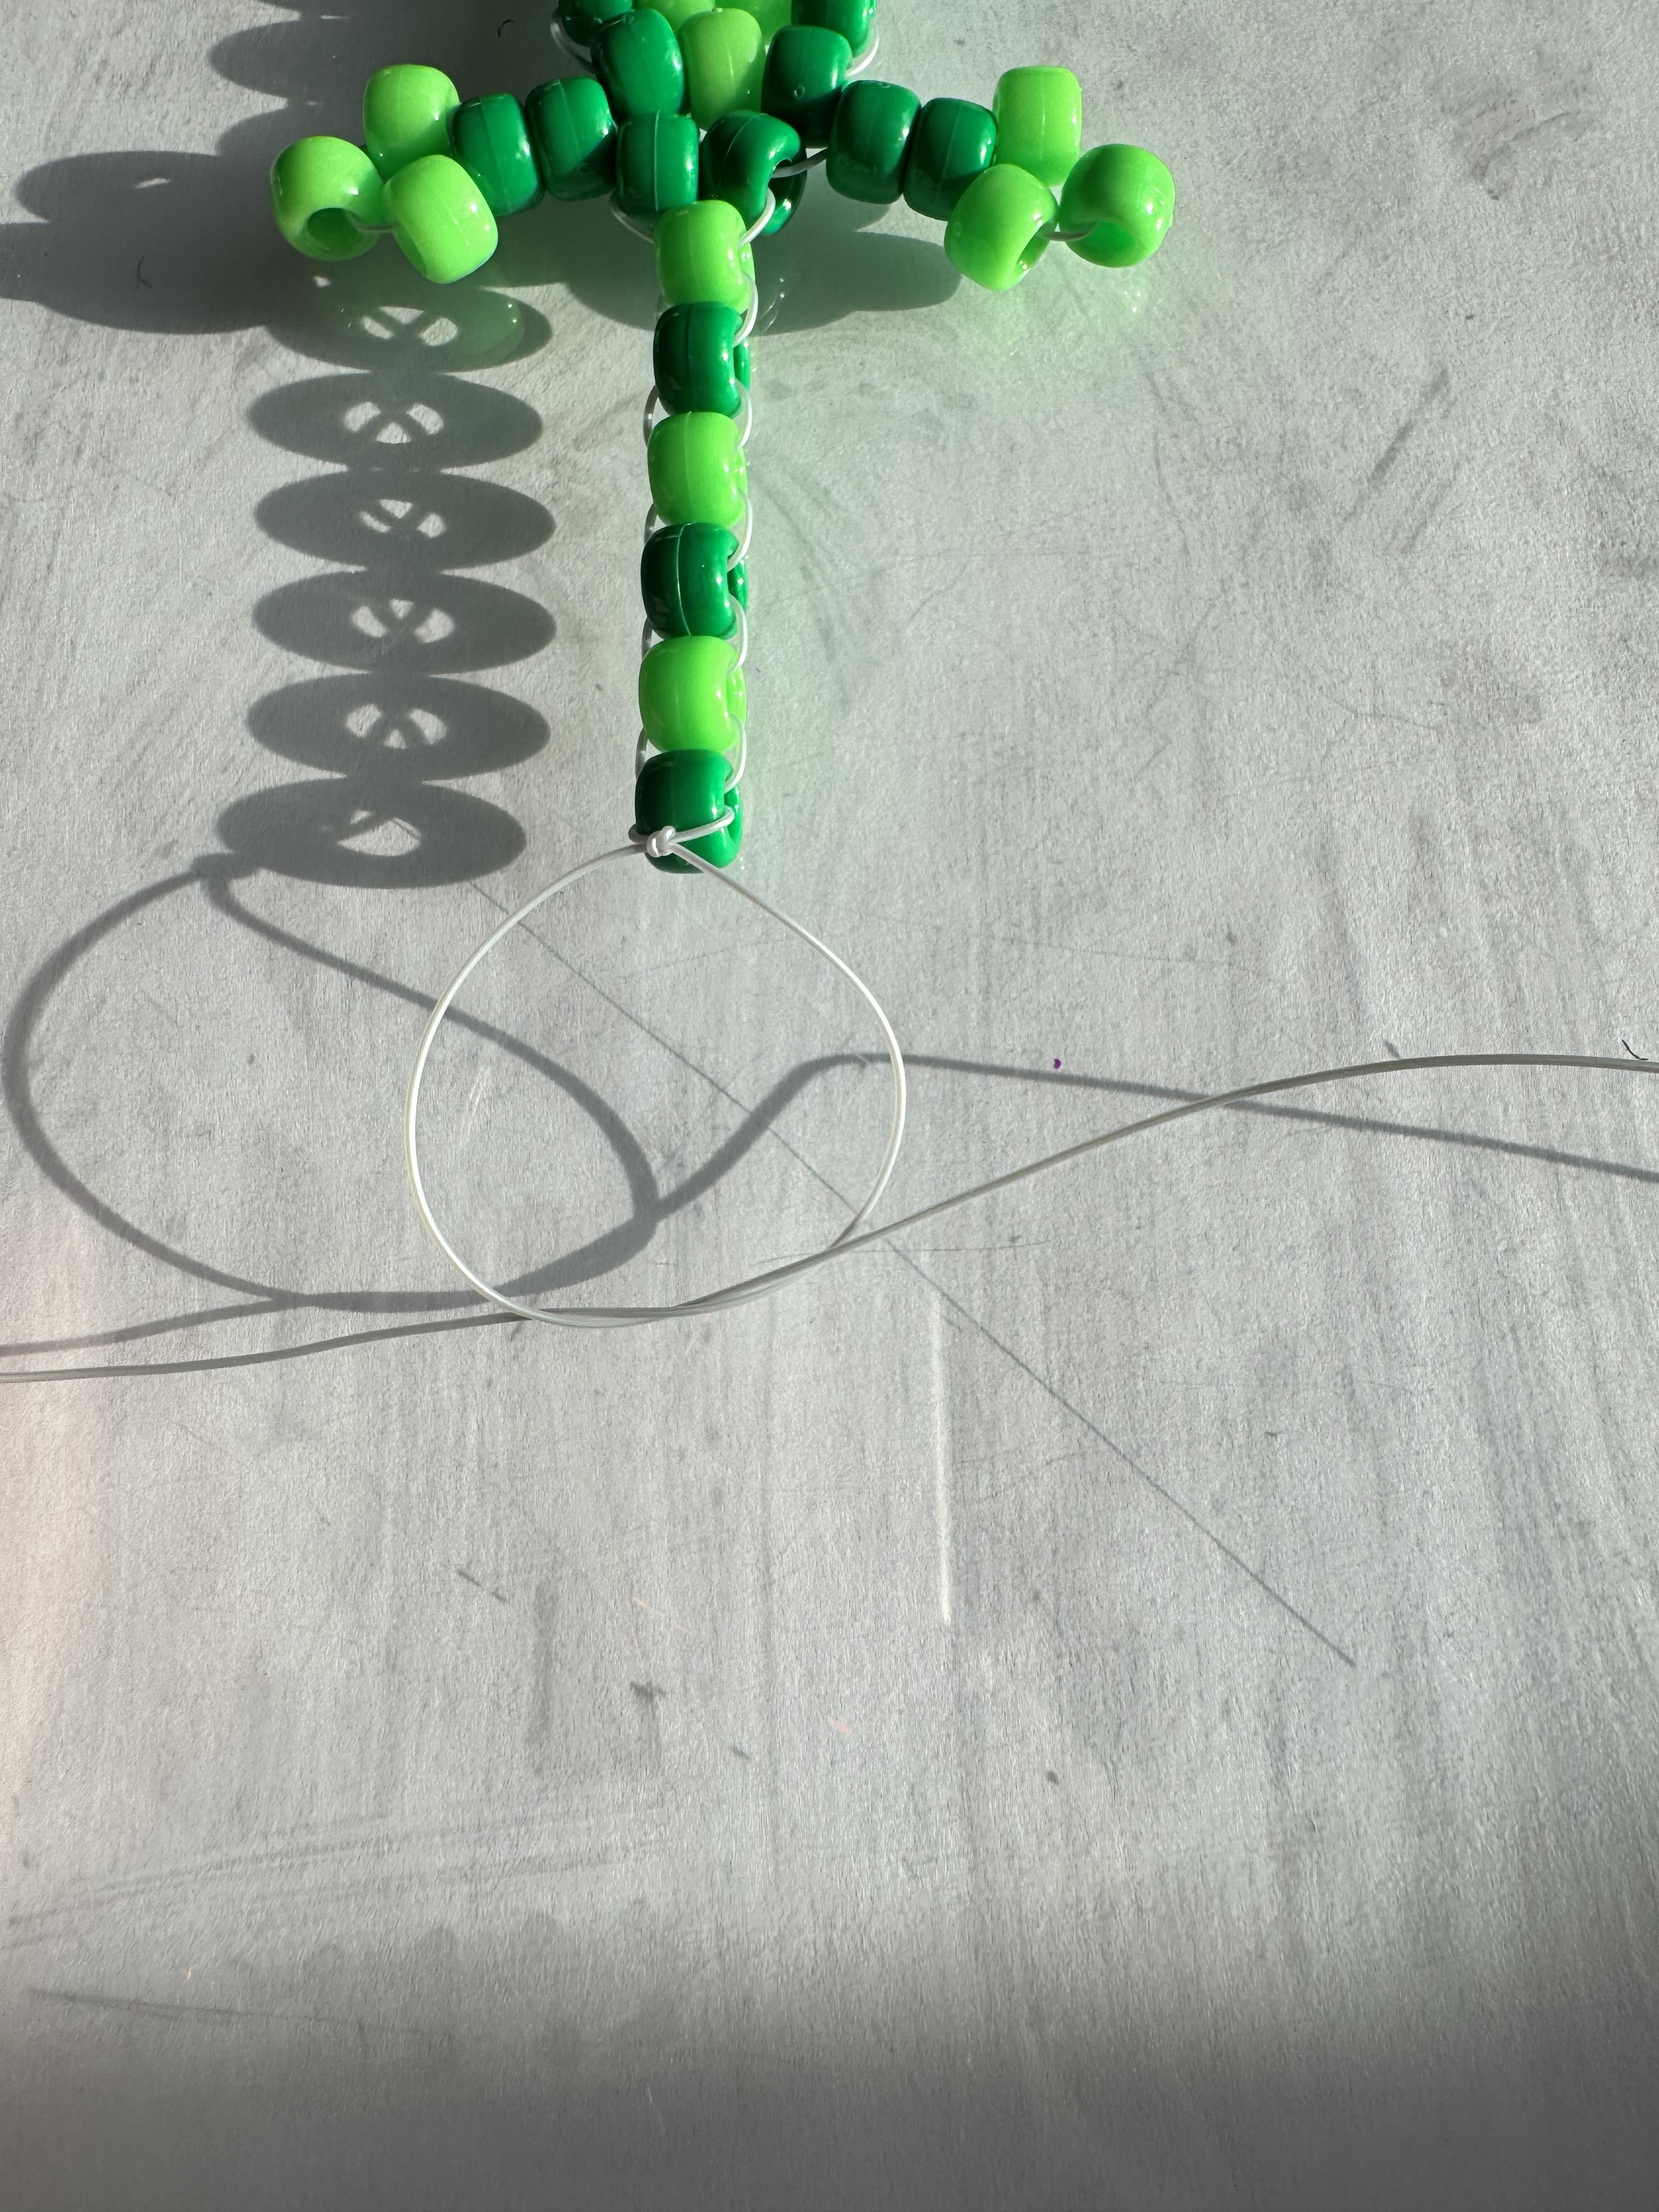
After beading the rest of tail to your liking (this is usually 5 or 6 beads but you can make it as long as you want). tie off the two ends around the final bead and make sure to have an adult help secure the elastic so it won't fall apart.
Save your work in our Art Gallery and get personalized recommendations for your next project.
Join GlueStick