About This Project

A 15–20 minutes craft for ages 5–12, using supplies you likely already have — Hole Punches, Sharpie Markers, and Pom Poms.

GlueStick supports kids from setup to cleanup. After they choose a project, we guide them through gathering the supplies, making it, and cleaning up when they're done. We'll even help them share it safely with trusted family and friends.

Ad-free and kid-safe library — designed by a mom who wants kids to explore and create independently.
Project Tags
  1. 1

    Find Supplies

    Do you have everything you need?
    Create a free GlueStick account to track supplies and see if you have what you need at a glance. Leave your kids tips about where supplies are stored in your household so they can set up and clean up their creative spaces independently.

    00:00
    A cartoon of Hole Punches
    Unknown cupboard quantity You have: unknown
    A cartoon of Sharpie Markers
    Unknown cupboard quantity You have: unknown
    A cartoon of Pom Poms
    Unknown cupboard quantity You have: unknown
    A cartoon of Scissors
    Unknown cupboard quantity You have: unknown
    A cartoon of Pencils
    Unknown cupboard quantity You have: unknown
    A cartoon of Clothespins
    Unknown cupboard quantity You have: unknown
    A cartoon of Paint
    Unknown cupboard quantity You have: unknown
    A cartoon of Printer
    Unknown cupboard quantity You have: unknown
    A cartoon of Newspapers
    Unknown cupboard quantity You have: unknown
    A cartoon of Plaper Plates
    Unknown cupboard quantity You have: unknown
  2. 2

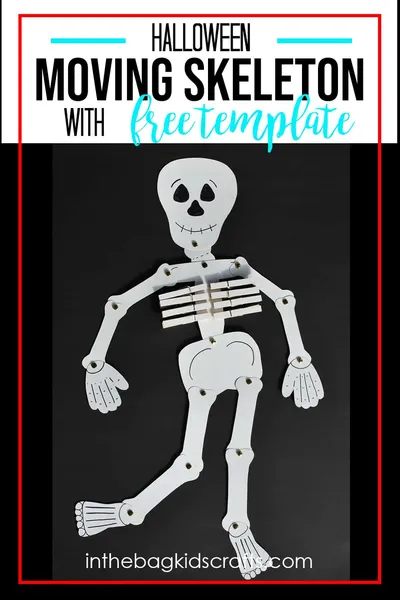
    Make Moveable Joints Skeleton Craft

    Your creative buddy says:
    "Are you as excited to make this as I am?"
    Step 1: Paint the Ribs

    May need grown-up help
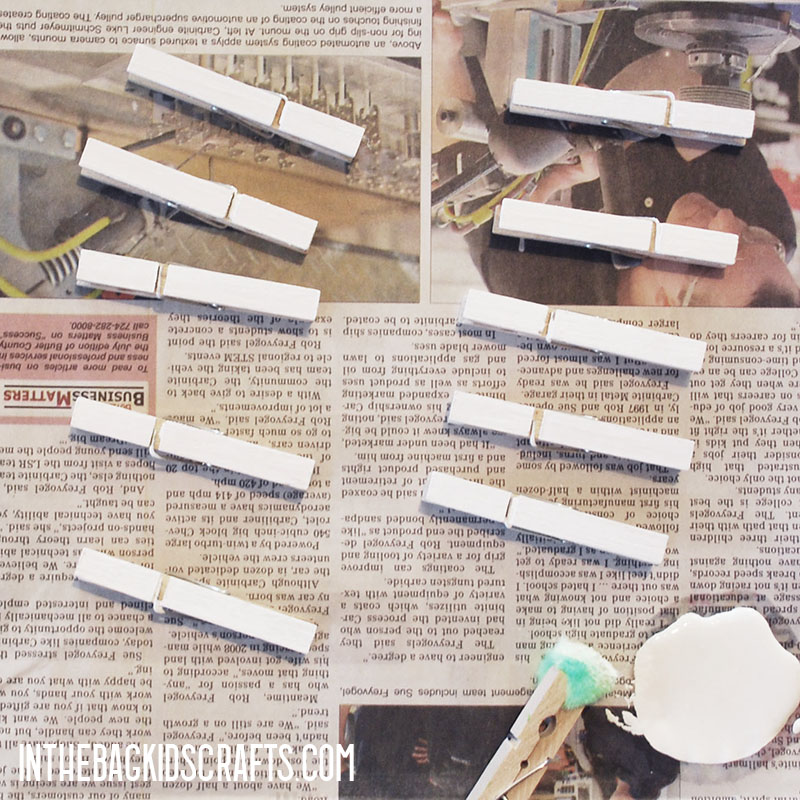
    1. Lay out 8 clothespins on newspaper. 2. Pinch the pompom with the remaining clothespin to form a “paint brush”. You can also just use a regular paint brush if you prefer. 3. Squeeze out some white paint onto the newspaper and paint one side of each of the clothespins. 4. Allow the paint to dry while you move on to step 2.

    Step 2: Cut Out Skeleton Parts

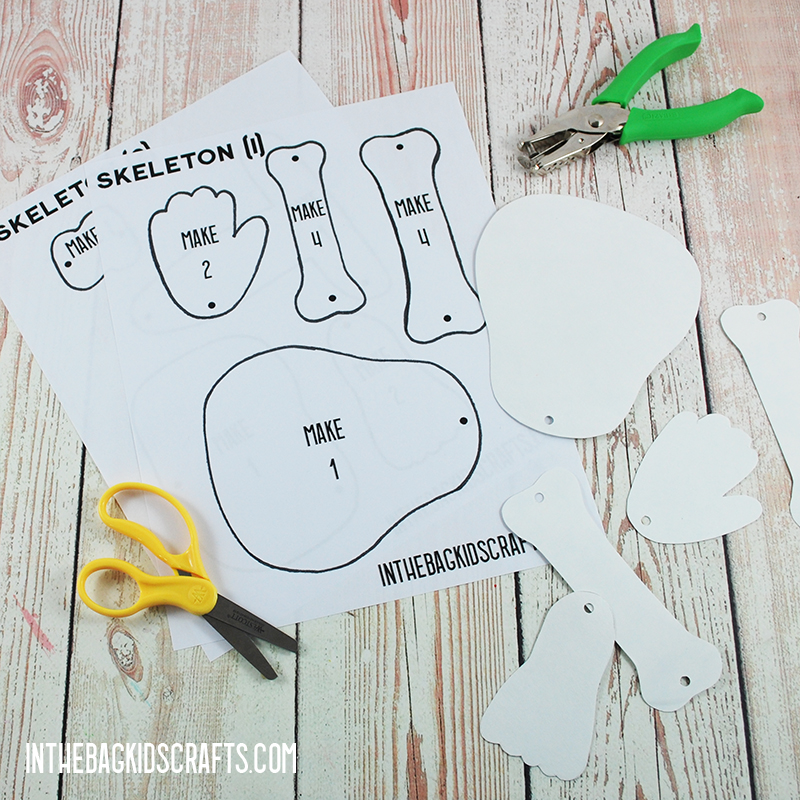
    1. Print the skeleton template. 2. Use the template to cut out the parts of the skeleton from paper plates. 3. Punch holes where the template indicates.

    Step 3: Add Details

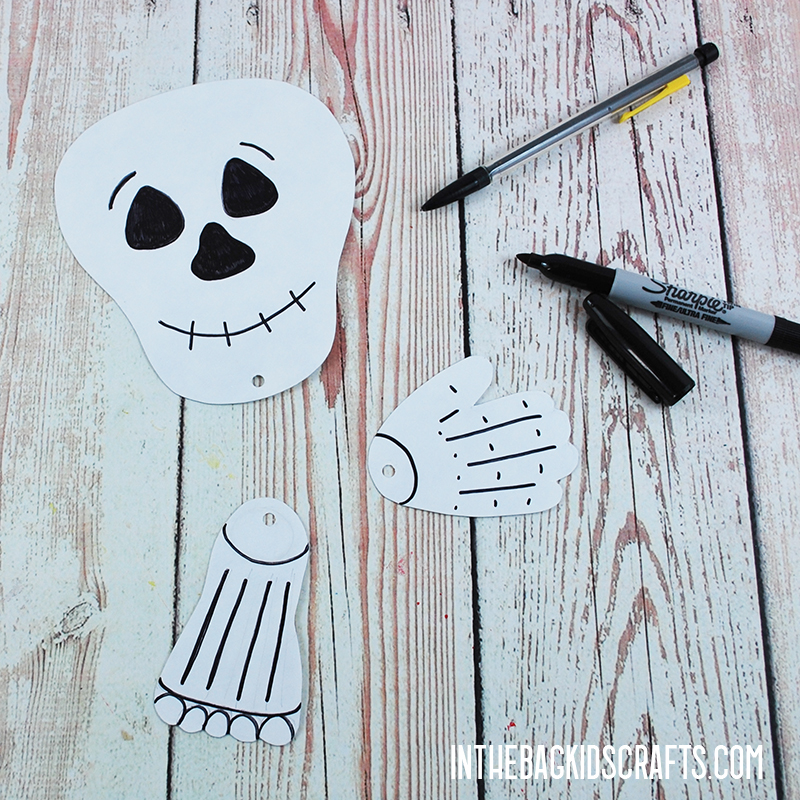
    1. Add details to the skeleton parts. First draw with a pencil and then go over it with your black Sharpie marker. 2. Pay attention to which side you are drawing on. There is a matte and a glossy side to the paper plates. Choose which side you prefer and stick to it to give it a cohesive look.

    Step 4: Assemble the Skeleton

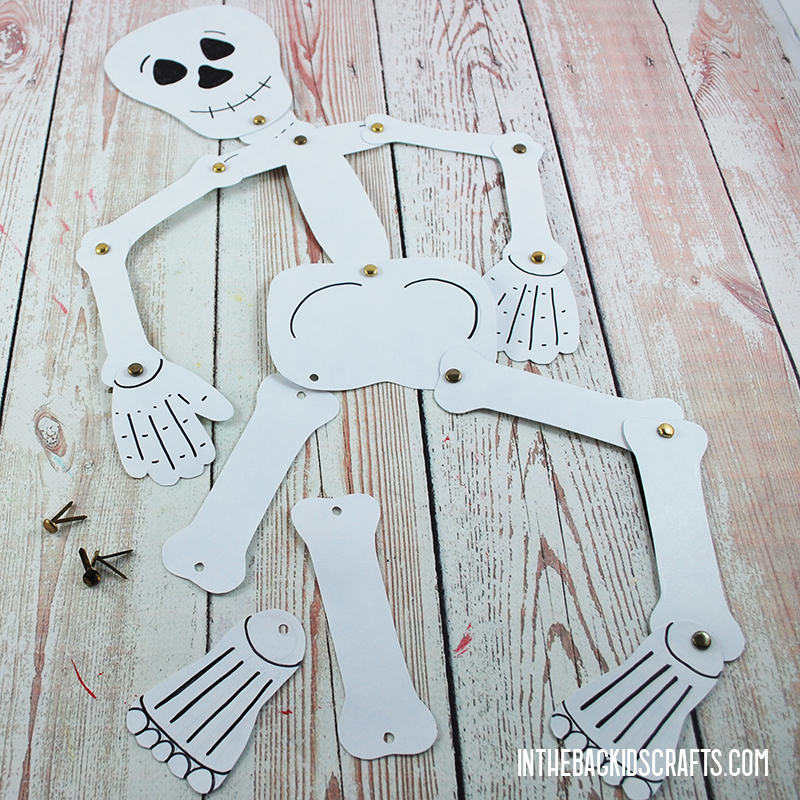
    1. Connect the bones with brads at each joint. 2. Start at the top and work your way down the skeleton body, placing one brass fastener at a time. If you have white fasteners, you can use those so that they blend into the bones. 3. Be sure to make both sides exactly the same for the best look. For example, if you put the hand on top of the arm bone on the right, also put it on top on the left.

    Step 5: Add Ribs

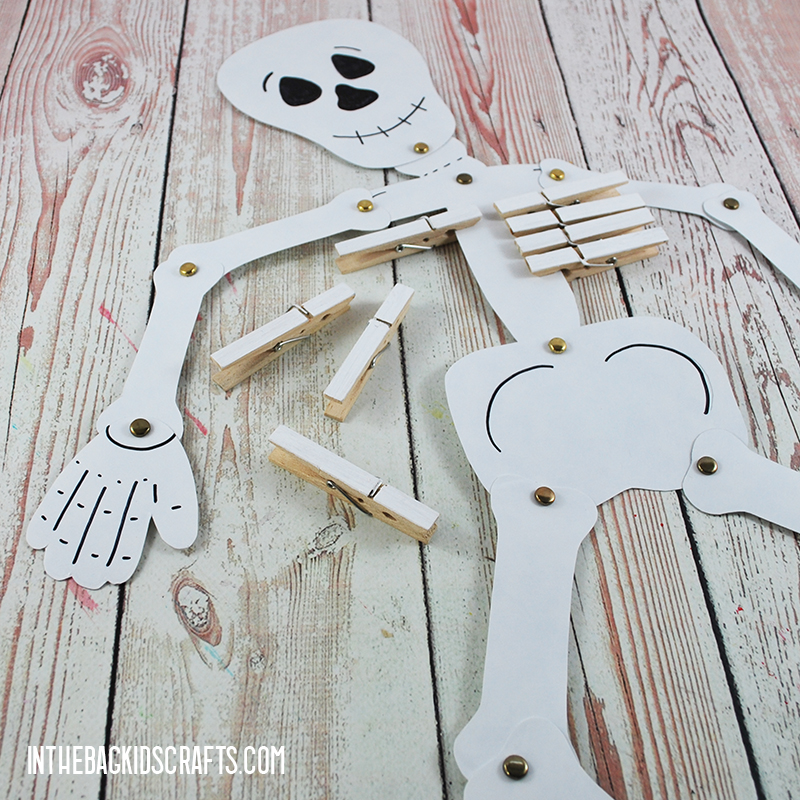
    1. Once the paint has dried on your clothespins, attach 4 to each side of the breast bone as pictured.
  3. 3

    Clean up

    Put things away so your space is tidy for next time.

    Tidy up our space

    Put away our supplies

    Check off each supply when it is put away — and any clean-up tips underneath are done too. You might find a fun surprise!

    • A cartoon of Sharpie Markers
      Where they belong:
    • A cartoon of Pom Poms
      Where they belong:
    • A cartoon of Pencils
      Where they belong:
    • A cartoon of Clothespins
      Where they belong:
    • A cartoon of Paint
      Where they belong:
      • — Don't forget! Close all paint lids tightly.
    • A cartoon of Newspapers
      Where they belong:
    • A cartoon of Plaper Plates
      Where they belong:
    • A cartoon of Hole Punches
      Where they belong:
    • A cartoon of Scissors
      Where they belong:
    • A cartoon of Printer
      Where they belong:

    Update what we have left

    Did we run out of anything while making this project? Update our supply cupboard so that we know exactly what we have for next time.

    This project could unlock 2 creative buddies. Sign in to unlock them.

  4. 4

    Save

    Your creative buddy says:
    "Way to stick with it!"

    Create a free account to save your digital masterpiece to the Art Gallery.

Use what’s already at home

Snap a junk-drawer photo and GlueStick finds projects you can start in minutes — no store trip, less expense, more creative afternoons.
+ 350 more
Supply Snap

About the Author