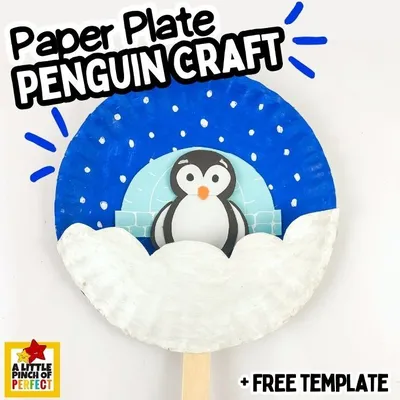
Make a cute penguin out of paper plates! This is a fun winter activity for kids. You can make a puppet or a decoration.
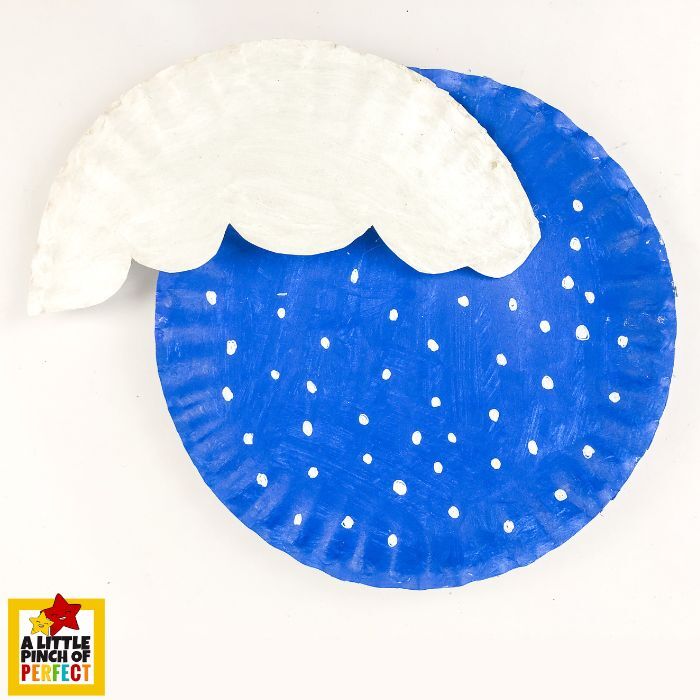
Paint one paper plate with blue paint. Let it dry. This will be your sky. Add snow by painting small dots using white paint. A paintbrush tip or Q-tip works well!
Take the second paper plate and cut it in half. For a fun twist, cut scallops along the edge to look like snowdrifts. It adds texture and makes the craft look extra special.
Print out the template and cut out the pieces. Trace them onto the correct construction paper: Black paper: Penguin body and large flippers White paper: Penguin tummy and inside of flippers Orange paper: Penguin feet and beak Or, print the template directly onto colored paper to save time.
Glue the penguin together. Start with the black pieces and glue the smaller white pieces on the top. Add the feet and beak, then draw on eyes or glue on googly eyes. You can customize your penguin with accessories like scarves or hats! Optional: To make a puppet, attach a popsicle stick to the back of the penguin with glue or double-sided tape.
Cut a half-circle from the blue construction paper. Paint lines to create the illusion of ice blocks. Let it dry.
Glue or staple the two paper plates together. If you made a puppet, make sure to leave an opening for the penguin to go through.
Glue the igloo onto the blue paper plate behind the top of the snow.
If you are not making a puppet, glue the penguin onto the paper plate. If you made a puppet, slide the penguin through the opening in the middle of the paper plates and enjoy your snowy stage.
GlueStick's projects are created by our community of paid Activity Authors. Are you a creative grown-up with a passion for inspiring kids? Learn more and apply to join our author community.
Learn More