About This Project

A 5–12 minutes craft for ages 5–12, using supplies you likely already have — Scissors and Paper.

GlueStick supports kids from setup to cleanup. After they choose a project, we guide them through gathering the supplies, making it, and cleaning up when they're done. We'll even help them share it safely with trusted family and friends.

Ad-free and kid-safe library — designed by a mom who wants kids to explore and create independently.

This project is perfect for:
Project Tags
  1. 1

    Find Supplies

    Do you have everything you need?
    Create a free GlueStick account to track supplies and see if you have what you need at a glance. Leave your kids tips about where supplies are stored in your household so they can set up and clean up their creative spaces independently.
    00:00
    A cartoon of Scissors
    Unknown cupboard quantity You have: unknown
    A cartoon of Paper
    Unknown cupboard quantity You have: unknown
  2. 2

    Make Paper Snowflakes

    Your creative buddy says:
    "I can't wait to make a project with you!"

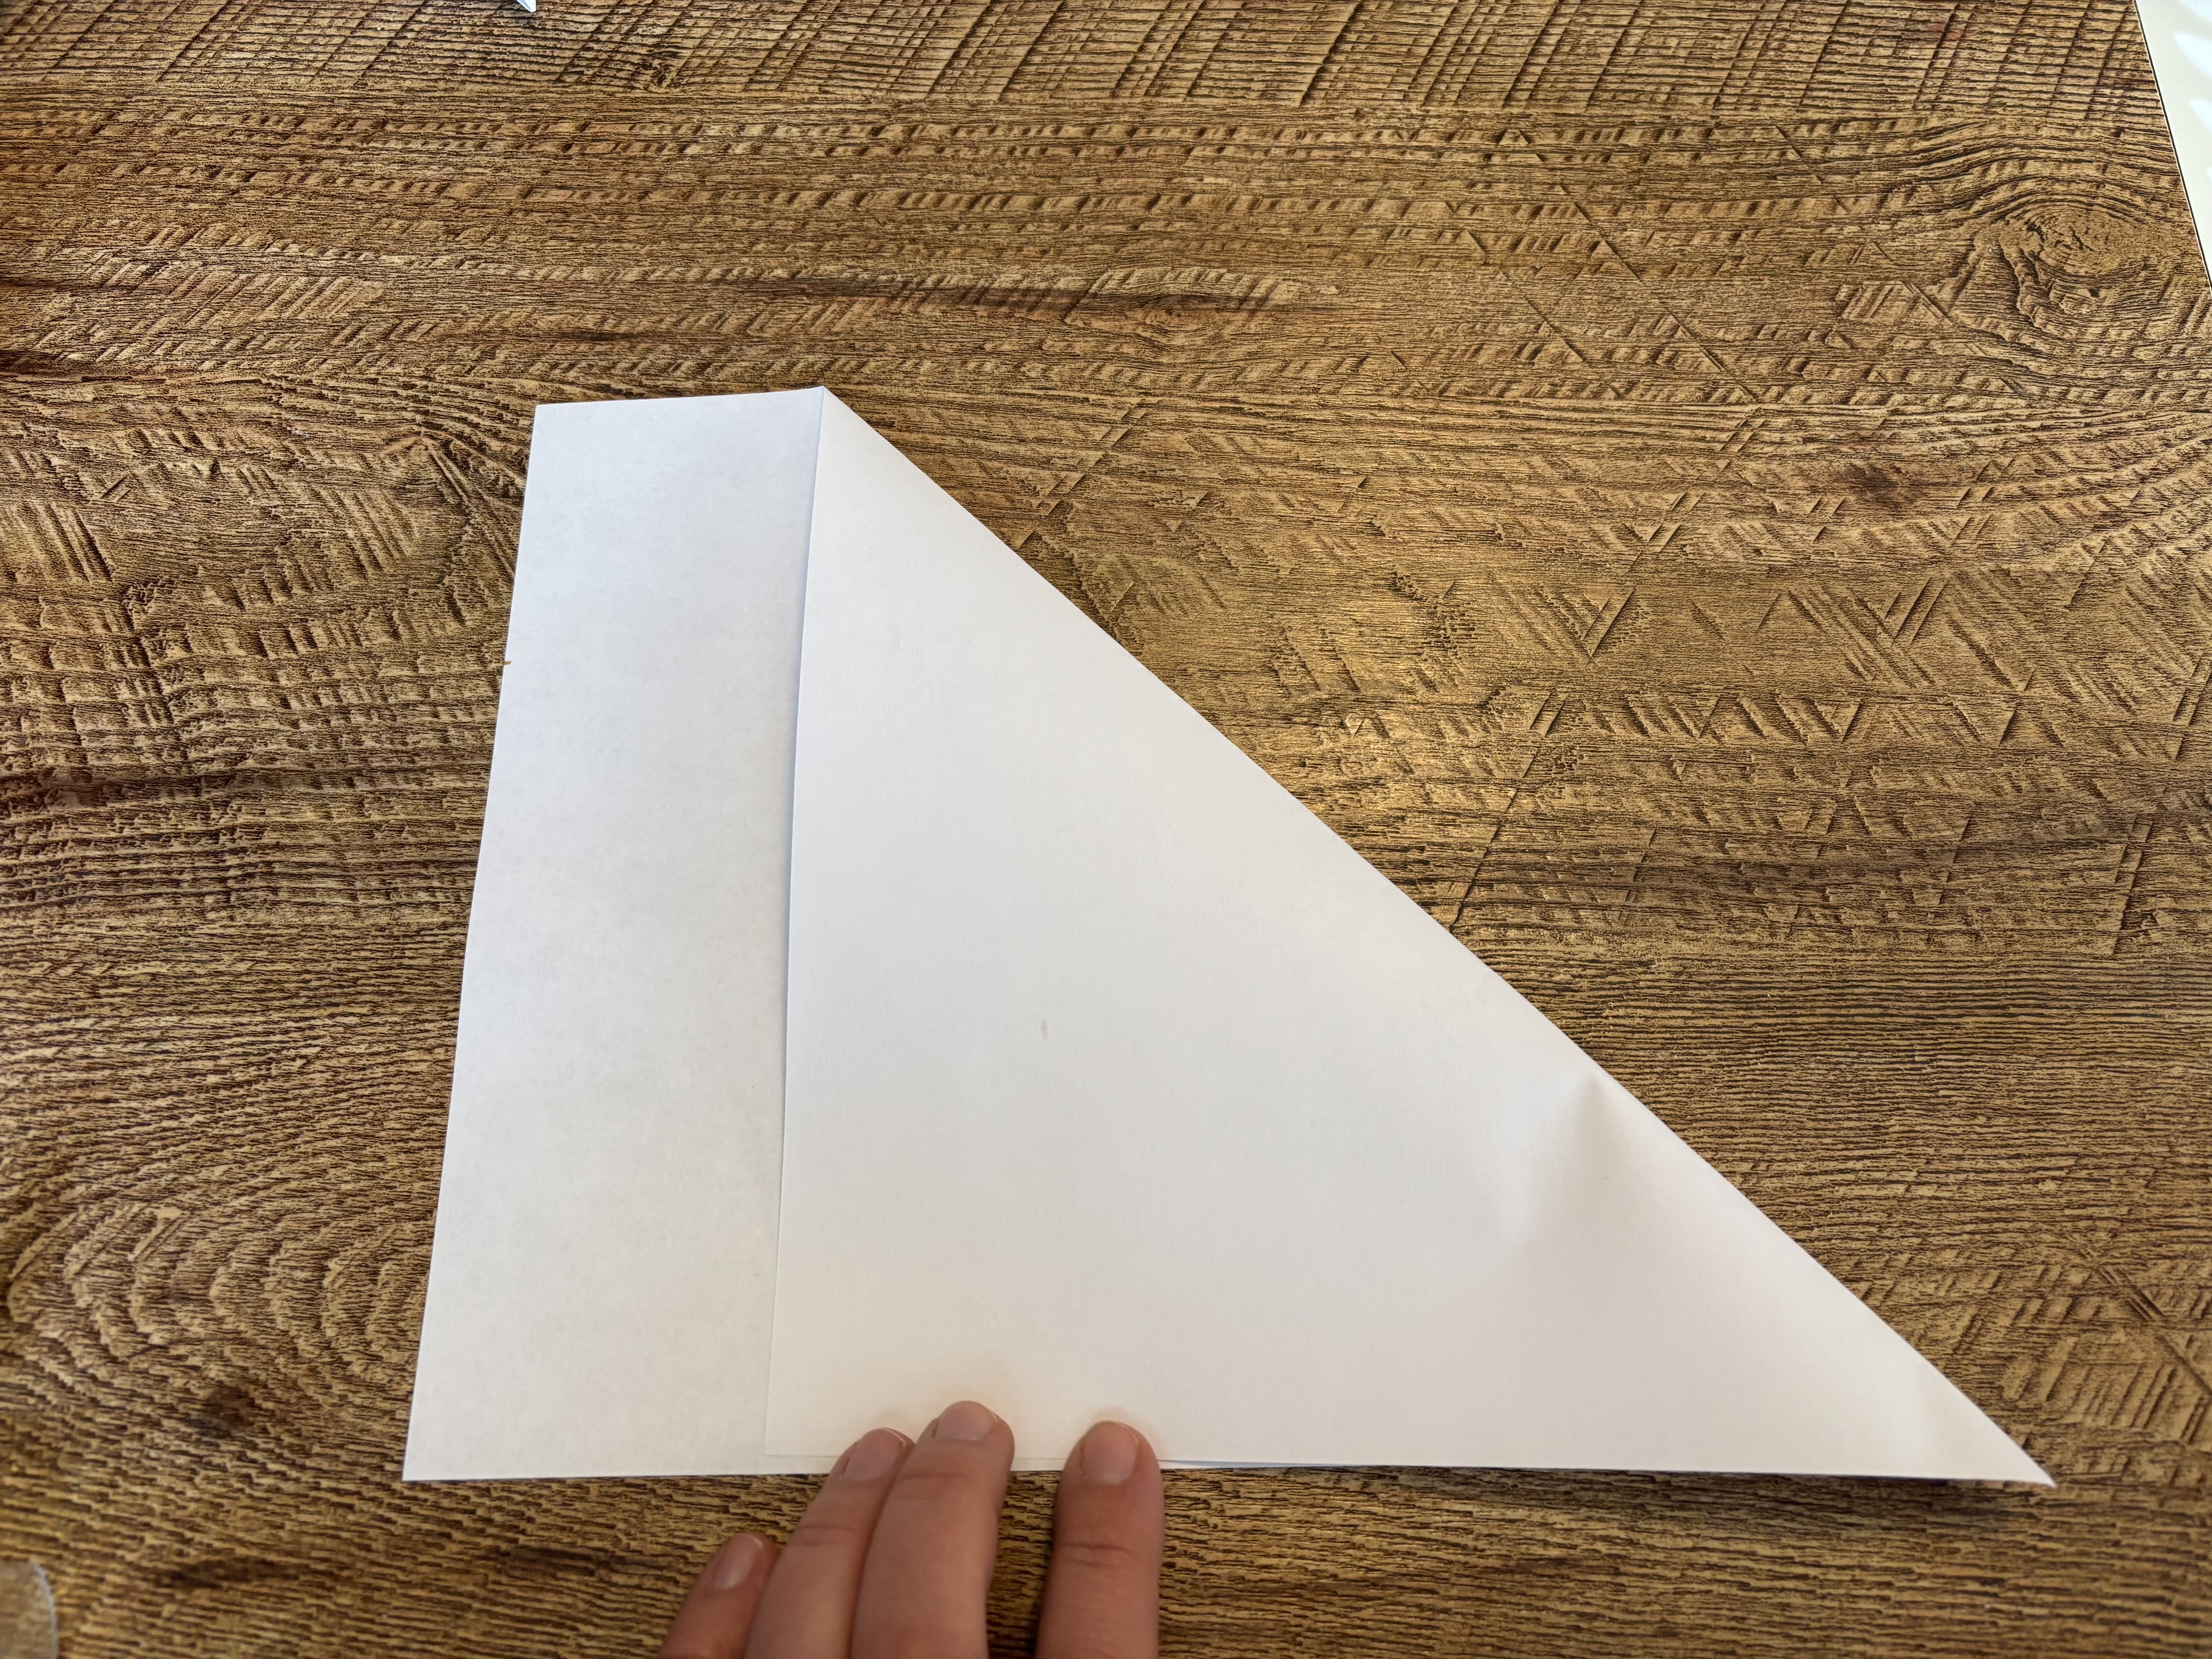
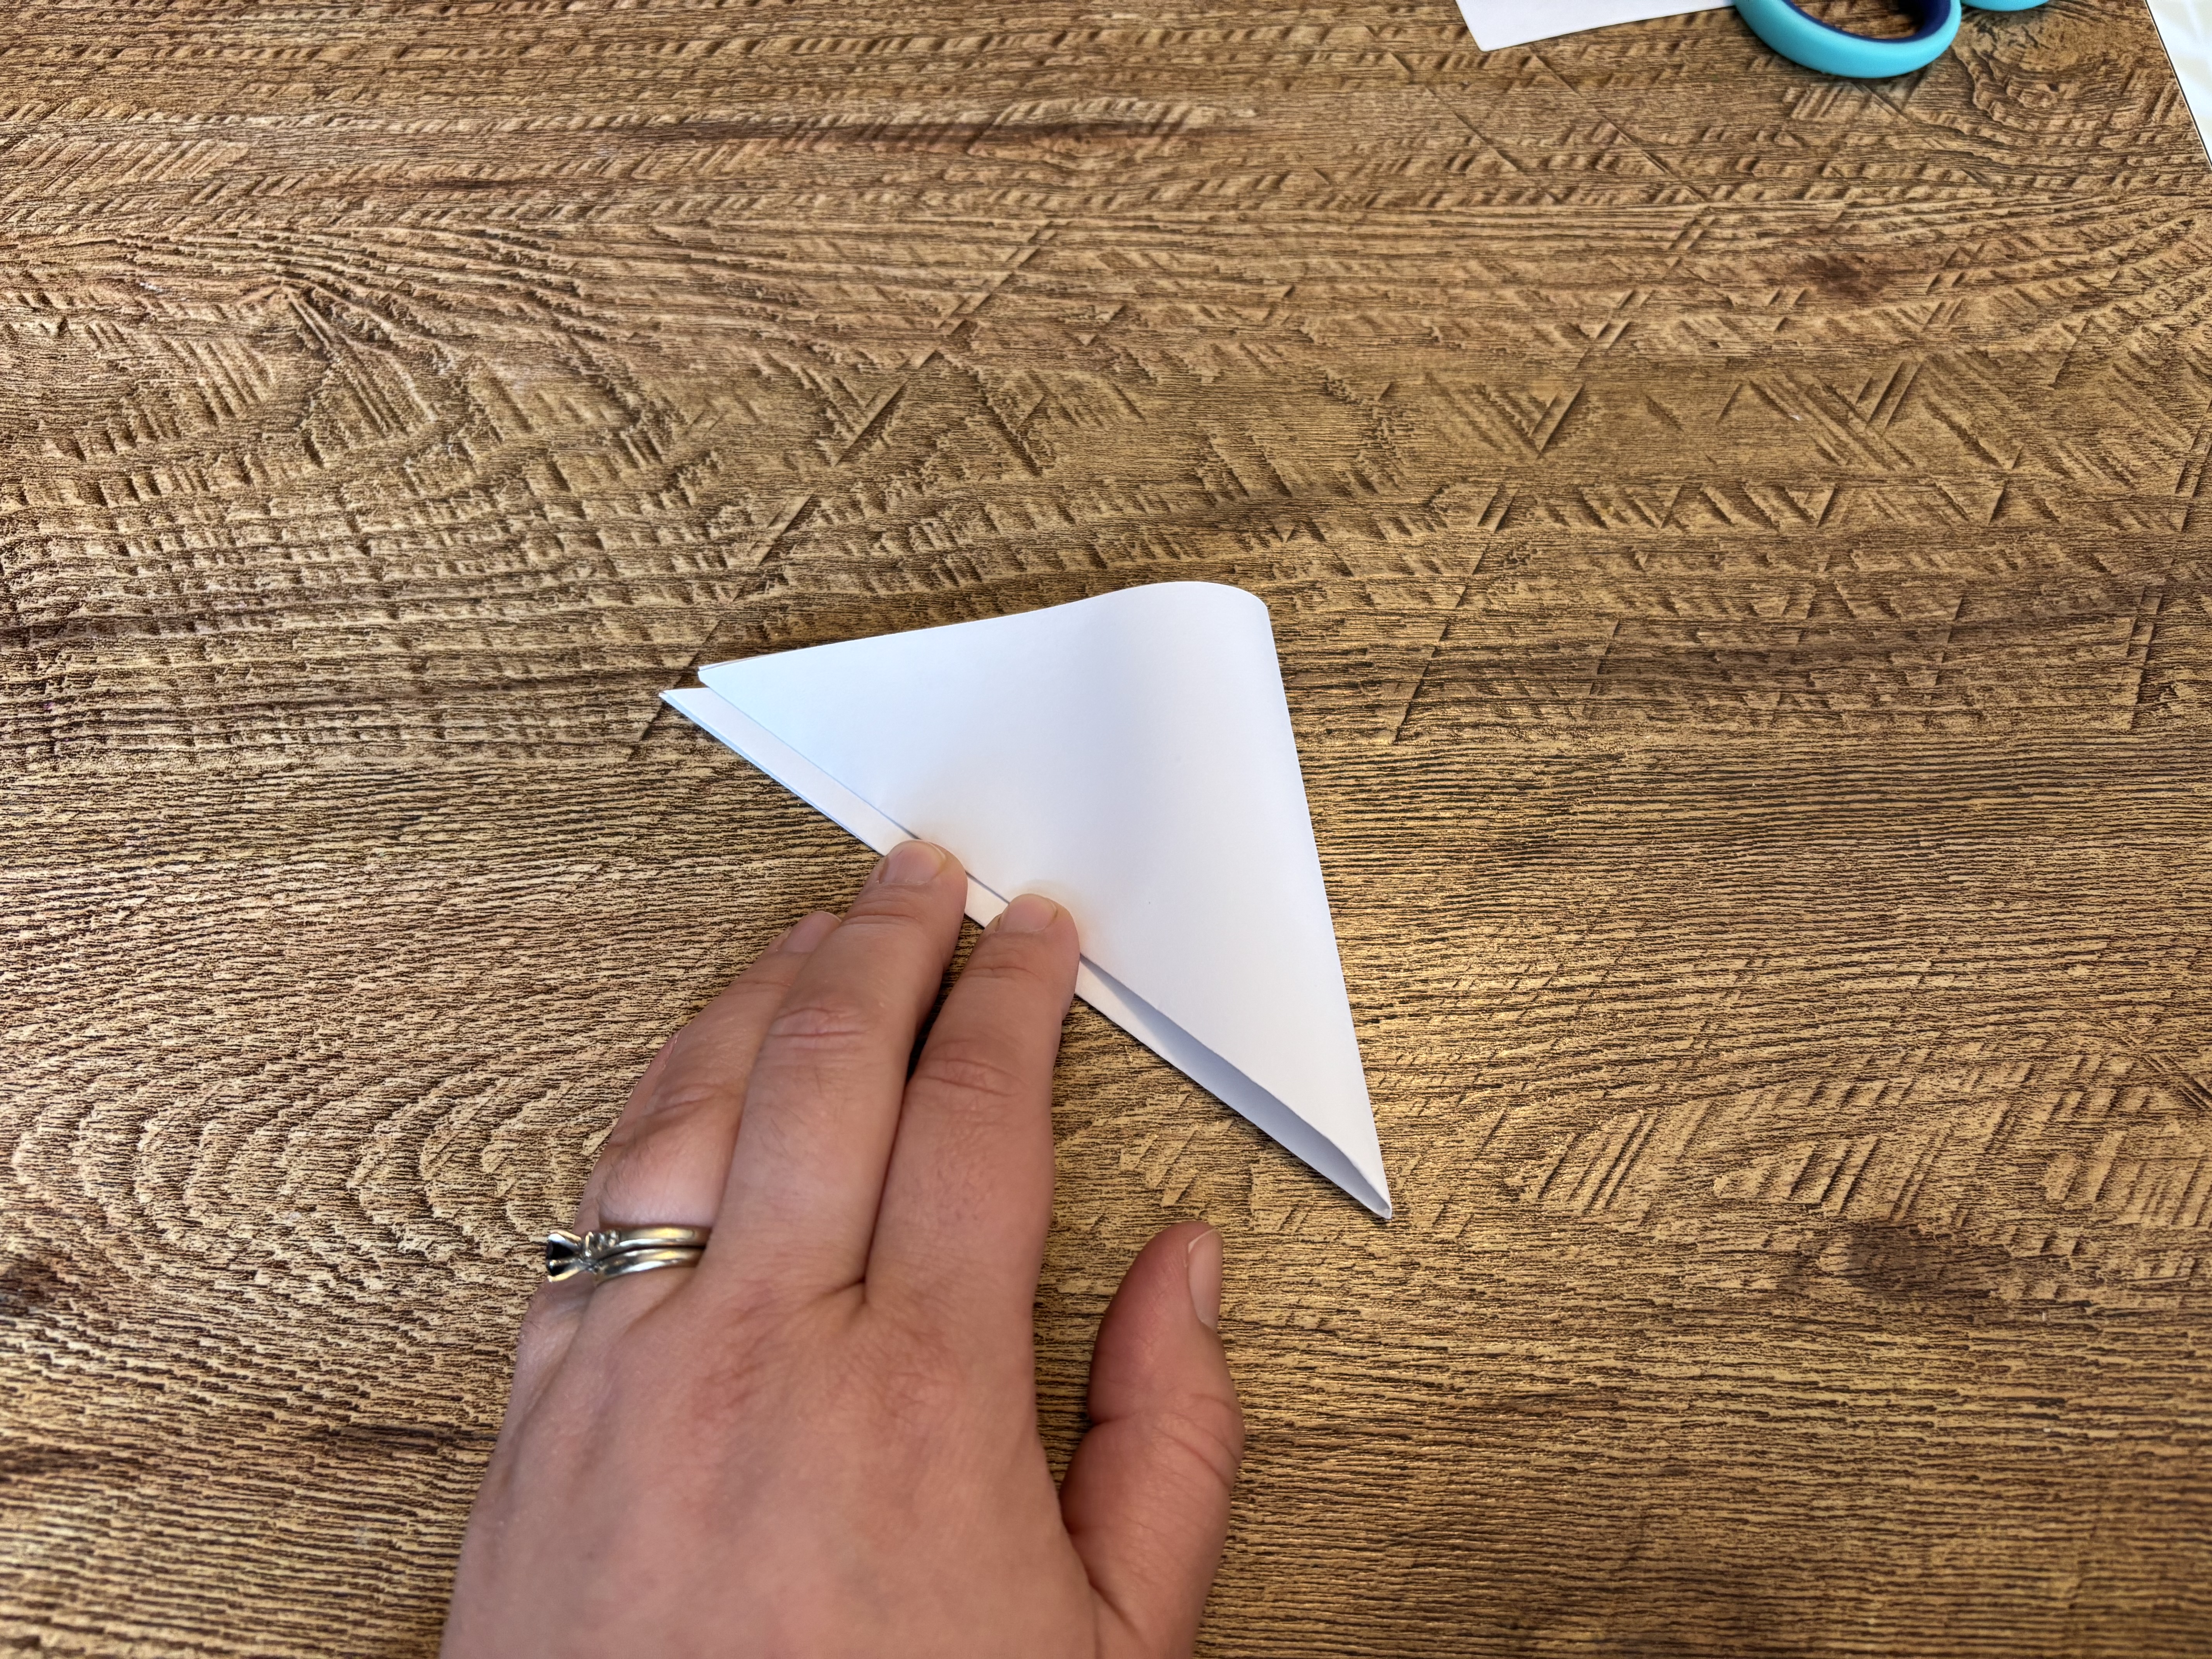
    Step 1: Fold your first triangle

    Symmetrical snowflakes start from a square piece of paper. Fold the short side of your paper to meet the long side as in the picture to make a large triangle.

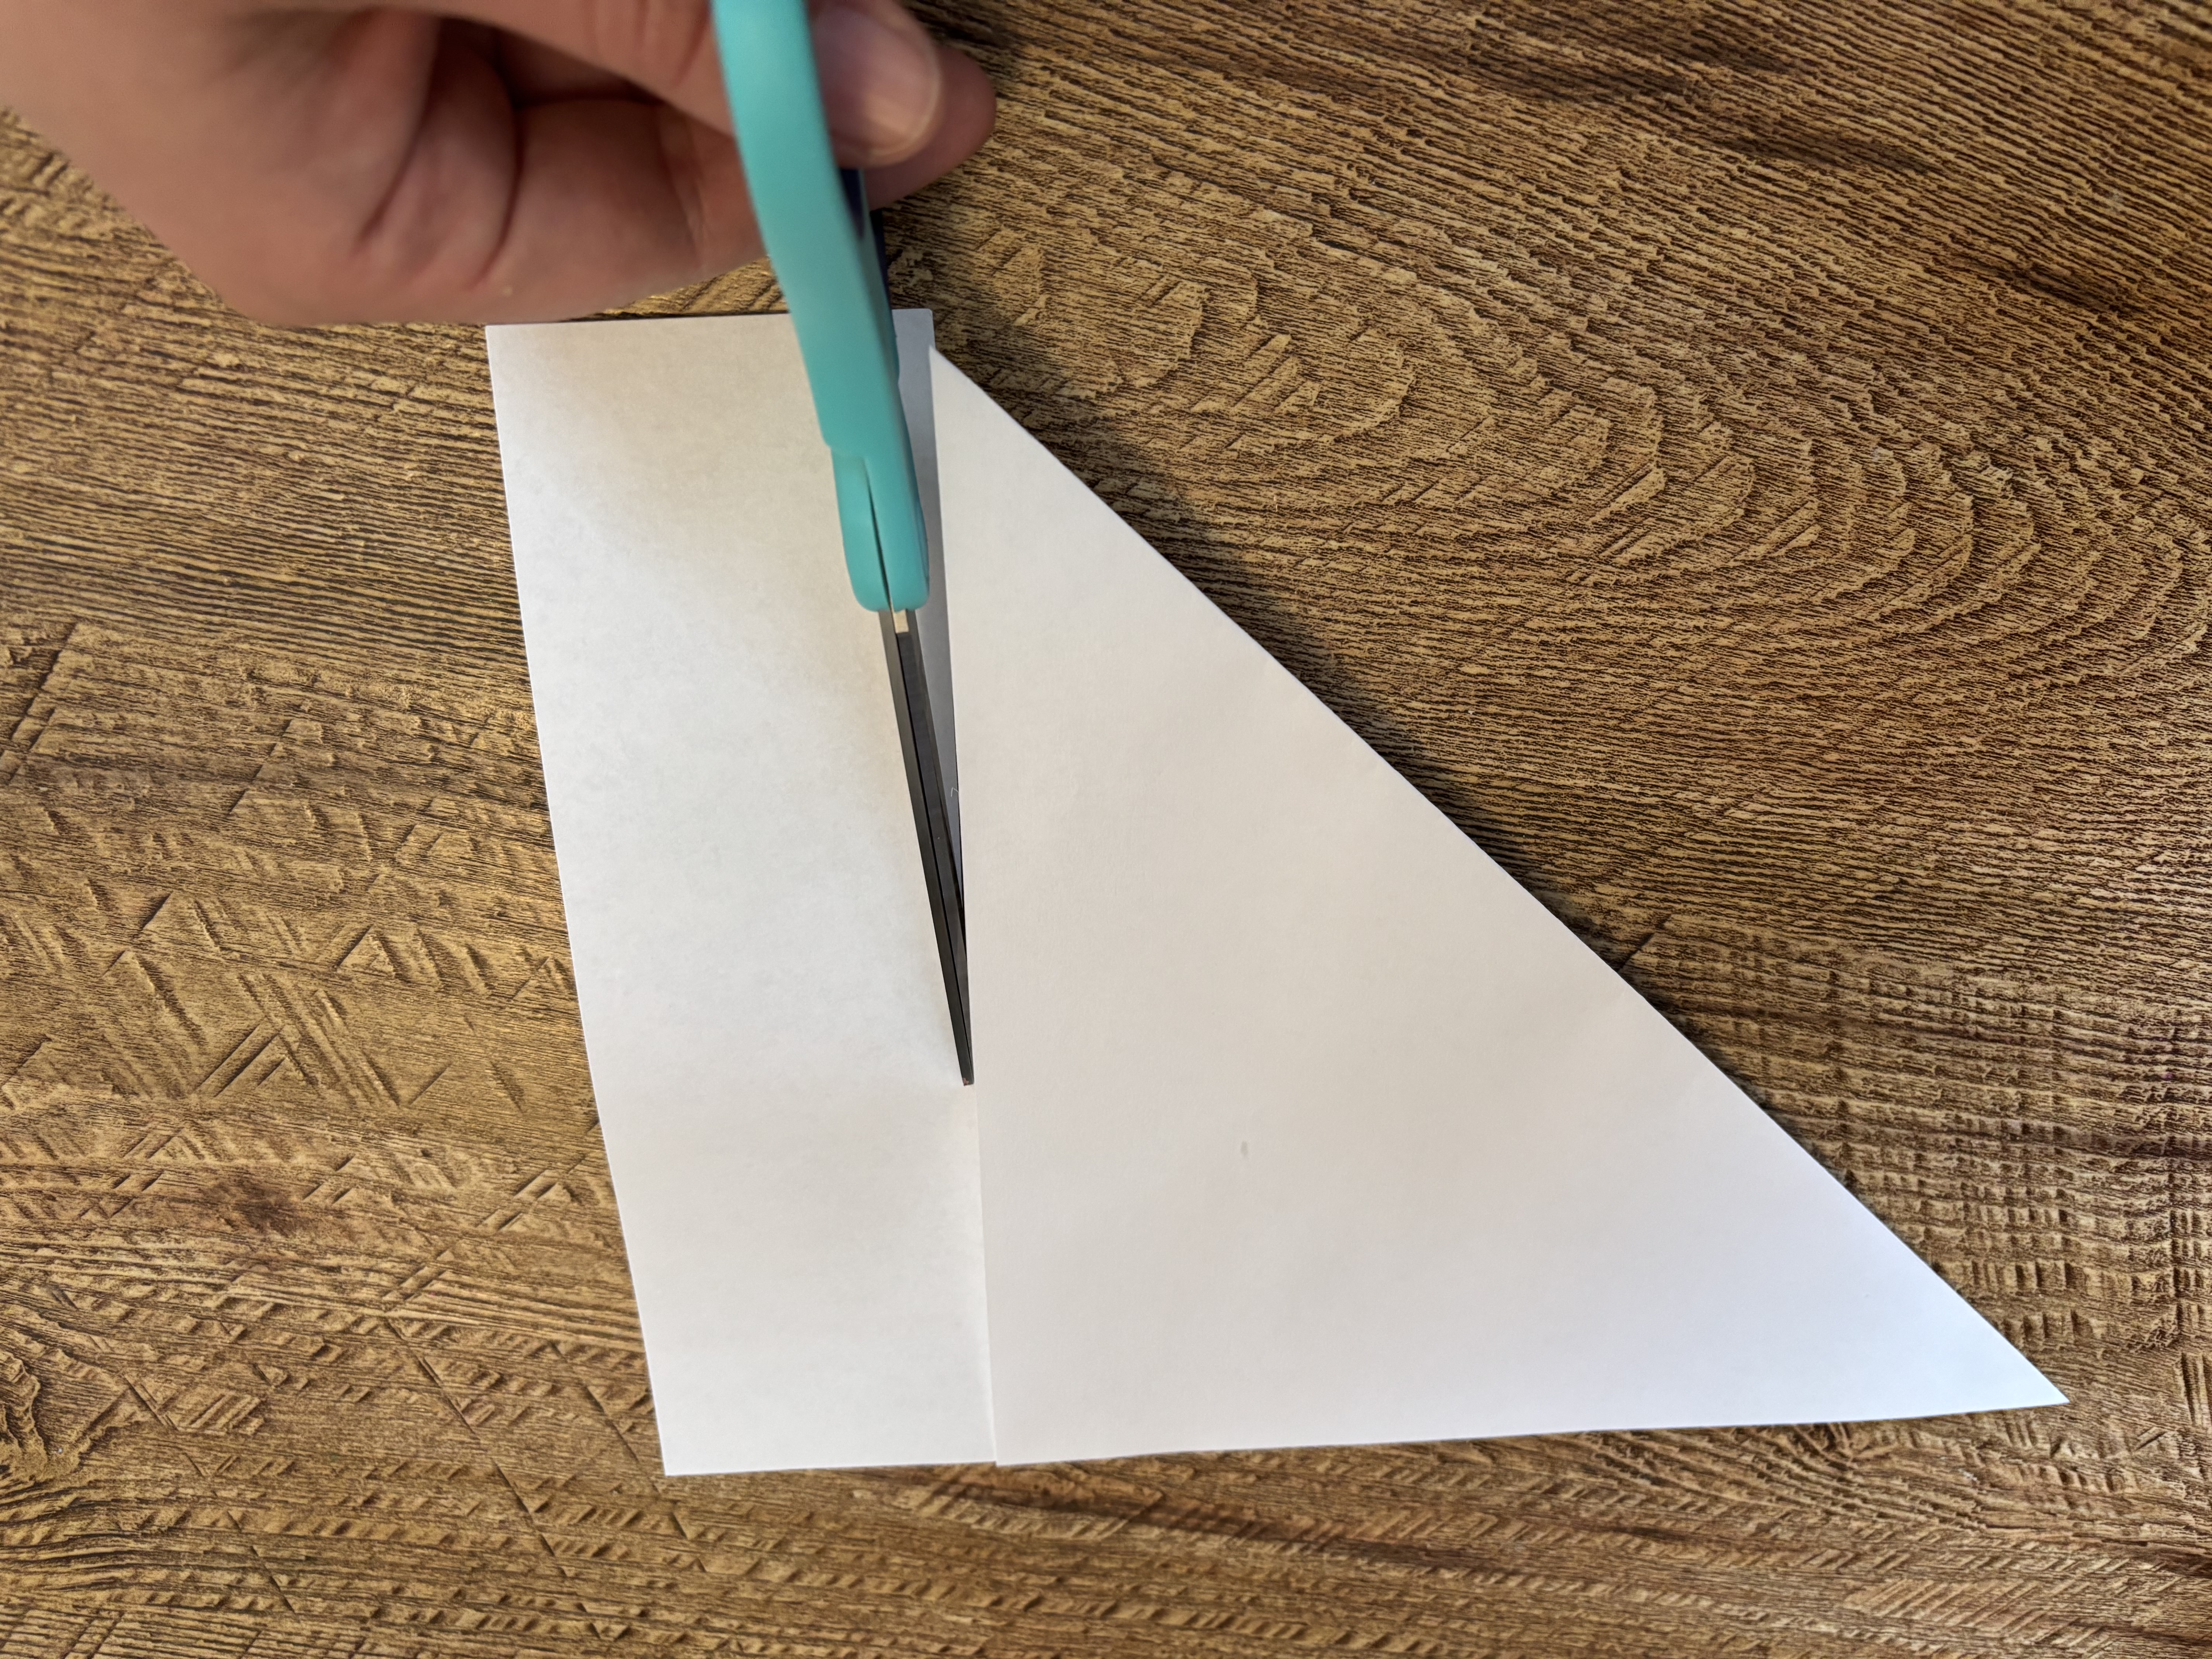
    Step 2: Trim the excess

    Trim the excess paper so that you have a nice, double-layered triangle.

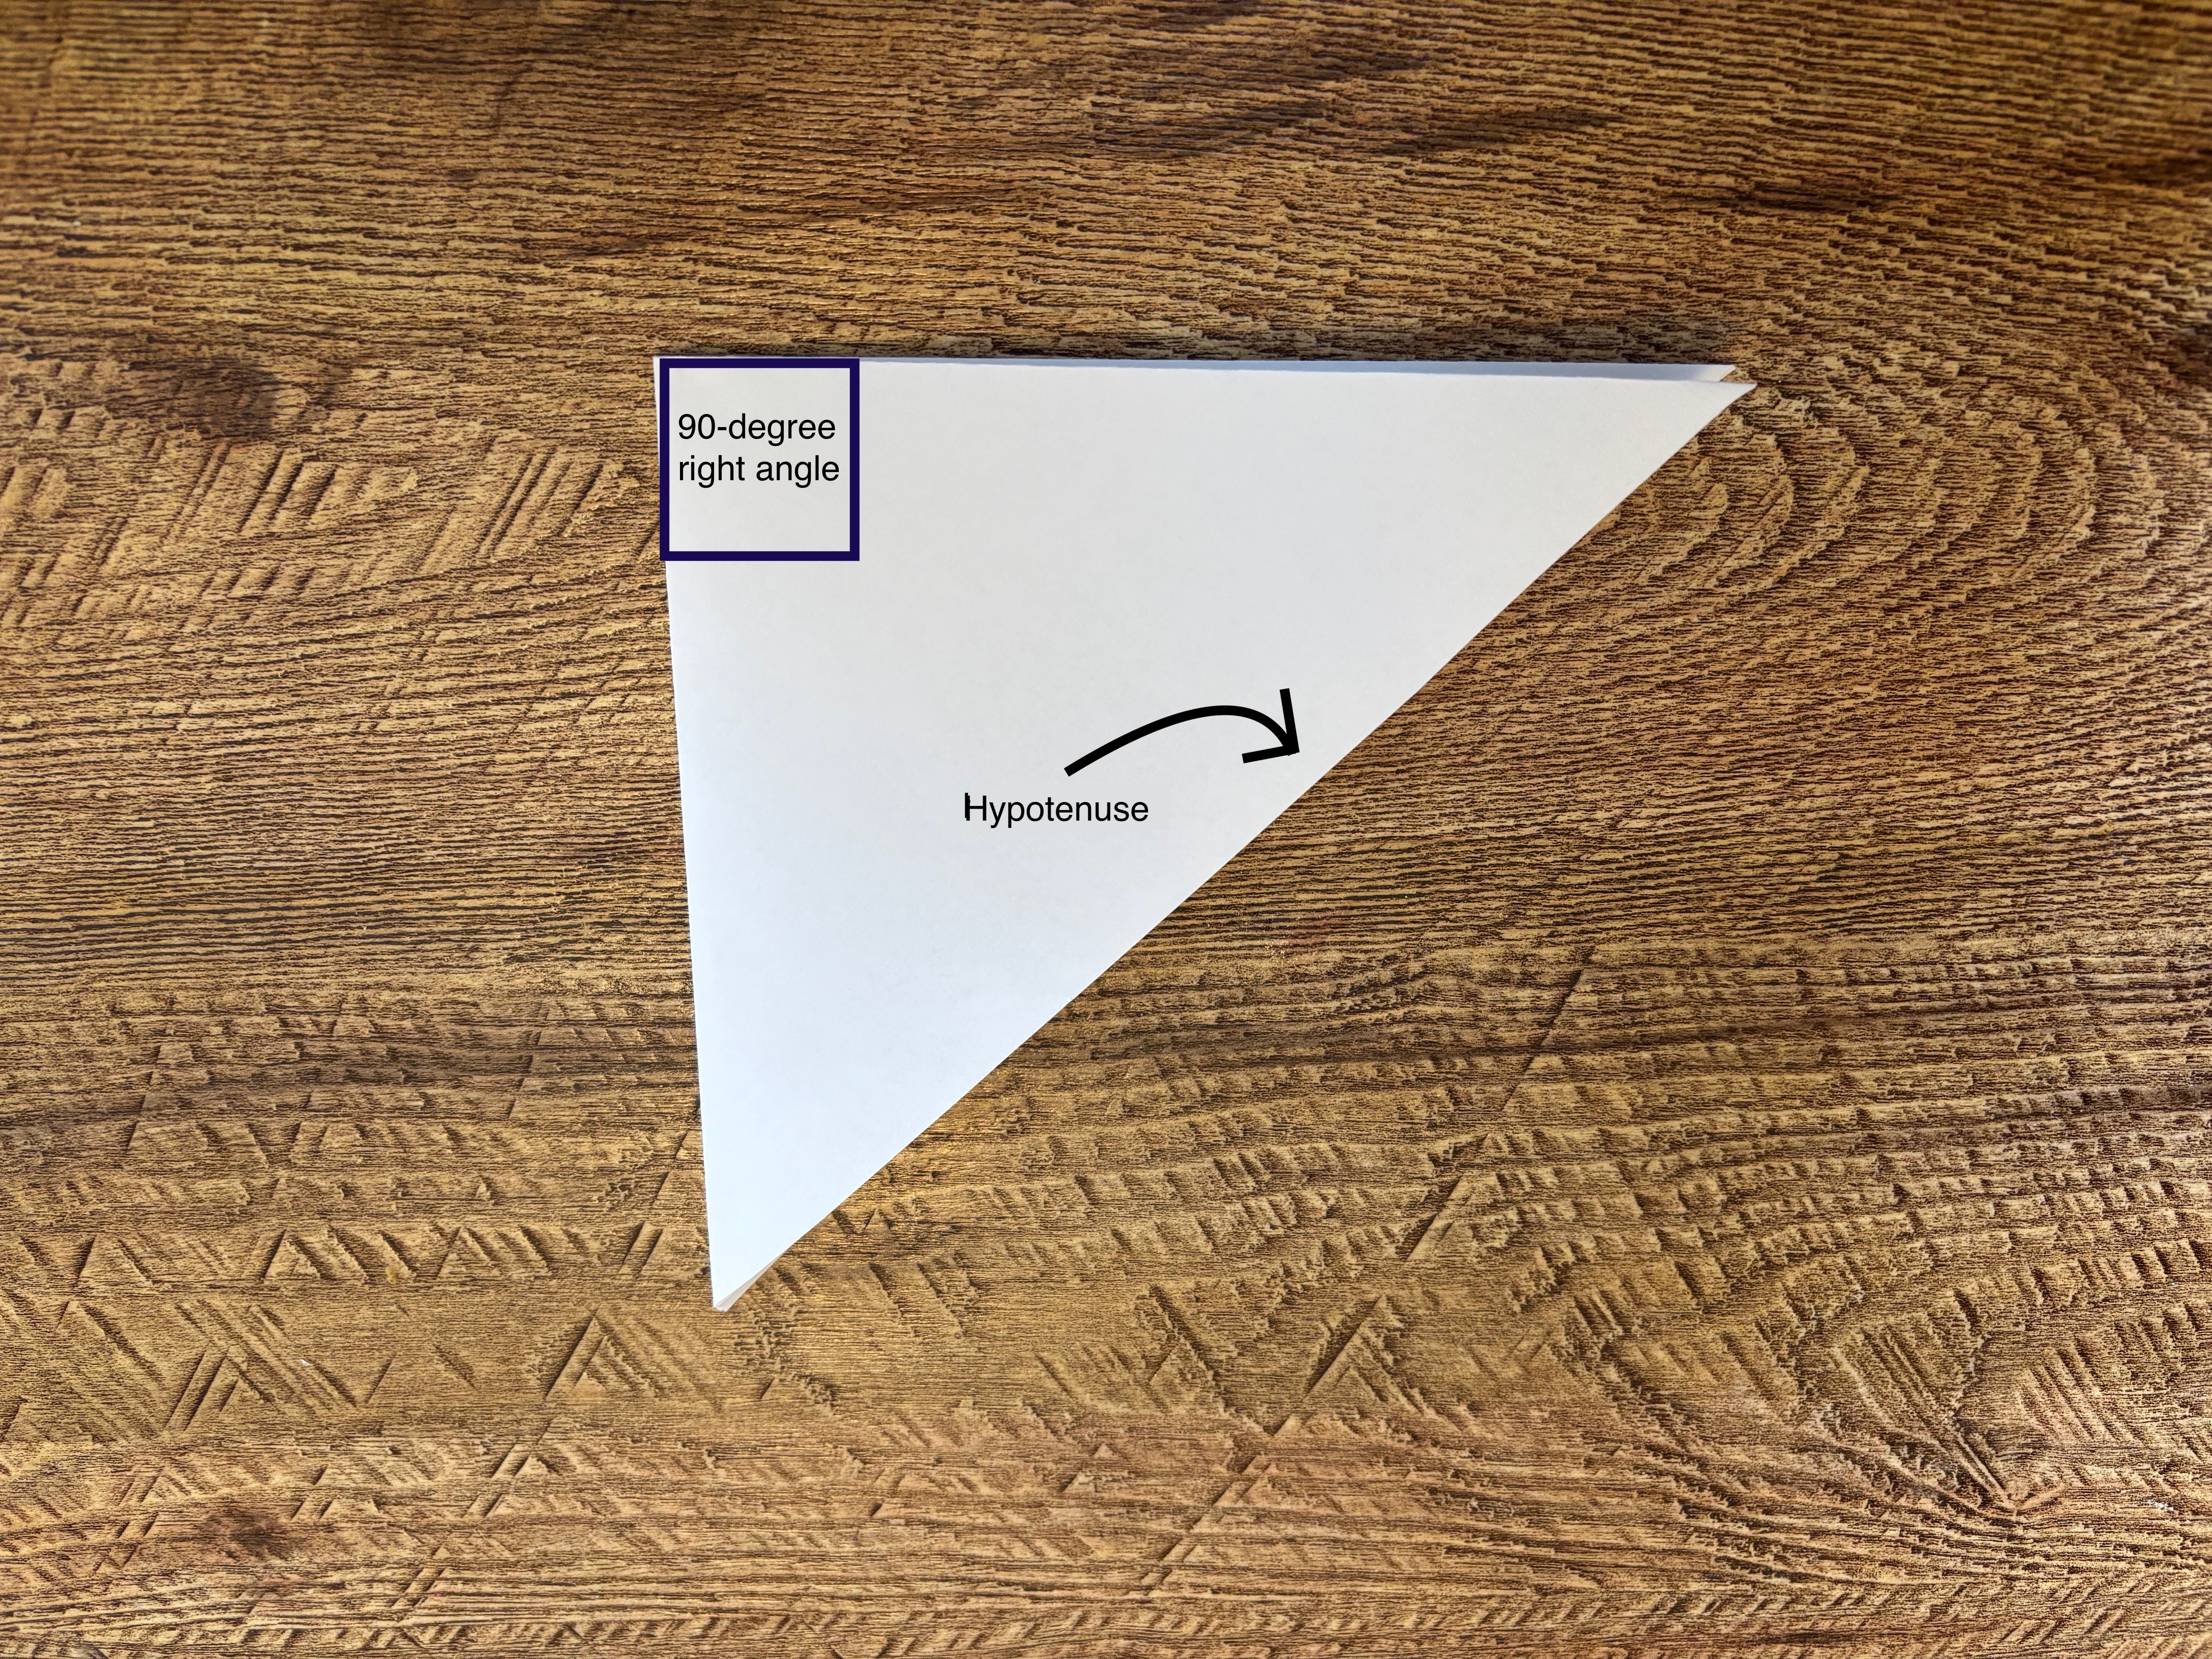
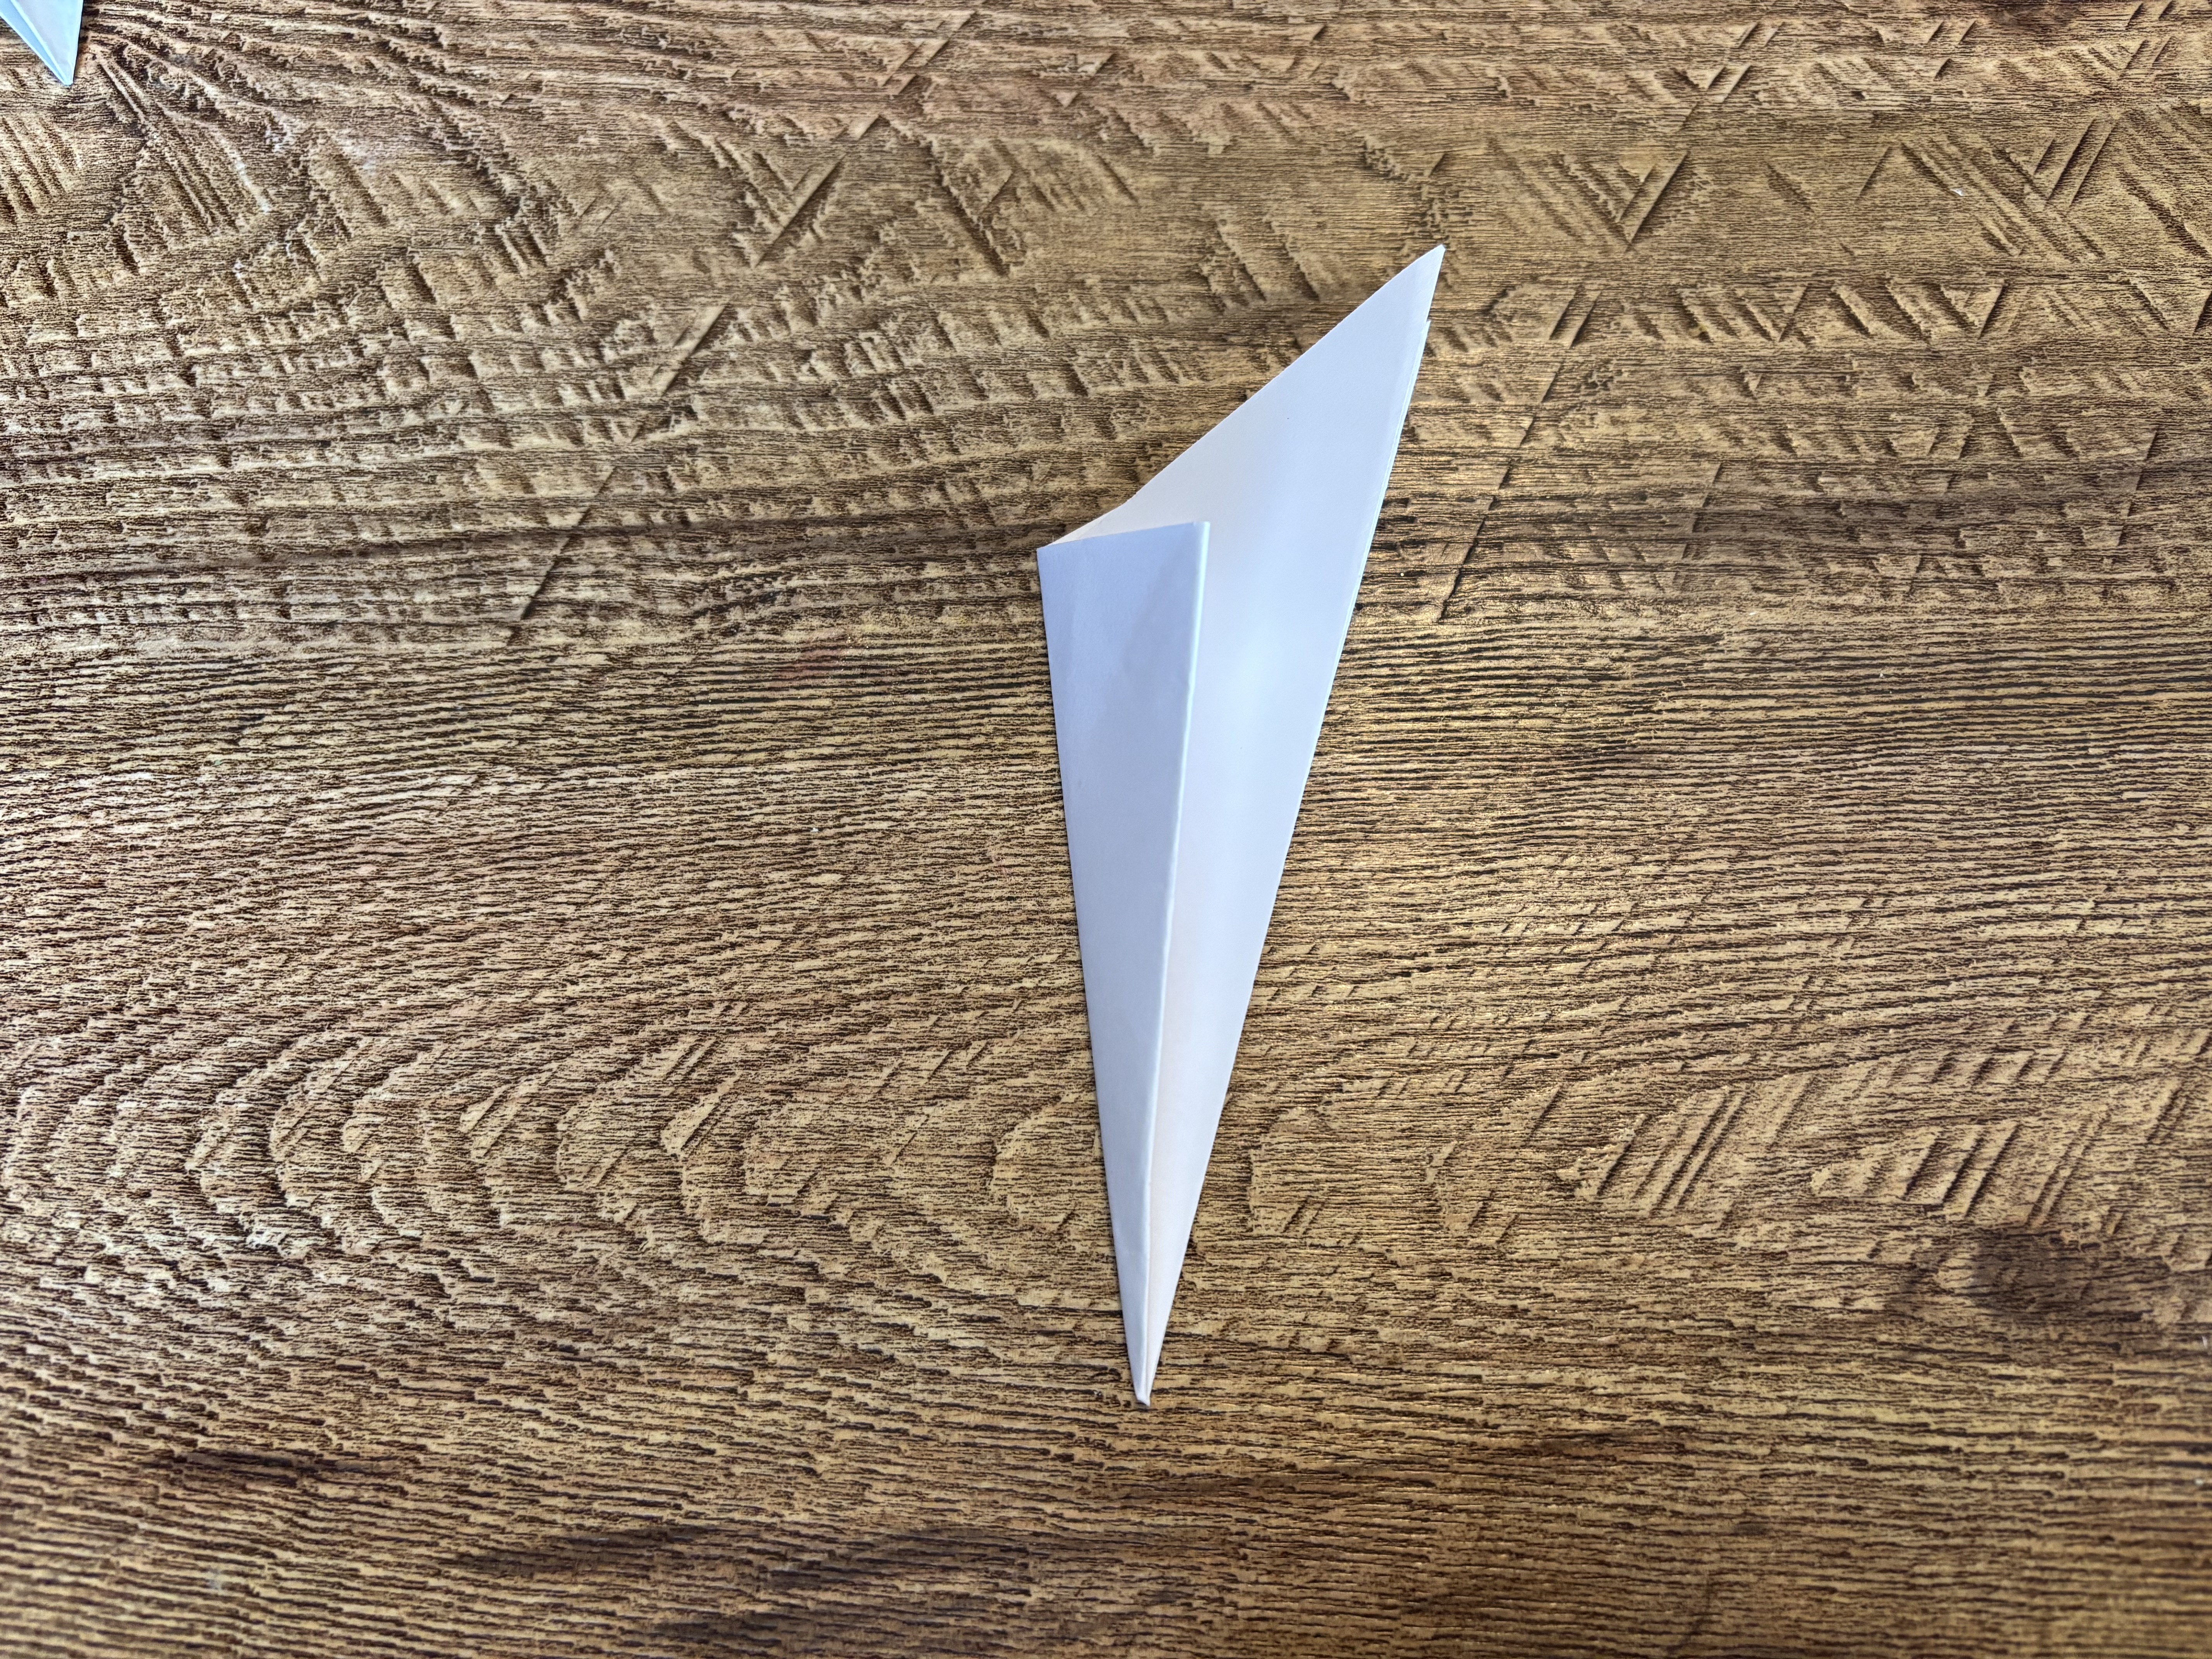
    Step 3: Fold the triangle in half

    Snowflakes in nature are symmetrical and great examples of fractals - patterns that repeat themselves over and over again. To make our own repeating fractals, we're going to fold our paper into smaller and smaller triangles. This makes our design radiate around the center, just like a fractal. Each time we fold our triangle, we are making a new right triangle. A right triangle is a type of triangle where one side is a 90 degree, or right, angle. The side of the triangle opposite the right angle is called the hypotenuse. Whenever we fold our triangle, we want to bring the two corners of the hypotenuse together.

    Step 4: Fold the triangle in half again

    Fold the paper into a right triangle a third time.

    Step 5: Fold one last time

    For our fourth and final fold, we are going to fold the right angle to meet the hypotenuse. This will make kind of an odd shape, but give us one central point on the bottom that will be the middle of our snow flake.

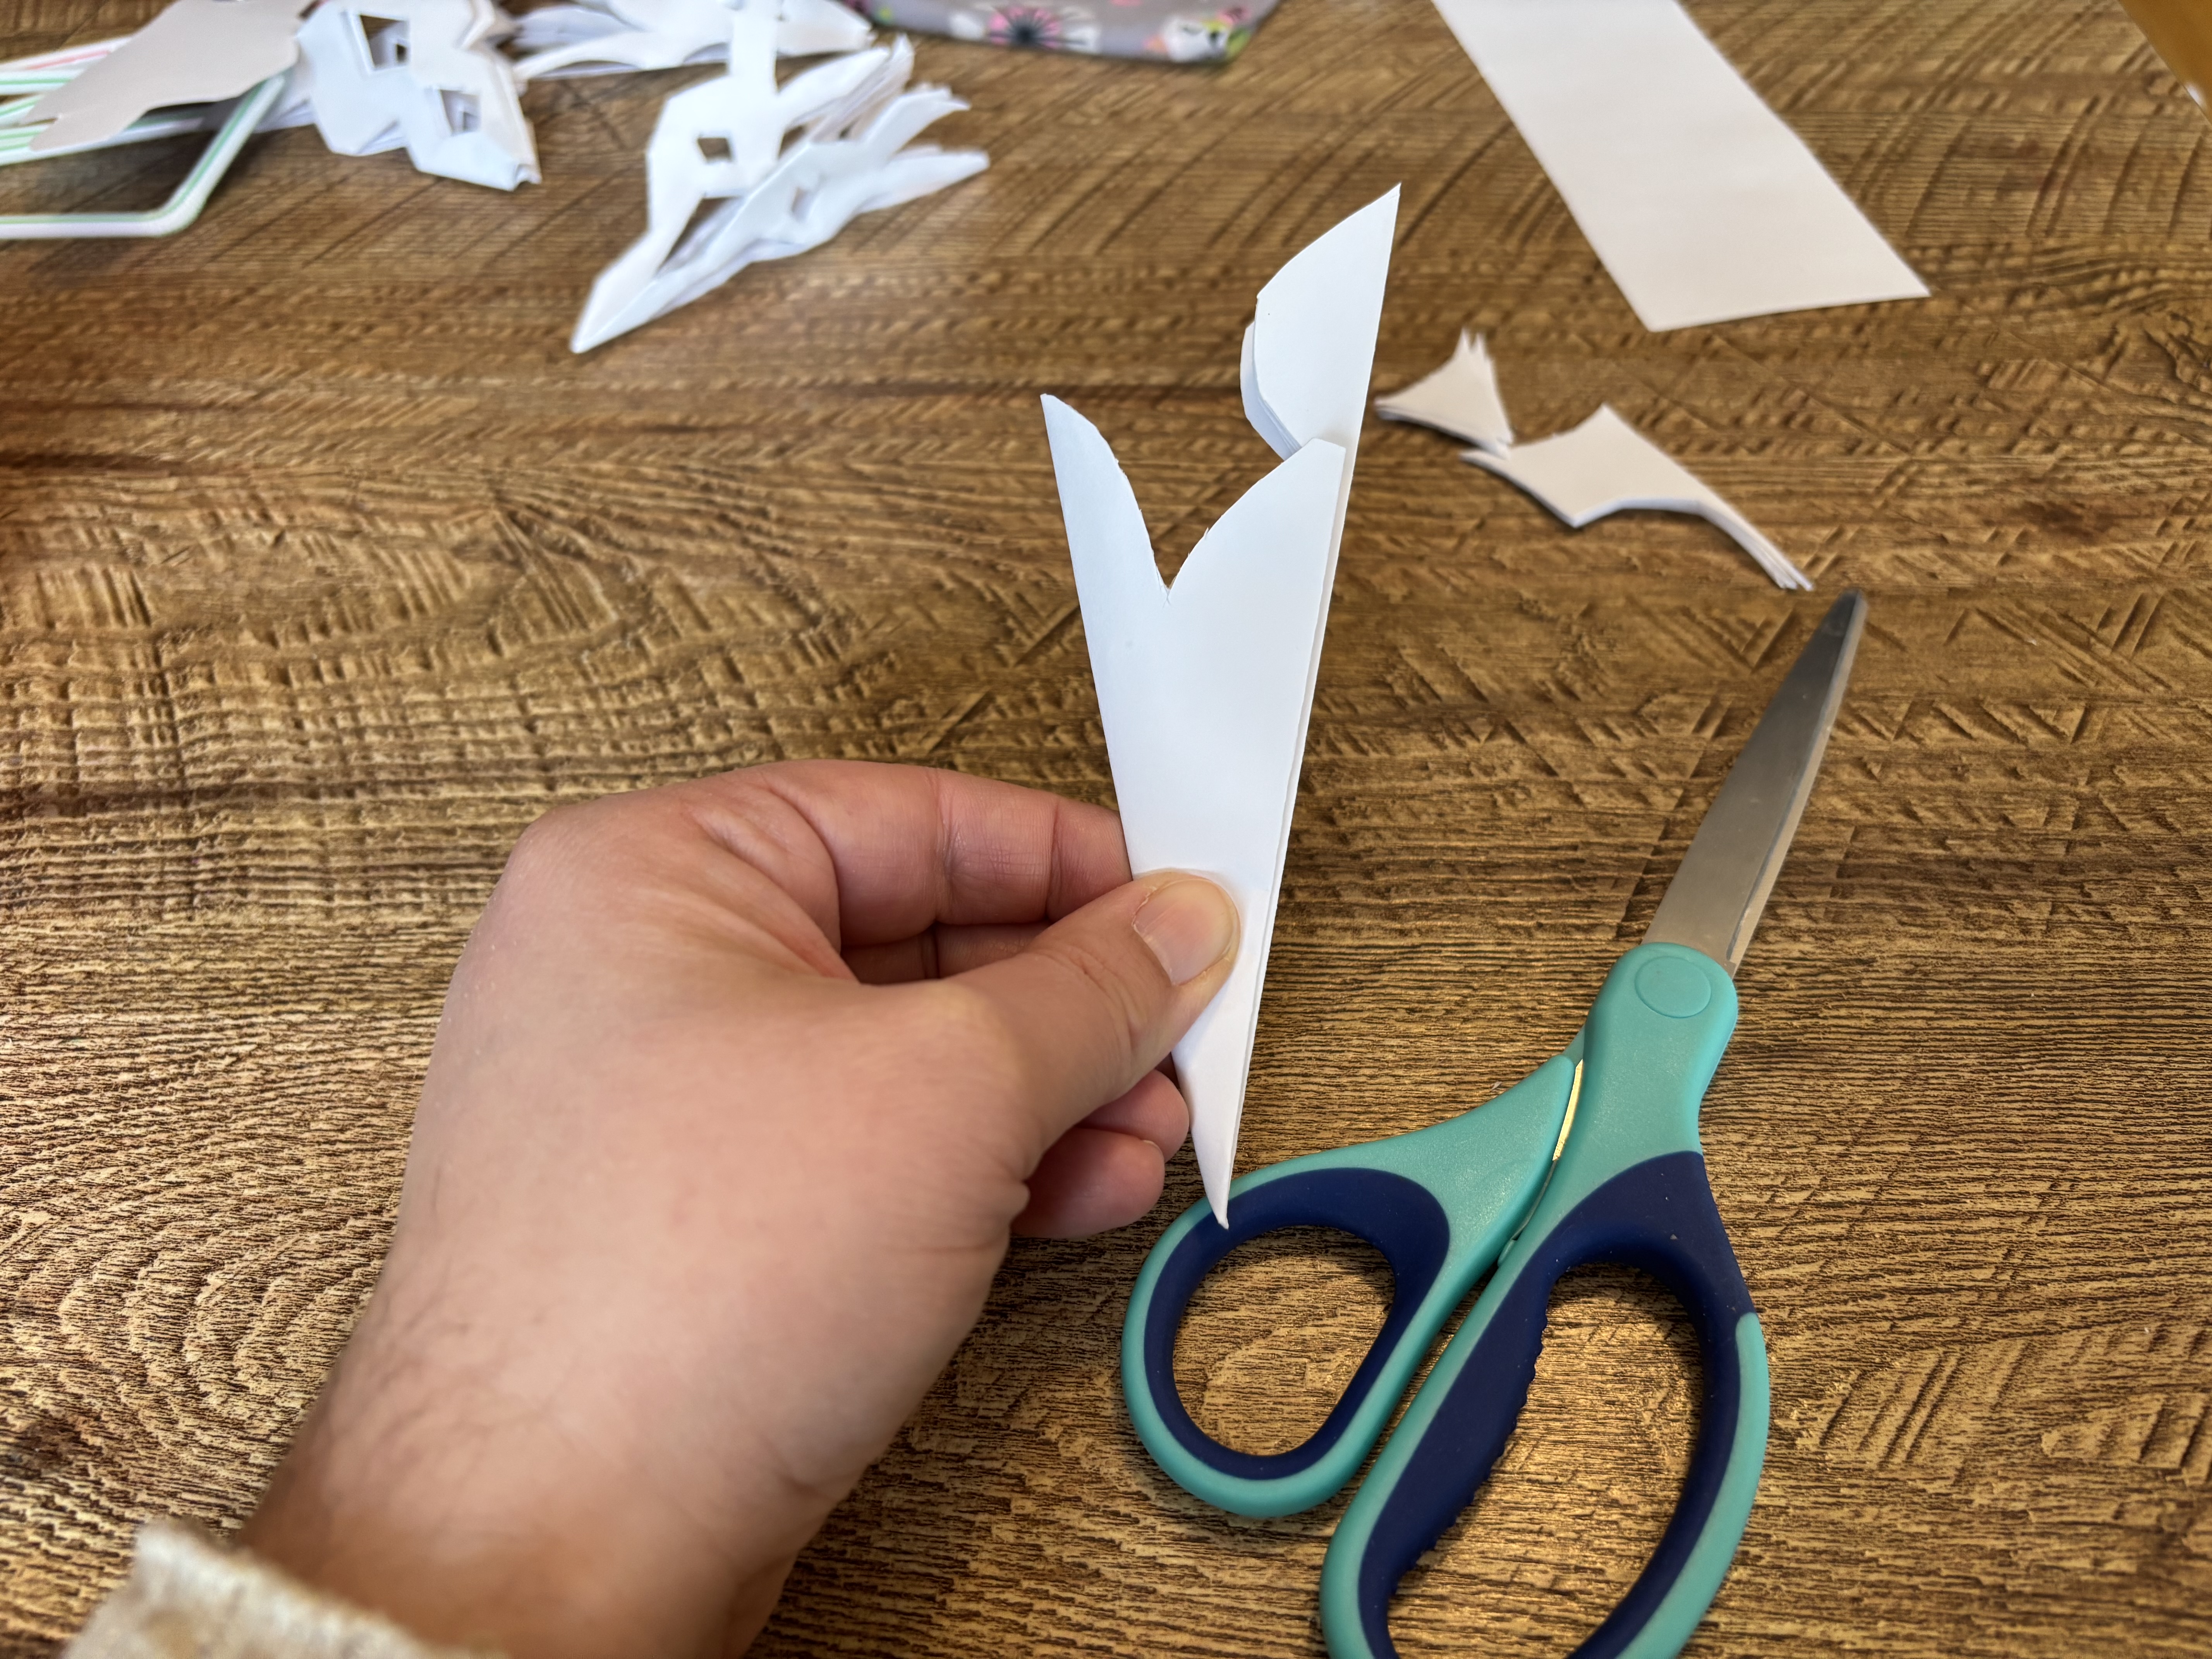
    Step 6: Cut the center of the triangle

    Our favorite snowflakes all started when we started at the top of our triangle and cut down into the center of it. Our best snowflakes made a half circle or diamond that ended at the top of the section that wasn't folded, then cut even more out below that. This helps to create the long, elegant points of the snowflake.

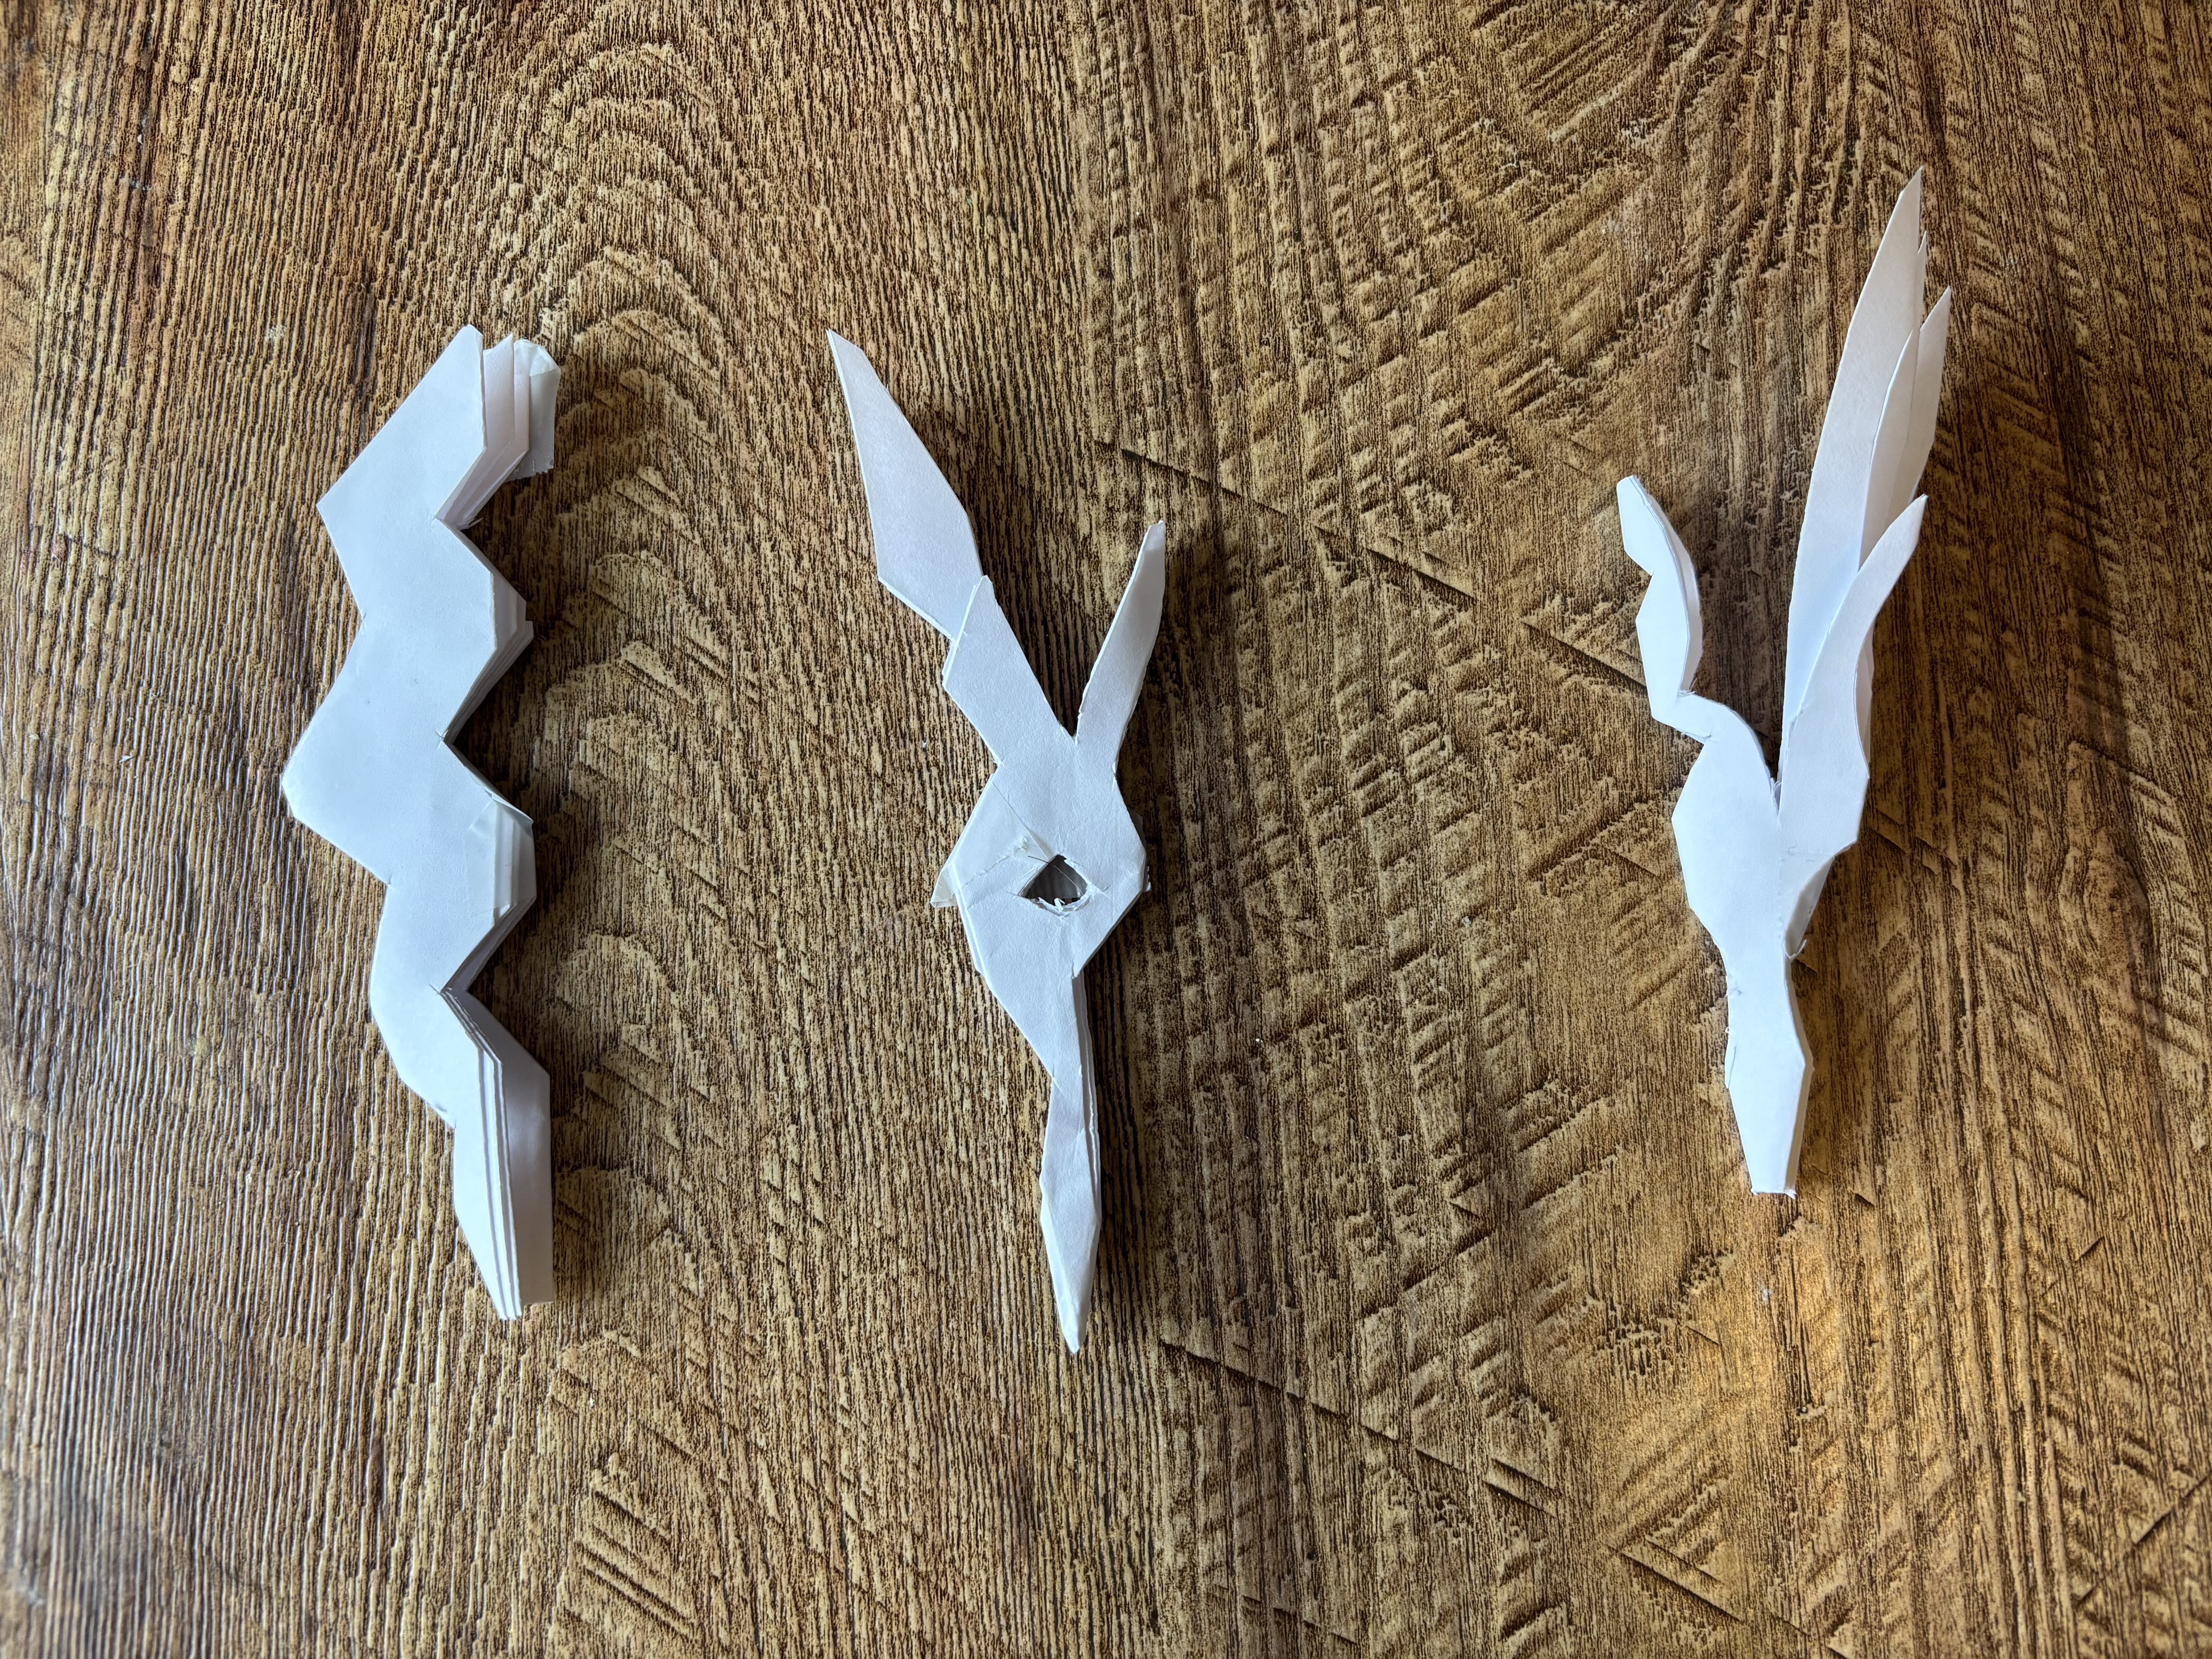
    Step 7: Cut from the edges

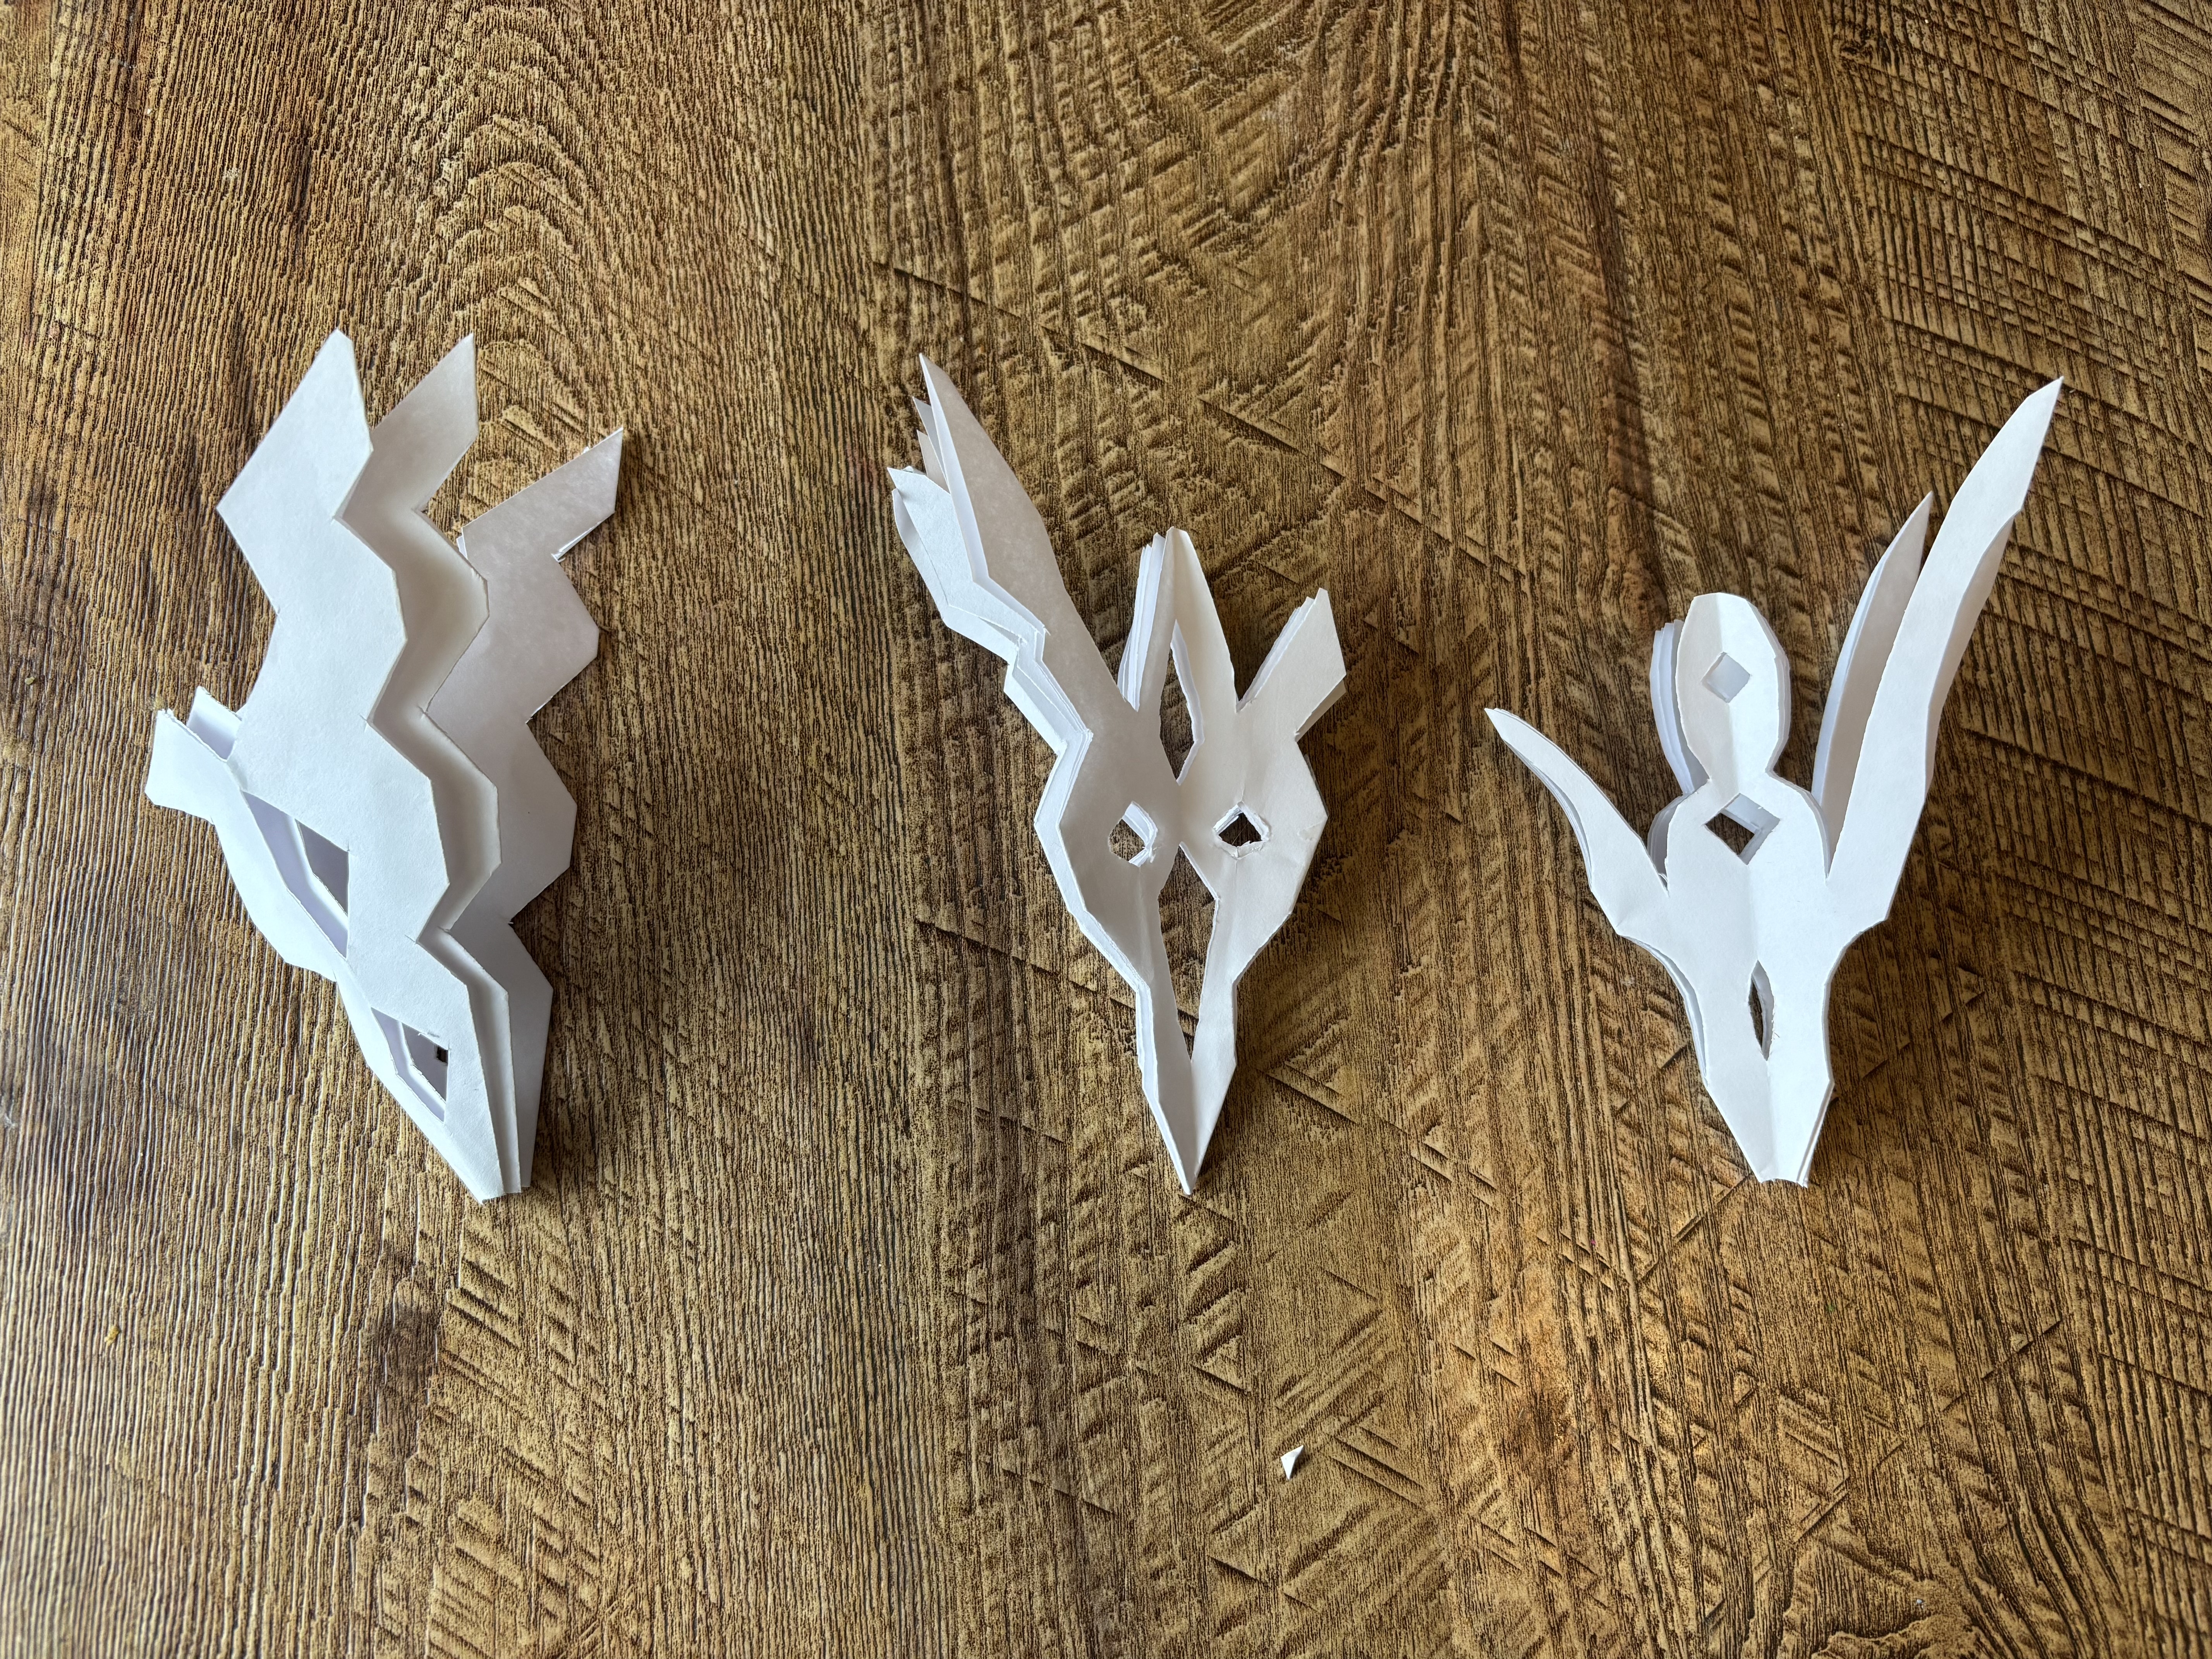
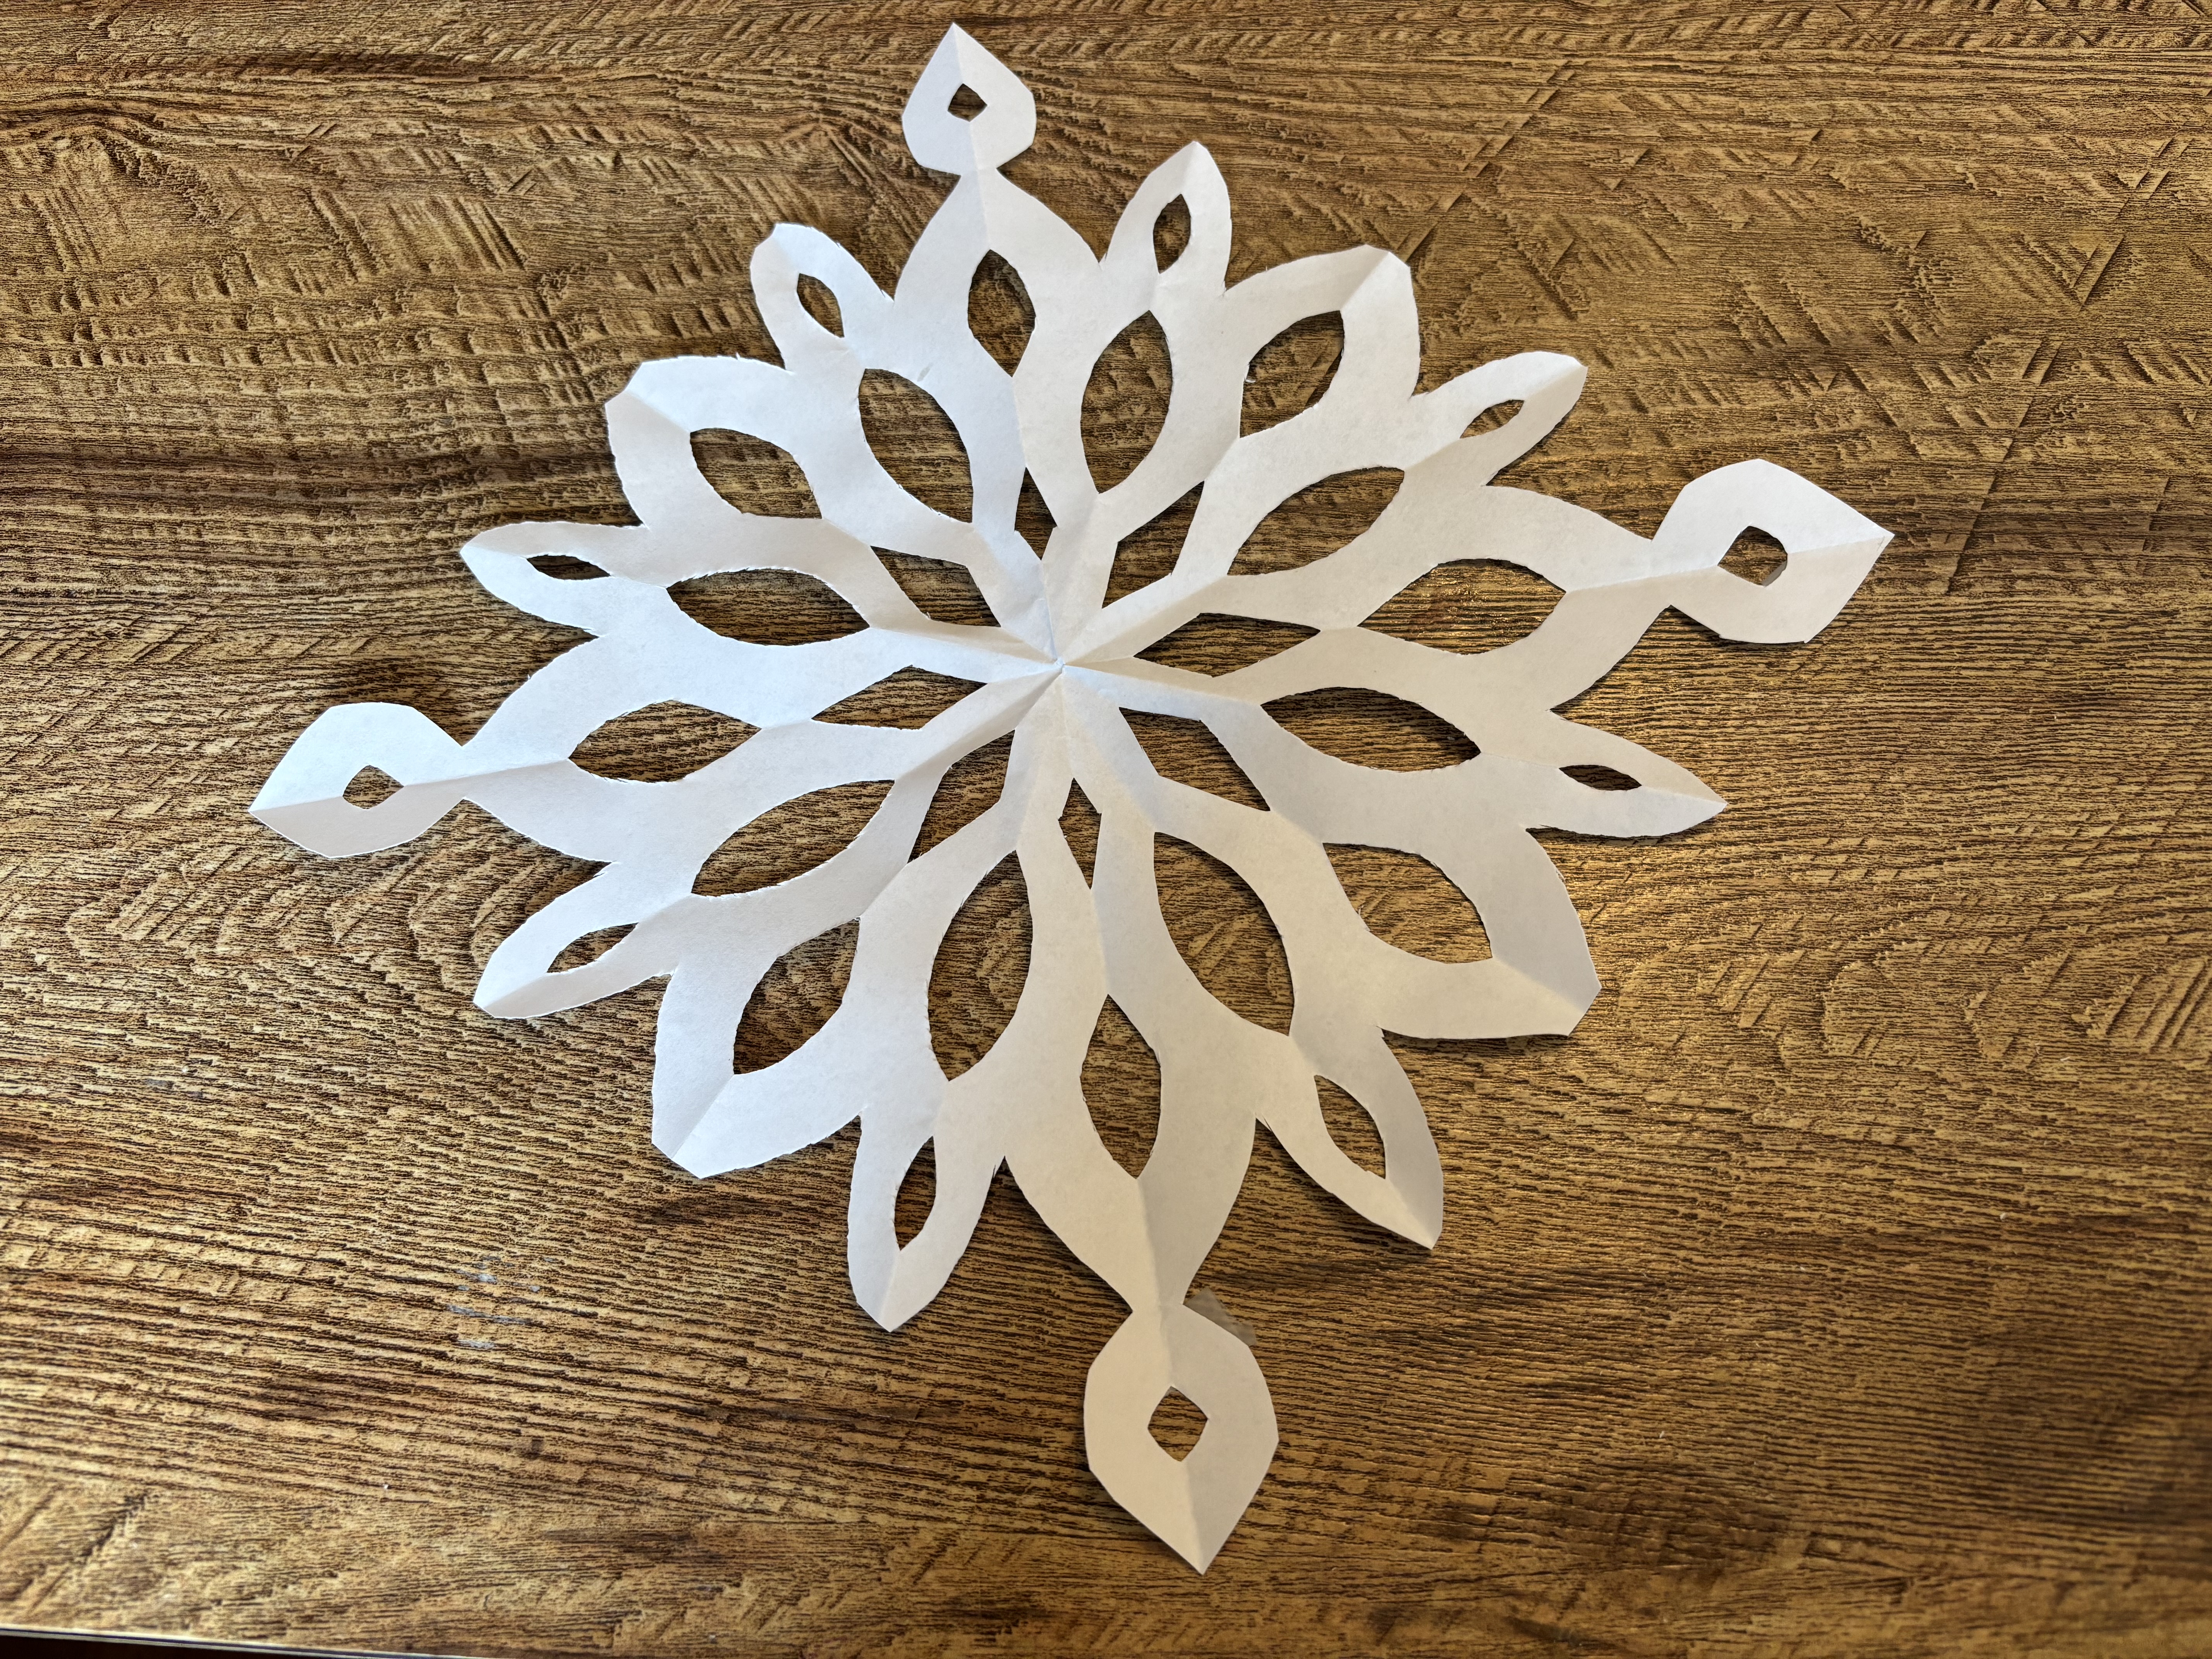
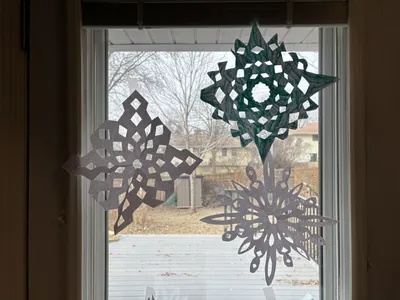
    Once you cut from the top down into the center, now you can cut triangles, diamonds, and semi circles from the edges. Make sure to leave enough of the folded edge to keep the snowflake together. If you cut off all of a folded edge you'll end up with a snowflake puzzle instead of a pretty snowflake to unfold. The picture shows a few different designs we made.

    Step 8: Pro tip: Unfold slightly and keep cutting

    Sometimes, one of your smaller points just doesn't look quite right. It can be easier to shape them if you unfold your snowflake one time, then cut designs out of the thinner paper. Here's what our same designs look like when unfolded one time.

    Step 9: Unfold and display

    Carefully unfold your snowflake. It will be delicate! Then, display it proudly. We like to tape ours to the window or hang them from some string from the ceiling with a T-pin or thumb tack. You can also color them, decorate them with glitter, or leave them plain.
  3. 3

    Clean up

    Put things away so your space is tidy for next time.

    Tidy up our space

    Put away our supplies

    Check off each supply when it is put away — and any clean-up tips underneath are done too. You might find a fun surprise!

    • A cartoon of Paper
      Where they belong:
    • A cartoon of Scissors
      Where they belong:

    Update what we have left

    Did we run out of anything while making this project? Update our supply cupboard so that we know exactly what we have for next time.

    This project could unlock 0 creative buddies. Sign in to unlock them.

  4. 4

    Save

    Your creative buddy says:
    "Way to stick with it!"

    Create a free account to save your digital masterpiece to the Art Gallery.

Use what’s already at home

Snap a junk-drawer photo and GlueStick finds projects you can start in minutes — no store trip, less expense, more creative afternoons.

+ 350 more
Supply Snap

About the Author