About This Project

A 15–30 minutes craft for ages 6–10, using supplies you likely already have — Yarn, Hole Punches, and Tape.

GlueStick supports kids from setup to cleanup. After they choose a project, we guide them through gathering the supplies, making it, and cleaning up when they're done. We'll even help them share it safely with trusted family and friends.

Ad-free and kid-safe library — designed by a mom who wants kids to explore and create independently.

Project Tags
  1. 1

    Find Supplies

    Do you have everything you need?
    Create a free GlueStick account to track supplies and see if you have what you need at a glance. Leave your kids tips about where supplies are stored in your household so they can set up and clean up their creative spaces independently.
    00:00
    A cartoon of Yarn
    Unknown cupboard quantity You have: unknown
    A cartoon of Hole Punches
    Unknown cupboard quantity You have: unknown
    A cartoon of Tape
    Unknown cupboard quantity You have: unknown
    A cartoon of Sharpie Markers
    Unknown cupboard quantity You have: unknown
    A cartoon of Scissors
    Unknown cupboard quantity You have: unknown
    A cartoon of Disposable Plates
    Unknown cupboard quantity You have: unknown
    A cartoon of Construction Paper
    Unknown cupboard quantity You have: unknown
    A cartoon of Printer
    Unknown cupboard quantity You have: unknown
    A cartoon of Paper
    Unknown cupboard quantity You have: unknown
    A cartoon of Pipe Cleaners
    Unknown cupboard quantity You have: unknown
    A cartoon of Glue Sticks
    Unknown cupboard quantity You have: unknown
  2. 2

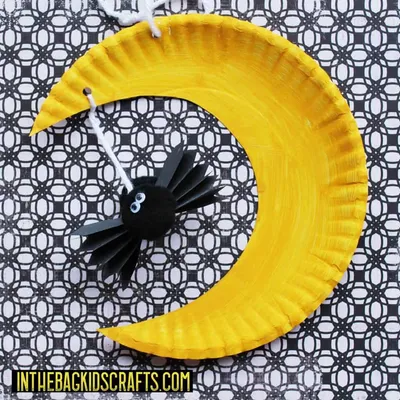
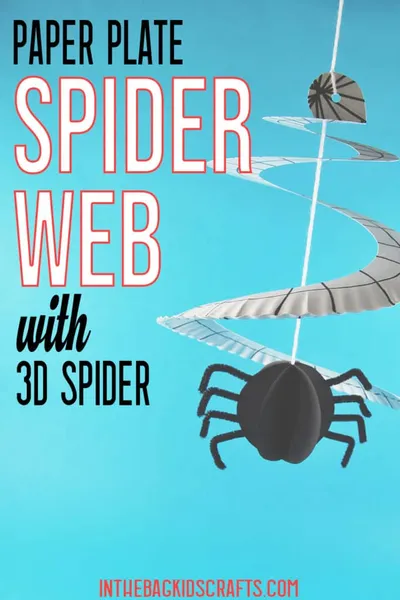
    Make Spider Web Mobile Craft

    Your creative buddy says:
    "Let's stick together and make this one!"

    Step 1: Draw lines on your paper plate.

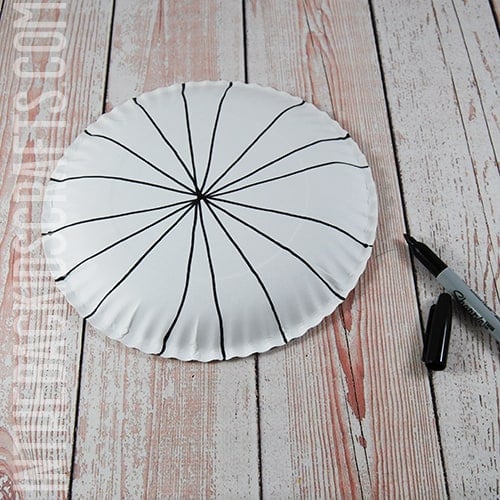
    On the bottom of your plate, use your black marker to draw lines that divide the plate into wedges, like a pizza. Then, flip the plate over and draw lines in the same way on the front side of the plate.

    Step 2: Cut your plate into a spiral.

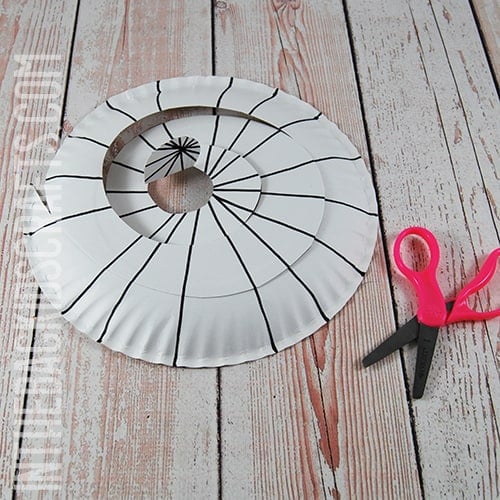
    Cut the plate into a spiral shape. You can ask a grownup for help cutting or drawing a spiral for you to follow. Make the sections about 1 1/2 inches wide. Cut all the way to the center and then fold the very center up. You can also draw one or two more spiral lines around the plate on each side to make your spider web look even cooler.

    Step 3: Cut out spider body circles.

    May need grown-up help
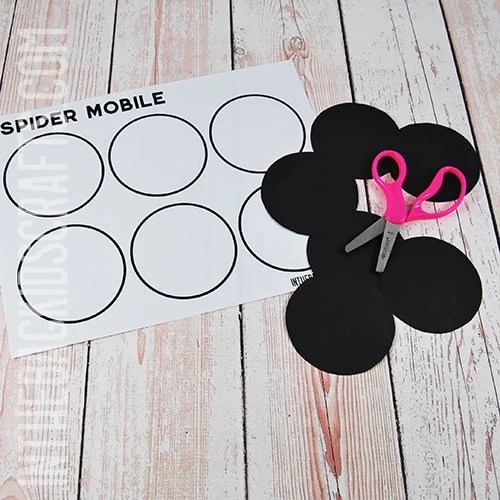
    Print the spider craft template. Use the template to cut out six circles from black paper. These will be for your spider's body. You can choose any color paper you like!
    Step 4: Fold and glue spider body parts.

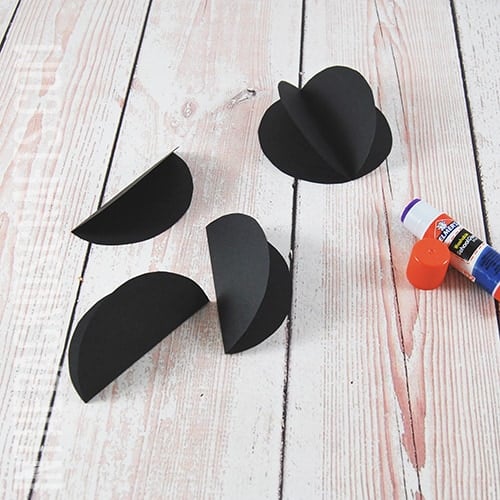
    Fold each of the six paper circles in half. Use your glue stick to attach two of the half circles together. Then, add a third half circle to them. Do the same thing with the other three half circles. Remember, do not glue the entire circle together just yet!

    Step 5: Attach pipe cleaner legs and yarn.

    SHARP! Grown-up required
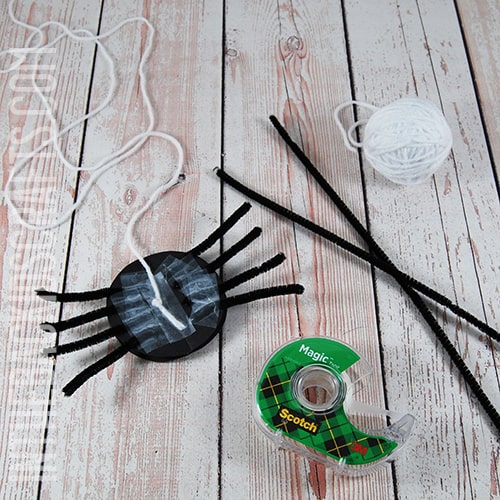
    Ask a grown-up for help to cut two black pipe cleaners into four pieces each. Take one set of the three connected circles and lay it flat. Use tape to attach four of the pipe cleaner pieces to each side to make your spider's legs. Next, cut a piece of white yarn about one yard long and tie a knot at one end. Place the knotted end in the center of your circle and tape it down.

    Step 6: Glue the spider body together and shape legs.

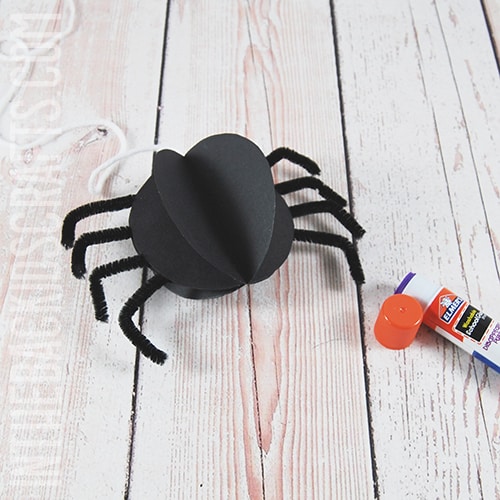
    Now, take the other three connected circles and place them on top of the section where you added the legs. Put a lot of glue on them and press firmly to connect the two halves of your spider. Hold them together until the glue is dry. Bend and shape your spider's legs.

    Step 7: Attach your spider to the web.

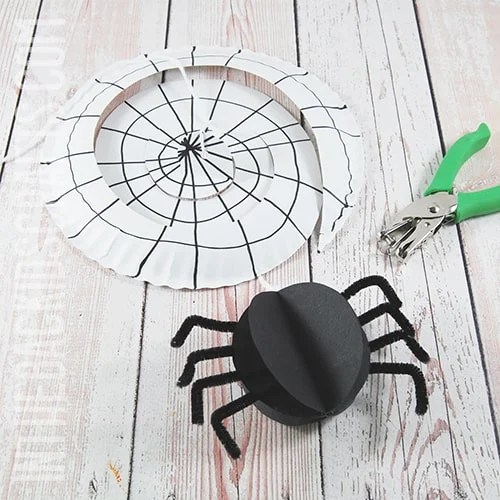
    It's time to put your spider in the middle of its web! Use the hole punch to make a hole in the very center of the paper plate, where you folded it up. Thread the end of the yarn through the hole. Hold up your spider web craft and let the spider hang down. You can choose how long you want the spider to hang. Tie a knot in the yarn to keep it at that length. The extra yarn at the top can be used to hang your spider web mobile!
  3. 3

    Clean up

    Put things away so your space is tidy for next time.

    Tidy up our space

    Put away our supplies

    Check off each supply when it is put away — and any clean-up tips underneath are done too. You might find a fun surprise!

    • A cartoon of Yarn
      Where they belong:
    • A cartoon of Tape
      Where they belong:
    • A cartoon of Sharpie Markers
      Where they belong:
    • A cartoon of Disposable Plates
      Where they belong:
      • — Don't forget! Disposable plates may be compostable or recyclable! Do your part to keep trash out of the landfill.
    • A cartoon of Construction Paper
      Where they belong:
    • A cartoon of Paper
      Where they belong:
    • A cartoon of Pipe Cleaners
      Where they belong:
    • A cartoon of Glue Sticks
      Where they belong:
      • — Don't forget! Put cap on glue sticks tightly.
    • A cartoon of Hole Punches
      Where they belong:
    • A cartoon of Scissors
      Where they belong:
    • A cartoon of Printer
      Where they belong:

    Update what we have left

    Did we run out of anything while making this project? Update our supply cupboard so that we know exactly what we have for next time.

    This project could unlock 3 creative buddies. Sign in to unlock them.

  4. 4

    Save

    Your creative buddy says:
    "What a fabulous project!"

    Create a free account to save your digital masterpiece to the Art Gallery.

Use what’s already at home

Snap a junk-drawer photo and GlueStick finds projects you can start in minutes — no store trip, less expense, more creative afternoons.

+ 350 more
Supply Snap

About the Author