About This Project

A 20–40 minutes craft for ages 3–10, using supplies you likely already have — Hole Punches, Stickers, and Scissors.

GlueStick supports kids from setup to cleanup. After they choose a project, we guide them through gathering the supplies, making it, and cleaning up when they're done. We'll even help them share it safely with trusted family and friends.

Ad-free and kid-safe library — designed by a mom who wants kids to explore and create independently.

Project Tags
  1. 1

    Find Supplies

    Do you have everything you need?
    Create a free GlueStick account to track supplies and see if you have what you need at a glance. Leave your kids tips about where supplies are stored in your household so they can set up and clean up their creative spaces independently.

    00:00
    A cartoon of Hole Punches
    Unknown cupboard quantity You have: unknown
    A cartoon of Stickers
    Unknown cupboard quantity You have: unknown
    A cartoon of Scissors
    Unknown cupboard quantity You have: unknown
    A cartoon of Hangers
    Unknown cupboard quantity You have: unknown
    A cartoon of Washi Tape
    Unknown cupboard quantity You have: unknown
    A cartoon of Ribbons
    Unknown cupboard quantity You have: unknown
    A cartoon of Paper
    Unknown cupboard quantity You have: unknown
  2. 2

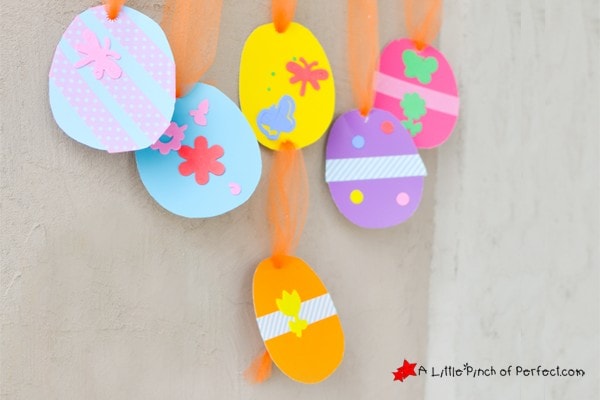
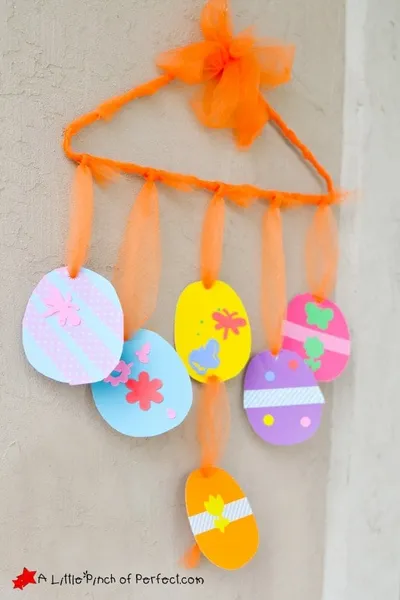
    Make Washi Tape Easter Egg Kid Craft

    Your creative buddy says:
    "Are you as excited to make this as I am?"
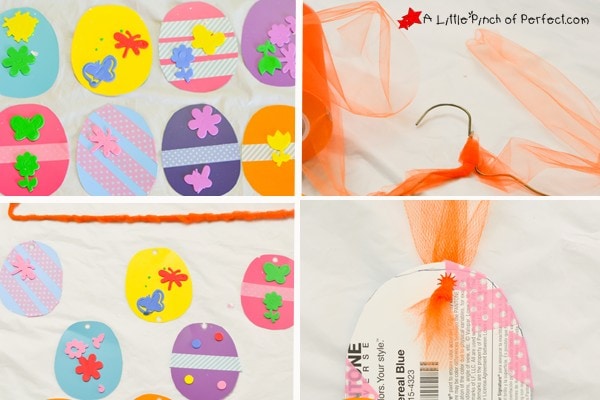
    Step 1: Cut out egg shapes

    Fold your paper in half. Draw half an egg shape on the folded side. Cut it out. Use this as a stencil to make more eggs. You will need 6 eggs.

    Step 2: Decorate the eggs

    Use foam stickers and washi tape to decorate the eggs. Have fun and be creative!

    Step 3: Wrap the hanger

    Wrap the wire hanger with tulle or ribbon. Tie a bow at the top.

    Step 4: Measure and cut tulle

    Decide how far you want the eggs to hang from the hanger. Cut pieces of tulle or ribbon to this length. Make sure to add a little extra length so you can tie a knot.

    Step 5: Punch holes

    Punch a hole at the top of each egg. If you want to hang eggs below other eggs, punch a hole at the bottom of those eggs too.

    Step 6: Tie eggs to the hanger

    Tie the eggs to the hanger using the tulle. Now you have a beautiful Easter decoration!
  3. 3

    Clean up

    Put things away so your space is tidy for next time.

    Tidy up our space

    Put away our supplies

    Check off each supply when it is put away — and any clean-up tips underneath are done too. You might find a fun surprise!

    • A cartoon of Stickers
      Where they belong:
    • A cartoon of Hangers
      Where they belong:
    • A cartoon of Washi Tape
      Where they belong:
    • A cartoon of Ribbons
      Where they belong:
    • A cartoon of Paper
      Where they belong:
    • A cartoon of Hole Punches
      Where they belong:
    • A cartoon of Scissors
      Where they belong:

    Update what we have left

    Did we run out of anything while making this project? Update our supply cupboard so that we know exactly what we have for next time.

    This project could unlock 0 creative buddies. Sign in to unlock them.

  4. 4

    Save

    Your creative buddy says:
    "What a fabulous project!"

    Create a free account to save your digital masterpiece to the Art Gallery.

Use what’s already at home

Snap a junk-drawer photo and GlueStick finds projects you can start in minutes — no store trip, less expense, more creative afternoons.

+ 350 more
Supply Snap

About the Author