About This Project

A 20–45 minutes craft for ages 5–12, using supplies you likely already have — Toothpicks, Scissors, and Nail Polish.

GlueStick supports kids from setup to cleanup. After they choose a project, we guide them through gathering the supplies, making it, and cleaning up when they're done. We'll even help them share it safely with trusted family and friends.

Ad-free and kid-safe library — designed by a mom who wants kids to explore and create independently.

This project is perfect for:
Project Tags
  1. 1

    Find Supplies

    Do you have everything you need?
    Create a free GlueStick account to track supplies and see if you have what you need at a glance. Leave your kids tips about where supplies are stored in your household so they can set up and clean up their creative spaces independently.
    00:00
    A cartoon of Toothpicks
    Unknown cupboard quantity You have: unknown
    A cartoon of Scissors
    Unknown cupboard quantity You have: unknown
    A cartoon of Nail Polish
    Unknown cupboard quantity You have: unknown
    A cartoon of Wax Paper
    Unknown cupboard quantity You have: unknown
    A cartoon of Modeling Clay
    Unknown cupboard quantity You have: unknown
    A cartoon of Modeling Clay
    Unknown cupboard quantity You have: unknown
    A cartoon of Modeling Clay
    Unknown cupboard quantity You have: unknown
    A cartoon of Rolling Pins
    Unknown cupboard quantity You have: unknown
  2. 2

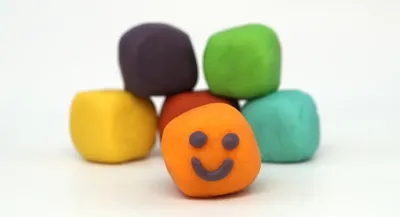
    Make Cosmic Cutie Clay Craft

    Your creative buddy says:
    "Let's stick together and make this one!"

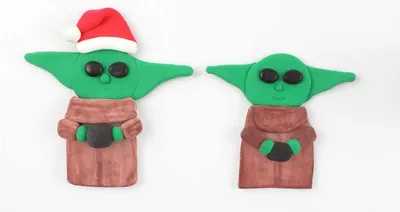
    Step 1: Make the head

    Lay down wax paper on your table to keep the clay from staining your table. Roll the green modeling clay into a ball about the size of a large bouncy ball. Flatten with the rolling pin. Roll another piece of clay into a long rectangle. Use scissors or your toothpick to cut it into two triangles for ears. Use your fingers to press the ears to the back of the head. Smooth the pieces together.

    Step 2: Add the eyes.

    Using your black clay, roll two small balls for eyes. Flatten with your fingers, then, place them on the head.

    Step 3: Add the nose

    Roll a very small green ball for the nose and gently place on the face.

    Step 4: Add the mouth.

    Carve a smile into the face with a toothpick. This can be tricky. You may want to practice on some extra clay first.

    Step 5: Make the robe.

    Roll out a sheet of brown modeling clay using your rolling pin. Use scissors to cut a rectangle from the clay. Fold the top edge down to form the robe's collar.

    Step 6: Make the cup

    Roll a ball of black modeling clay, then flatten the top and bottom to make into a cup. Place the "cup" in the middle of the figure. What do you think your cutie is holding in their cup? Soup? Hot cocoa? Or, get creative and have them hold something totally different!

    Step 7: Add Arms

    Make two balls of green modeling clay for the hands. Place on either side of the bowl. Roll a "snake" of brown modeling clay to form the arms. Cut into two pieces. Place on the figure next to the hands, press into body.

    Step 8: (Optional) Make a hole for hanging

    If you'd like to turn your character into a Christmas ornament, use your toothpick to make a hole near the top of its head. Make sure the hole is large enough for an ornament hook to get a good grip on.

    Step 9: Let dry

    Let your character dry overnight in a warm, dry place.

    Step 10: Make the eyes shiny

    To make the eye shiny, paint clear nail polish on the eyes once your character is fully dry. If you want to turn your project into a fridge magnet instead of an ornament, attach a magnet to the back with hot glue, e6000 or super glue.
  3. 3

    Clean up

    Put things away so your space is tidy for next time.

    Tidy up our space

    Put away our supplies

    Check off each supply when it is put away — and any clean-up tips underneath are done too. You might find a fun surprise!

    • A cartoon of Toothpicks
      Where they belong:
    • A cartoon of Nail Polish
      Where they belong:
      • — Don't forget! Screw the cap on the nail polish tightly.
    • A cartoon of Wax Paper
      Where they belong:
    • A cartoon of Modeling Clay
      Where they belong:
      • — Don't forget! Seal leftover modeling clay in an air-tight container so it does not dry out.
    • A cartoon of Modeling Clay
      Where they belong:
      • — Don't forget! Seal leftover modeling clay in an air-tight container so it does not dry out.
    • A cartoon of Modeling Clay
      Where they belong:
      • — Don't forget! Seal leftover modeling clay in an air-tight container so it does not dry out.
    • A cartoon of Scissors
      Where they belong:
    • A cartoon of Rolling Pins
      Where they belong:

    Update what we have left

    Did we run out of anything while making this project? Update our supply cupboard so that we know exactly what we have for next time.

    This project could unlock 2 creative buddies. Sign in to unlock them.

  4. 4

    Save

    Your creative buddy says:
    "What a fabulous project!"

    Create a free account to save your digital masterpiece to the Art Gallery.

Use what’s already at home

Snap a junk-drawer photo and GlueStick finds projects you can start in minutes — no store trip, less expense, more creative afternoons.

+ 350 more
Supply Snap

About the Author